Conical Roof Building Instructions
|
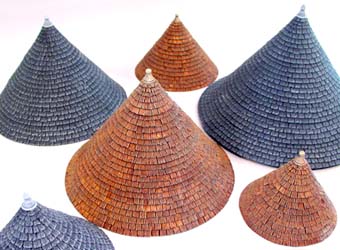
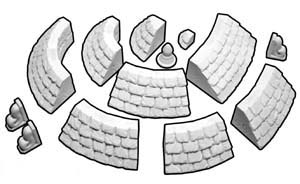
Two Kinds of Conical Roofs
There are 2 kinds of conical roof molds. Both of these molds contain the same basic block shapes. Either of these molds can be used to make conical roofs for 3", 4", 6" and 8" diameter towers.
The main difference between these two molds is the texture of the shingles. One is a wood shingle texture and the other is a slate texture. If you want a flat roof that matches these conical roofs, the wood shingle texture closely matches mold #240 and the slate texture matches mold #245.
Mold #86 - Wood Shingle Texture 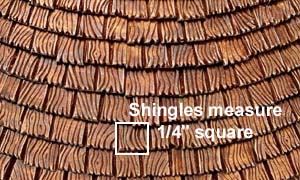
The inside of the wood shingle blocks has a fieldstone texture. 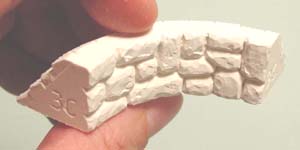
|
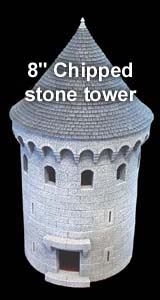
Mold #87 - Slate Texture 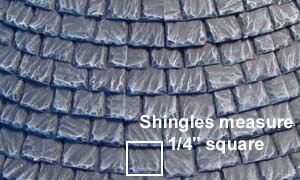
The inside of the slate blocks has a chipped stone texture. 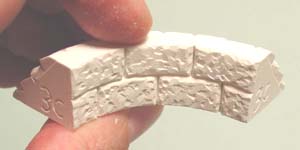
|
 I had textured the insides of the blocks because it seemed a shame to have a nice circular shape with nothing on it. I thought that maybe someone could use the insides for lining a pit or well.
However, using the pieces in this manner is not easy. The diameters of the inner circles are not a standard size. I really wanted them to be but if I had made them in standard diameters, the blocks would have taken up too much space on the mold.
Also, I don't currently have any floor tile blocks with an open hole on them. You would need to lay large arch blocks on their side to finish off the top of the hole, and arch blocks are 1/2" thick (whereas floor tiles are only 1/4" thick).
Anyway, feel free to mess around with ways to use the inside, even if it's not very useful. The only reason I'm pointing out the texture is to answer the question "Why is there texture on the inside?"
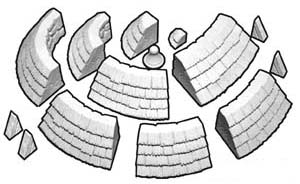
Sorting the Pieces
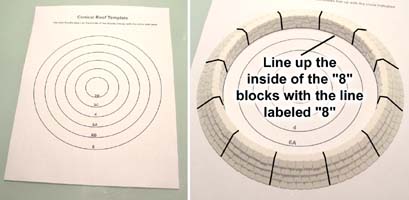
All of the blocks are clearly labeled on the sides. The number on the side of the block refers to the diameter of the ring it will make. In other words, the block labeled "8" will be the final ring used in a roof for an 8" tower. The block labeled "3C" would be the final ring used in a 3" round tower.
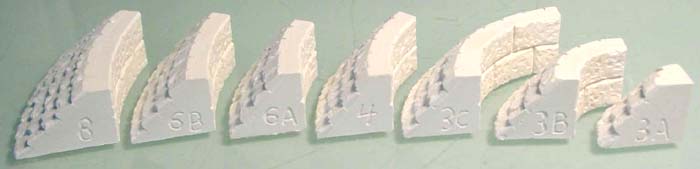
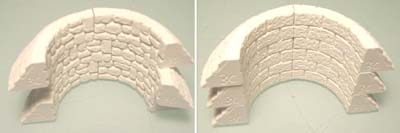
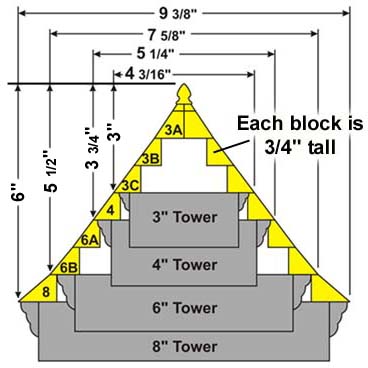 This is a side view of the blocks stacked up to make a roof.
You will notice that if you stack up 3A, 3B and 3C, you will get a roof that will fit a 3" outside diameter tower. You will also notice that the width of the roof actually measures 4 3/16", which will make the roof jut out around the outside of the 3" tower.
Once you add the decorative braces around the outside, the roof looks fairly natural because all roofs need to extend beyond the outside edge of the tower to look proper.
When making a roof for the 4", 6" and 8" towers, you can either use the decorative braces included on the roof molds, or simply use the decorative braces that were included with the original towers.
The various heights of each roof are also shown in the diagram.
|
Building the RoofYou will need to cast the mold 12 times in order to build one of these combinations of roofs. If you only cast the mold 4 times, you can build one 3" or one 4" roof. However, it takes a total of 12 castings to make one of the larger 6" or 8" roofs. |
|
| 1. | To print out a guide to glue the blocks onto, go to our Printed Plans page and look near the bottom for a plan labeled "Conical Roof Plan". To use the plan, glue together a ring of blocks by lining up the inside of matching number blocks around the appropriate ring. Do not glue the blocks down to the plan! Only glue them together on the sides. |
 |
|---|
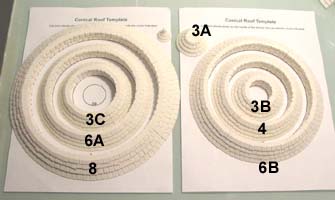
| 2. | If you do it right, you can print out 2 copies of the plan and then glue one of every ring together at one time. If you do this, it's better to start gluing the smaller diameters of rings first, then work your way out to the larger sizes. Since you cannot glue every size of ring on one plan, you'll notice that I've alternated the sizes. On the left plan I've glued 3C, 6A and 8. On the right plan I've glued 3B, 4 and 6B. You don't need the plan to glue the rest of the bits together. |
 |
|---|
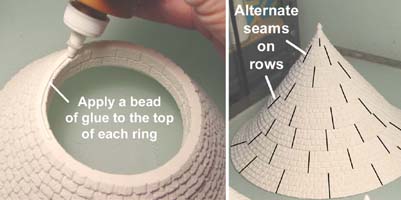
| 3. | Glue the rings together by applying a bead of glue to the top of each ring. Set the next size smaller ring on top of it and continue to work your way up until the whole roof is finished. Be sure to alternate the seams on each row to help hide them. |
 |
|---|
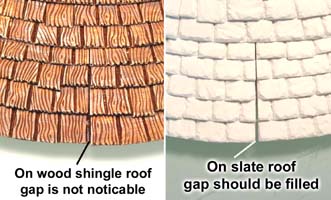
| 4. | On some rows, especially the bottom of the 8" row, you will notice a gap between two blocks. All of the other blocks on that ring will fit well except in one place where the ends connect. On the wood shingle blocks this is not a problem because you will not see the gap because of all the vertical lines from the wood texture. However, on the slate roof you will need to fill the occasional gaps between blocks to give a seamless effect. |
 |
|---|
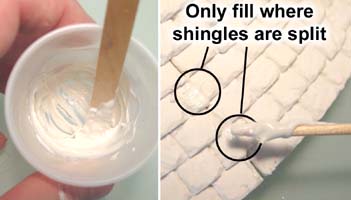
| 5. | The easiest way to do this is to mix some glue and plaster together to make the paste. It should be about the consistency of toothpaste. Use a toothpick, pick up a glob and rotate the toothpick to shove some of the paste into the crack. You only want to do this where the shingle is split in two and not where two shingle meet. |
 |
|---|
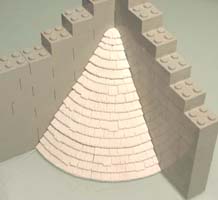
| 6. | In this photo I have stacked up some roof blocks into a 90 degree corner of Legos. I did this to demonstrate that you can use the roof mold to make a half or quarter roof if you like. The only problems this may cause is that the seams will line up on the blocks which may make the seams more noticeable. Also, you may need to sand the decorative top cap or texture the flat part on the very top block to finish the top. |
 |
|---|
Painting the Wood Shingle Roof
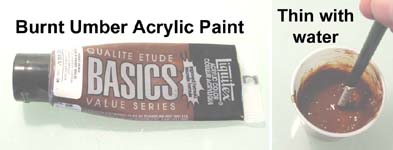
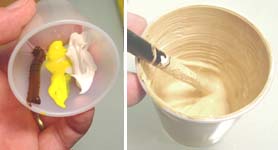
| 1. | I'm going to use burnt umber acrylic artist's tube paint for the roof. In a small cup, put about 1 part paint to 1 part water to start with. You will need to mix it well because tube paint doesn't thin very easily. Try to get it slightly thicker than milk. |
 |
|---|
| 2. | Now do a test on a spare block and see what happens. Brush the paint on and get it into all the cracks. Then take a paper towel and wipe it off like a stain. Doing small areas this way is pretty easy. However, this may not work for a large roof because the paint will dry before you get a chance to wipe the paint off. If you want to paint your roof using this method, I suggest you paint all the blocks before gluing them together. |
 |
|---|
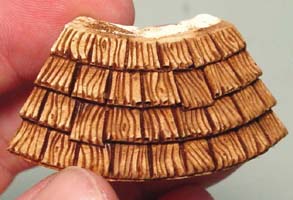
| 3. | Instead, I'm going to paint the roof all at once. I'll start by brushing on the thinned paint to cover the roof completely. Be sure to get the paint into all the cracks. While I'm painting, I'll end up wiping off some of the excess paint which will give sort of a mottled look to the paint. I really like the mottled look because is helps hide the seams in the blocks and it also gives a natural color variation to the shingles. |
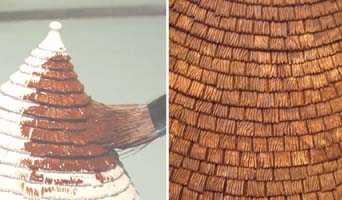 |
|---|
| 4. | The final step will be to dry brush a highlight color onto the roof. To make this highlight color, I'm going to use 1 part burnt umber, 1 part yellow and 2 parts white acrylic tube paint. Do not thin the paint! Just mix it up well. This color will be a very light tan. |
 |
|---|
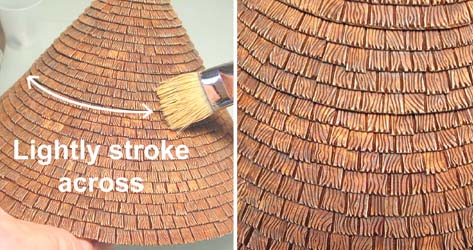
| 5. | Get some paint on a brush and wipe it all off on a paper towel. For more complete instructions on dry-brushing, look at our Painting Instructions page. After the brush is almost completely dry, gently brush side to side in a horizontal direction only. I want to emphasize the sides of the shingles more than the bottom edges of the shingles if possible. |
 |
|---|
Painting the Slate Roof
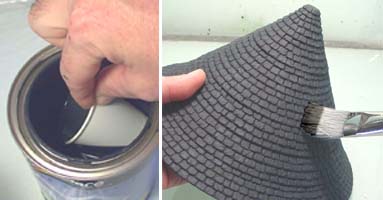
| 1. | I'm going to use solid black latex house paint for the base coat on the slate roof. You will want to thin it slightly with water so that it goes down into all the cracks easier. I would mix 1 part water to 2 parts paint. Paint the roof solid black and really push the brush into the cracks so there are not accidental white spots between shingles. |
 |
|---|
| 2. | Next we will mix up a highlight gray. This will be the last step to paint the roof. This gray is mixed using 1 part black and 4 parts white. Do not thin the paint with water (unless you are using tube paints which are really thick). You will not need very much of this paint. Four tablespoons of white and one tablespoon of black paint will easily do several roofs. |
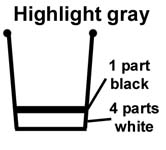 |
|---|
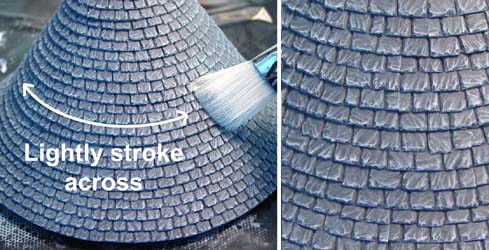
| 3. | Get some paint on a brush and wipe it all off on a paper towel. For more complete instructions on dry-brushing, look at our Painting Instructions Page. After the brush is almost completely dry, gently brush side to side in a horizontal direction only. I want to emphasize the sides of the shingles more than the edges of the shingles. |
 |
|---|
Updated Instructions
My original building instructions for the round towers did not include how to build a tower with a roof attached. Instead the top was finished with crenellations.
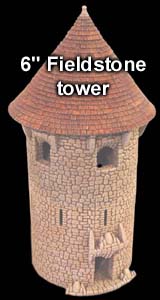
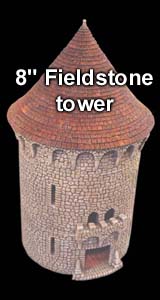
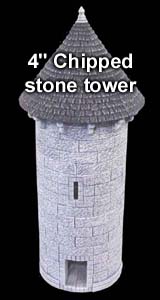
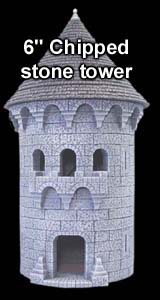
All of the round towers now have special instructions on adding a conical roof. Some of these towers may be built differently near the top so they look better with a conical roof. Below I have included links to the updated instructions.
 |
 |
 |
 |
 |
 |
 |
 |