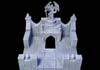
Advanced Gothic Dungeon Pieces Page 2
These dungeon pieces use a variety of molds. Click on the photo to see building instructions for each piece.
 |
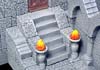 Stair Piece |
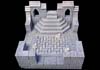 Stair Room |
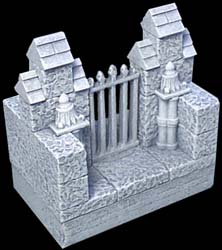
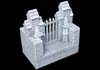 Opening Gate |
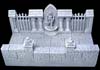 Thief Hall |
 Cellar of Fear |
 |
Stair Piece
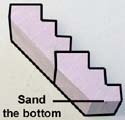
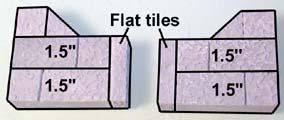
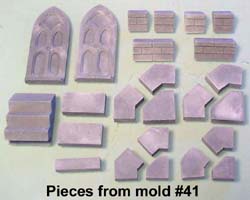
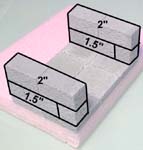
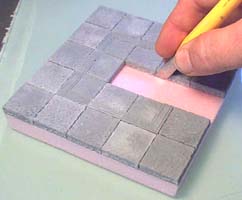
| 1. | You will need 2 step pieces from mold #41 for this. Be sure to sand the bottom point off the bottom step piece. Glue the step pieces as shown. Next make the sides of the stairway. Use flat floor tiles on these pieces. |
 |
 |
|---|
| 2. |
You will need to sand off 1/8" of the steps in order for the stair piece to fit into normal hallway or doorway sections. The second photo shows how the stair piece fits into a hallway to take characters up to the next level. |
 |
|---|
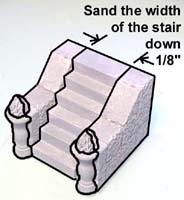 To make the stair fit inside of finished hallways, sand down one side of the step piece before you glue the sides on.
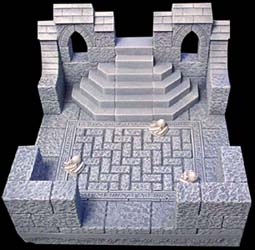
Stair Room
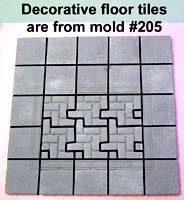
| 1. | You will need these pieces from mold #41 for this room. If you want to make a decorative floor, then you will also need mold #205 (Gothic Floor Tiles). However, if you don't have this mold, you can just make a plain floor by using mold #201 instead. |
 |
 |
|---|
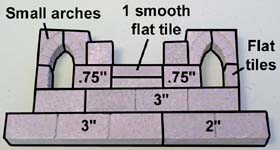
| 2. | Assemble the back wall and side walls as shown. The top flat block in the center is smooth, and the flat block underneath it is a textured block from the floor tile mold. |
 |
 |
|---|
| 2. |
Add the back and side walls, along with the first row on the front. Finish the piece by adding the roof caps, stairs and rest of the front wall. |
 |
 |
|---|
 Glue together the step sections.
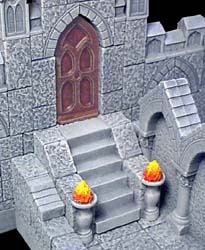
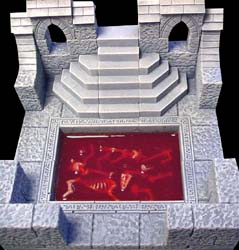
| 3. | The door will set at the top of the stairs if you want to add it. I did not glue the brick floor tiles down, so they could be removed to reveal a pool below them. The brick floor is held in place by the bone piles (without them the brick would fall through). For instructions on making the bone pool, see the Tips & Tricks 15 page. |
 |
 |
|---|
Opening Gate Section
| 1. | Gather these pieces from mold #41. You will also need 2 gate sections glued back to back. For strength, I would strongly suggest you cast the gates out of plastic. Refer to the Plastic Casting Instructions for this. Glue the floor tiles on the 1/2" foam as shown. |
 |
 |
|---|
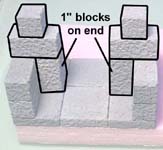
| 2. | Glue the blocks onto the floor to form the side walls. Add 1" blocks on end centered in the hallway, and top them off with 1" blocks and 1/2" blocks. |
 |
 |
|---|
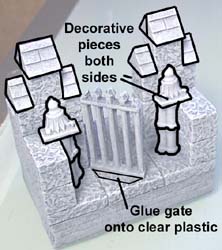
| 3. | Glue the decorative caps onto the tops of the blocks. You'll notice I used 2 half roof blocks for the top peak. You can use full blocks if you like instead. I was just running short of full blocks at the time. Add the decorative pieces on both sides of the gate. I glued the gate onto a piece of clear hard plastic, so it could stand up on its own and be moved or opened. |
 |
 |
|---|
Thief Hall Section
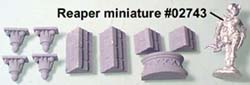
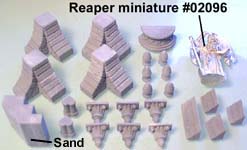
| 1. | Gather these pieces from mold #41. All of the miniatures used in the dungeon pieces are from Reaper Miniatures. Their web site is at www.reapermini.com. I've listed the model number of this miniature so you can find the same one if you want to use it. I prime the miniature with a gray spray paint primer, then paint it the same color as the rest of the dungeon. The decorative floor tiles are from mold #205, but you can use just regular 1" squares instead. I've made the pattern a little different so I could use up some of the other spare floor tiles. |
 |
|---|---|---|
 |
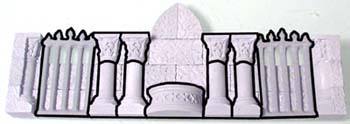
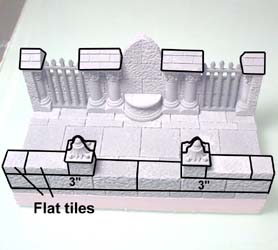
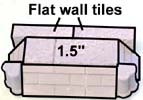
| 2. | The back wall is mostly made of flat tiles. Add the pillars, gates and base onto the back wall. |
|
 |
|---|
| 3. | Do not glue the statue in place until after the section and miniature are painted separately. To attach the miniature securely to the stone, I pin it in place with a piece of wire. To do this, drill a small hole in the bottom of the miniature, and glue a piece of wire into the hole so the end sticks out. Then drill a hole into the stone base, and glue the statue in place. The wire will secure the statue to the base. |
 |
|---|
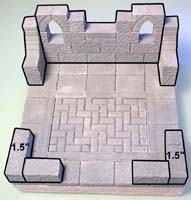
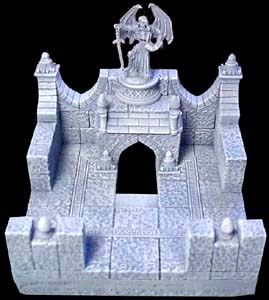
Cellar of Fear
| 1. |
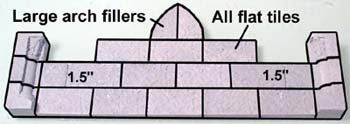
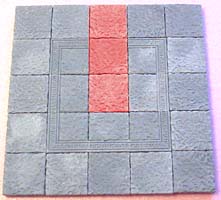
Glue the floor tiles on the 1/2" foam, but do not glue the tiles shown in red! These are used to help keep the floor straight and square as you're gluing the tiles down. The decorative tiles are from mold #205, but you can just use regular square tiles if you want to. |
 |
|---|
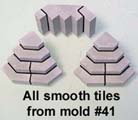
 Gather these pieces from mold
 | 2. | We'll start with the passage arch that goes over the stairway. Glue the pieces shown in the first photo. Then add the statue base and small points to the top of it. |
 |
 |
|---|
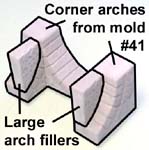
| 3. | Place the arch pieces upside-down and glue in the large filler pieces as shown. Once dry, flip the arch right-side-up and glue the pieces on top and on the front as shown in the second photo. The arch filler pieces are on the sides (so you can't see them in the second photo) which help keep the arch standing up. |
 |
 |
|---|
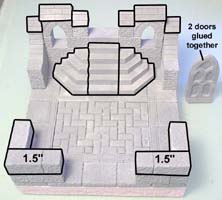
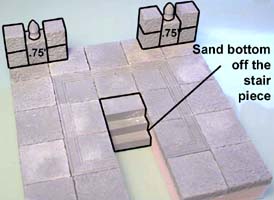
| 4. | Cut the center out of the floor using a sharp hobby knife. Sand the sharp bottom off of the stair piece and glue it in the center. Also glue the pieces shown on the front room edge. |
 |
 |
|---|
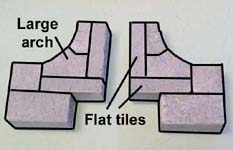
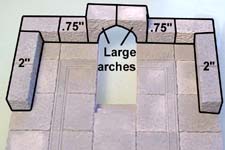
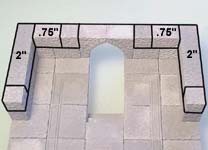
| 5. | Glue a large arch so it bridges the gap over the floor. Then glue the wall pieces as shown in each photo. |
 |
 |
|---|
| 6. |
Do not glue the decorative archway (with the statue) in place until after both pieces are painted. The statue will be just the right height to overlap onto the top of the wall. To attach the miniature securely to the stone, I pin it in place with a piece of wire. To do this, drill a small hole in the bottom of the miniature, and glue a piece of wire into the hole so the end sticks out. Then drill a hole into the stone base, and glue the statue in place. The wire will secure the statue to the base. |
 |
|---|
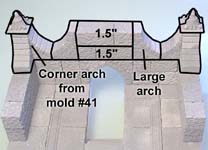 The final blocks include the large corner arches from mold