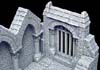
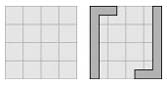
Advanced Gothic Dungeon Pieces
These dungeon pieces use a variety of molds. Click on the photo to see building instructions for each piece.
 |
 Basing Pieces |
 Construction Guidelines |
 Peak Hall |
 Modular Doorways |
 Modular Gates |
 |
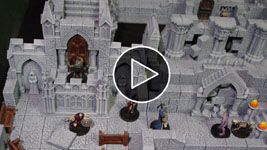
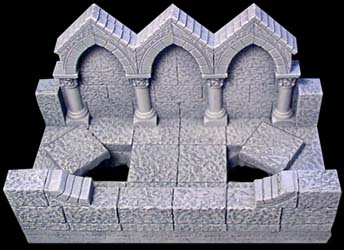
Finished Dungeon Video This shows what the complete advanced gothic dungeon will look put together and also shows each of the pieces in the order that they appear in these instructions. |
 |
Basing Your Dungeon Pieces
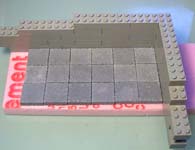
| 1. | To base these dungeon sections, I'm going to mount the floor tiles on pieces of 1/2" thick polystyrene foam insulating board. This is the stuff they use for sheeting on houses before they put siding on. You can get it at any lumber yard and usually comes in pink or blue. The main advantage is that it's stiff and doesn't warp easily. It's also easy to cut (with a sharp knife), and you can make pits and holes in the floor that actually look deep. |
 |
|---|
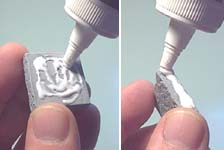
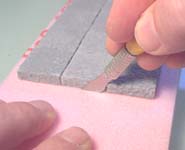
| 2. | When gluing the blocks down, be sure to spread glue on the bottom and sides of the blocks. I'm using a corner made out of Legos as a guide to keep the tiles square and straight. Let the glue dry completely before trying to trim off the outside edges of the foam. |
 |
 |
|---|
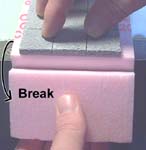
| 3. |
If it doesn't cut all the way through, break off the excess edge after you cut the foam and it will break fairly clean. |
 |
 |
|---|
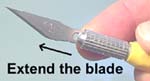 If you extend the blade of your hobby knife, you can cut completely through the foam. Be sure you use a sharp blade or the foam will tear.
Construction Guidelines
There are many of you who will want to make your own custom pieces. If you follow these basic guidelines, all of your dungeon pieces will line up exactly with the ones I show in this site.
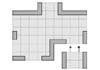
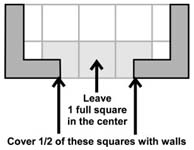
Rule #1 When you plan a new piece, lay out full square tiles to make the floor. When you place your walls on top of the floor tiles, you lose a 1/2" on each side. Three squares wide will make your average hallway. |
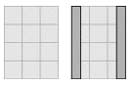 |
If you made a hallway only 2 squares wide, it wouldn't give you enough room to move your figures around and the floor tiles won't match up. Making your base grid over 3 wide is just fine. Here's an example of a grid that's 4 squares wide. |
 |
 |
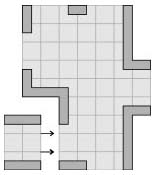
Rule #2 This will ensure that your hallway pieces will fit against your room openings correctly. This odd-looking room would still be functional because hallway pieces would fit into the openings. |
 |
 |
Rule #3
|
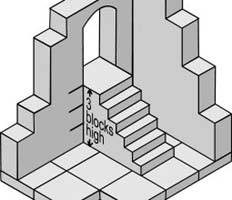 |
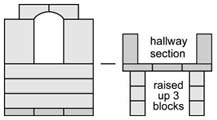 Occasionally you will want to add a higher level to your dungeon for bridges, pit traps and rivers that fall below the floor level. Landings and raised doorways will be 3 blocks above the floor tiles. Now you can use a hallway section as a bridge.
Peak Hall
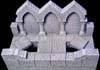
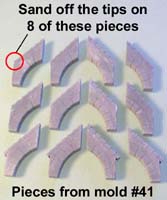
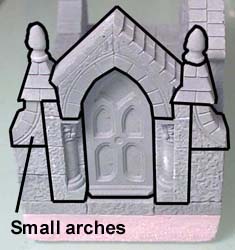
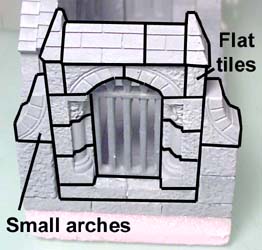
| 1. | To begin with, every dungeon section shown on these pages, uses mold #45 (Gothic Dungeon Builder) and mold #201 (Floor Tile Mold) as a base. You may run into a few photos and wonder "which mold are those pieces from?" If they are not labeled, then they are most likely from mold #45. This first photo shows what pieces are used from mold #41 to complete this hallway section. You will have to sand off the corners on 8 of these pieces so they will set next to each other later on. |
 |
|---|
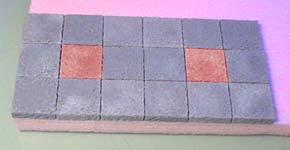
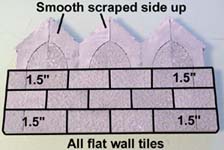
| 2. | Glue down the floor tiles shown onto 1/2" foam. I did not glue the tiles shown in red because I wanted to add secret pits under these tiles. You don't have to do this if you want to keep things simple. The great thing about making your own dungeon is that you can add secrets and traps anywhere you like. Be sure that the glue is completely dry before you trim off the excess foam. |
 |
|---|
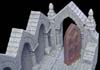
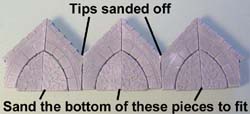
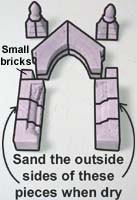
| 3. | Glue together the arches as shown. Sanding the tips off will allow them to butt next to each other. The filler pieces will need to be sanded to fit. You want the bottom of the arches and filler pieces to be straight. |
 |
|---|
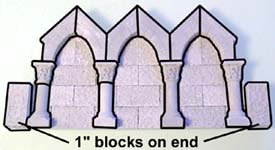
| 4. | Flip the arches over and glue on the flat wall tiles underneath them. Add the columns and roof pieces. The blocks on the ends are 1" basic blocks. |
 |
 |
|---|
| 5. |
You may have to sand the edges of the removable tiles if you want them to go in and out easily. Cut holes in the foam for pits or secret entrances. |
 |
|---|
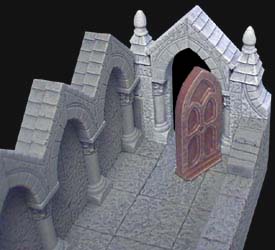
 Glue the back wall onto the floor. Also glue the blocks shown onto the front of the hall to make the front wall.
Modular Doorways
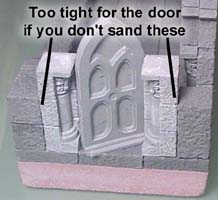
| 1. |
You will need to sand the outside sides of the door frame (with the small bricks on them) or your door will not fit in the doorway. |
 |
 |
|---|
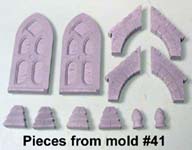 Gather these pieces from mold
 | 2. | You want the door frame to fit loosely, so you can place it and remove it easily. This allows you to put doorways anywhere you want in the dungeon. I painted the door dark brown, and then dry brushed it with lighter brown to pick up the highlights. |
 |
 |
|---|
Modular Gates
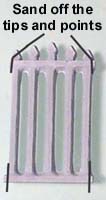
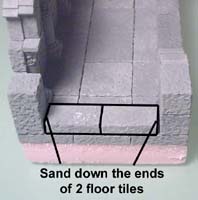
| 1. |
Sand the tips and part of the outside points where the lines are drawn. Sand the edges of 2 floor tiles and lay them down on a hallway section. These pieces should fit loosely in the hallway. |
 |
 |
|---|
 Gather these pieces from mold
 | 2. | Now glue together the pieces shown. Do not glue this section into your hallway! You want the door frame to fit loosely, so you can place it and remove it easily. This allows you to put gates anywhere you want in the dungeon. |
 |
 |
|---|