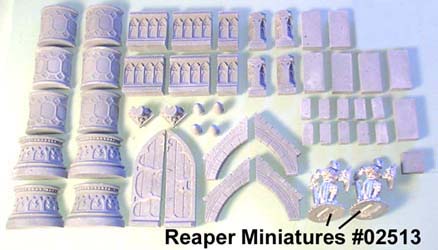
Advanced Gothic Dungeon Pieces Page 3
These dungeon pieces use a variety of molds. Click on the photo to see building instructions for each piece.
 |
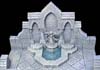 Specter Fountain |
 Sealed Passage |
 Short Pillar Hall |
 Demon Shrine |
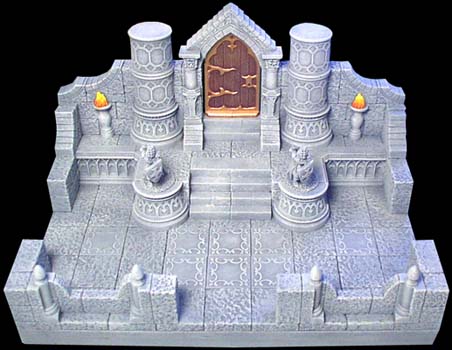
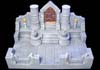 King's Hall |
 |
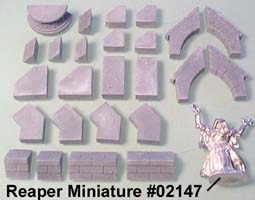
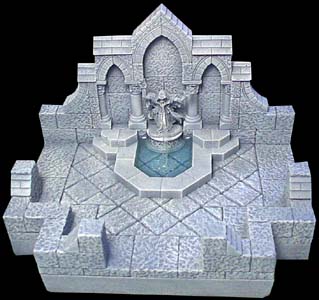
Specter Fountain
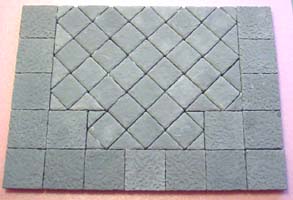
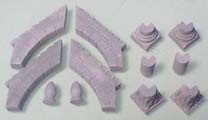
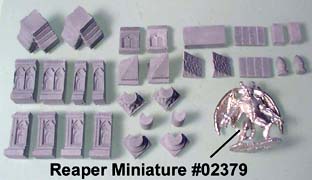
| 1. | Gather these pieces from mold #41. The miniature is from Reaper Miniatures at www.reapermini.com. Glue the floor tiles on the 1/2" foam. The decorative tiles are from mold #205, but you can just use regular square tiles instead. |
 |
 |
|---|
| 2. |
|
 |
|---|
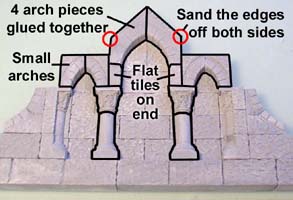
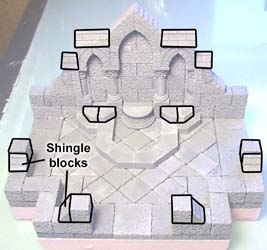
 Glue these blocks together to make the back wall. The blocks in green are flat blocks.
| 3. | Glue the back wall onto the floor (where the diamond tiles go off the edge). Add the smooth octagon step pieces to form the outside of the fountain and statue base. Also glue the front edge of the wall and add the decorative roof pieces. |
 |
 |
|---|
| 4. |
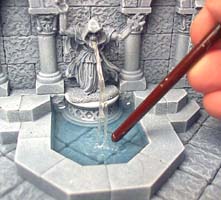
To attach the miniature securely to the stone, I pin it in place with a piece of wire. The water in the fountain is done at the very end. For instructions on how to make the water, see the Tips & Tricks 15 page. |
 |
|---|
 Do not glue the statue in place until after the section and miniature are painted separately.
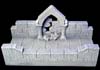
Sealed Passage
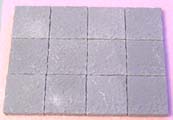
| 1. | You will need these pieces from mold #42 for this room. Glue the 7 x 3 grid of floor tiles down onto the foam base. |
 |
 |
|---|
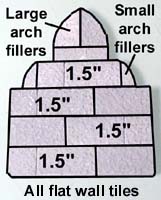
| 2. | Glue the blocks onto the floor tiles for the front and back walls. The second photo shows the flat wall blocks that will fill the gap in the wall. As you break the blocks with pliers, lay the broken pieces back down so you know where they go. |
 |
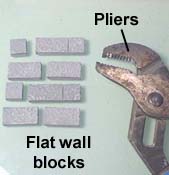 |
|---|
| 3. |
Glue the broken blocks across the gap, and also glue some of the broken bits onto the floor for rubble. The large roofed arch is placed on the red area indicated on top of the pillars. Don't forget the decorative points! |
 |
|---|
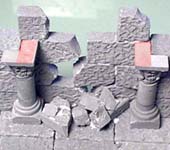 Always wear safety glasses when breaking the blocks.
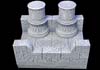
Short Pillar Hall
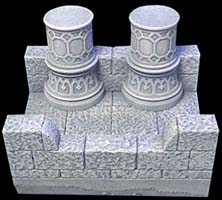
| 1. | Gather these column pieces from mold #42. Glue the floor tiles on the 1/2" foam as shown. |
 |
 |
|---|
| 2. |
Finally, glue the columns onto the back wall. The column tops are two halves glued together. |
 |
|---|
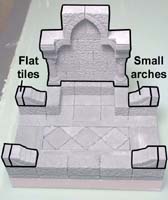
 Glue the blocks onto the floor to form the front and back walls. The small arch fillers are used on the front wall.
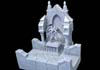
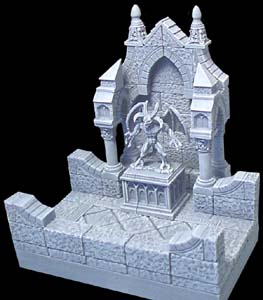
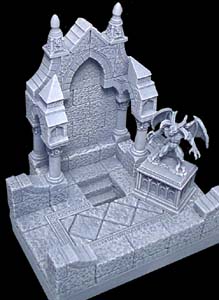
Demon Shrine
| 1. | Gather these pieces from mold #42. The decorative floor tiles are from mold #205. Do not glue the tile shown in red if you want to add the secret stairs. |
 |
 |
|---|
| 2. |
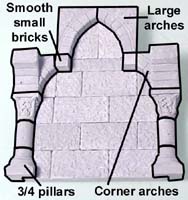
Assemble the back wall out of flat wall blocks. Then add corner arches, 3/4 pillars and small smooth bricks (from mold #42), along with the other pieces around the outside. |
 |
 |
|---|
 Glue one row of regular blocks onto the base as shown.
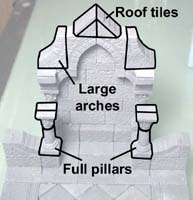
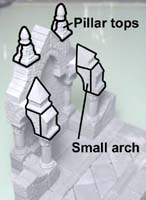
| 3. | Glue this onto the back wall and add the small arch pieces. The roof tiles and angle blocks are found on mold #42. In the last photo, the pillar tops are from mold #45 (just flip them upside down). |
 |
 |
 |
|---|
| 4. |
If you want to add the stairway under the statue, the steps are made from 1 flat floor tile plus a 1" long small brick from the floor tile mold. |
 |
 |
|---|
 The statue base is made of pieces from mold
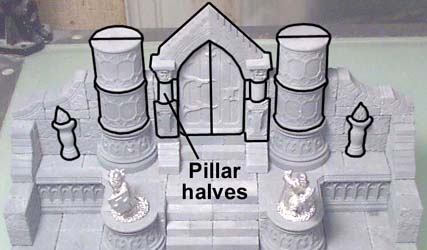
 The King's Hall
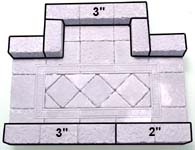
| 1. | Glue the floor tiles as shown and gather these pieces from mold #42. The miniatures are from Reaper Miniatures. Their web site is at www.reapermini.com.  |
 |
|---|
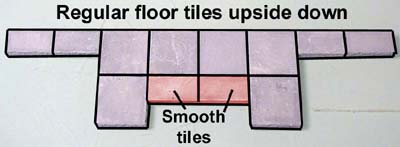
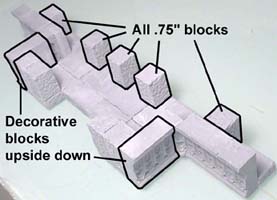
| 2. | We'll start by making the back shelf. Glue the floor tiles together upside down (rough texture down). Be sure that the tiles in red are smooth flat tiles from mold #42.
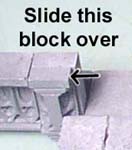
You'll notice that the decorative block (in the small photo) is not as wide as the smooth block that goes behind it. Slide it to the outside so it's flush against the other decorative blocks. |
 |
|---|---|---|
 |
 Next, glue the decorative pieces upside down along the front of the floor tiles.
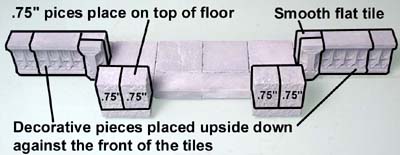
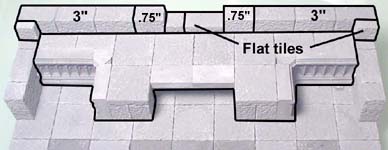
| 3. | We'll finish the back shelf by adding two decorative pieces (upside down as well) and some .75" blocks to be used as braces on the back side. Place these blocks over the floor tile seams and they will support the floor tiles. Next place the first row of blocks on the floor tiles. Once again I have darkened the decorative floor tiles so you can see their position according to the walls. | |
|---|---|---|
 |
 | |
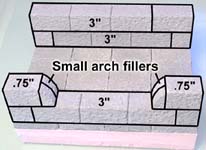
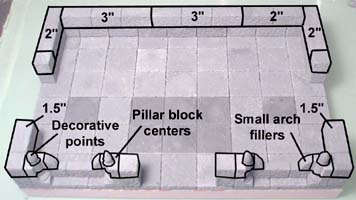
| 4. | Add the second row of blocks onto the walls. The pillar block centers are the ones you would use in the middle of a pillar. The decorative points glue right on top of the round part of the pillar block centers. The small arch fillers help finish the front wall. |
 |
|---|
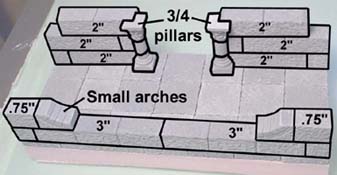
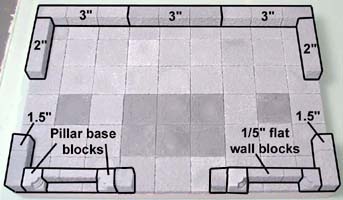
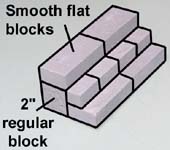
| 5. | Add the back shelf along with the other blocks shown. Next build the step section out of a 2" block and smooth blocks. |
 |
 |
|---|
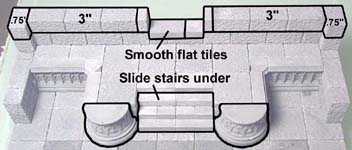
| 6. | Slide the stair section under the back shelf and glue it into place. Be sure to glue smooth tiles on the middle back (which forms the back doorway). |
 |
|---|
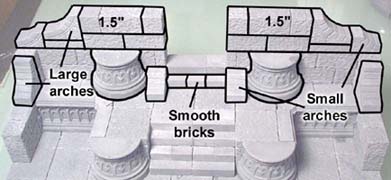
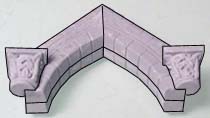
| 7. | The large arches go on the side corners and the back wall. The small arches go on the back wall and also on both sides of the doorway. Be sure to use smooth blocks for the steps under the doorway. |
 |
|---|
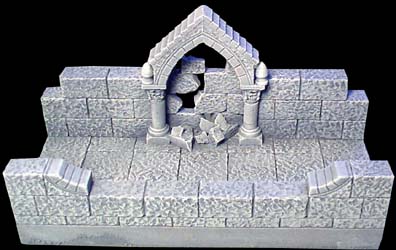
| 8. | Trim down the roof pieces so the 3/4 column top will fit. Glue the top arch on and add the other pieces to the walls. |
|
 |
|---|
| 9. |
Fill it with a drop of plaster and scrape the top flat with a hobby knife. Glue the statues on after the whole piece is painted. |
 |
|---|
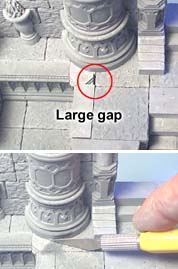 You'll notice a large gap near one of the column bases.