Star Fortress Building Instructions Page 5
 |
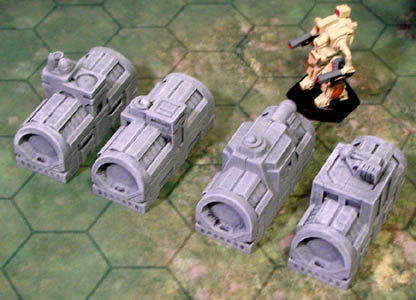
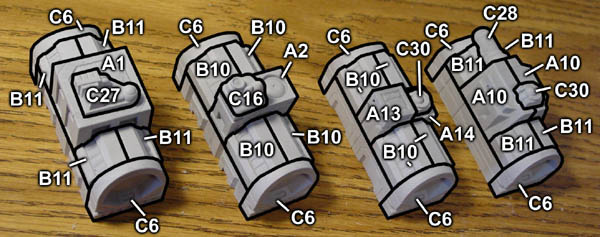
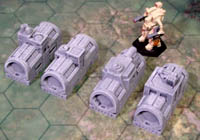 Four Barracks |
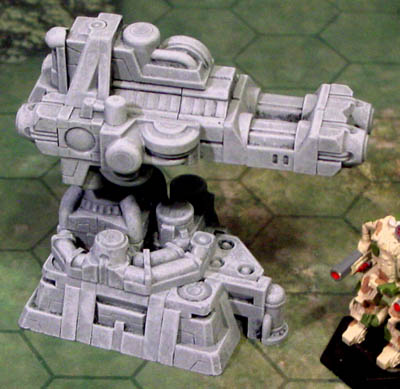
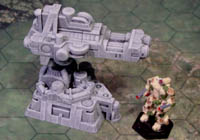 Long Gun |
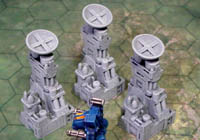 Comm Towers |
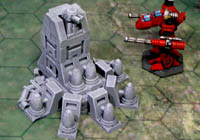
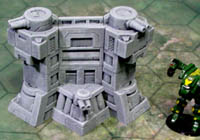 Twin Towers |
 Missile Silo |
 |
To build all of the items shown here, you will need 12 castings of each of the following molds:
#312 Star Fortress Mold A, #313 Star Fortress Mold B, #314 Star Fortress Mold C and #275 Techno Floor Mold.
 You will need this parts list to build these items!
Click on the icon on the right to bring up a PDF file of the parts list. These are all of the parts from molds #312 (mold A), 313 (mold B) and 314 (mold C).
The reference numbers of these parts are referred to in the instructions and also the videos.
Barracks
| 52. | Parts List Part# - Quantity
|
 |
|---|
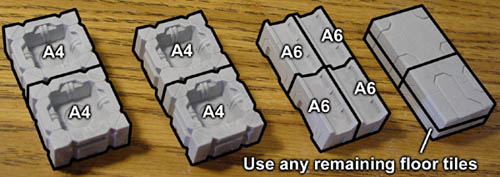
| 56. | The 1" square floor tiles used on the last set can have any pattern on them. For any of the models further down on this page, it doesn't matter what the floor tile patterns are because they will be covered up. |
 |
|---|
| 56. | On the far right barrack, there is a B11 piece underneath the C28 block. |
 |
|---|
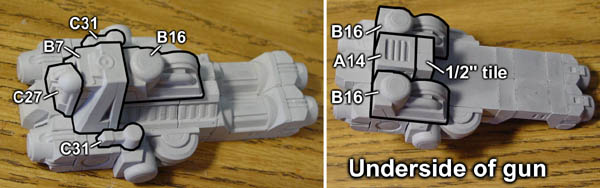
Long Gun
| 57. | Parts List Part# - Quantity
|
 |
|---|
| 58. | 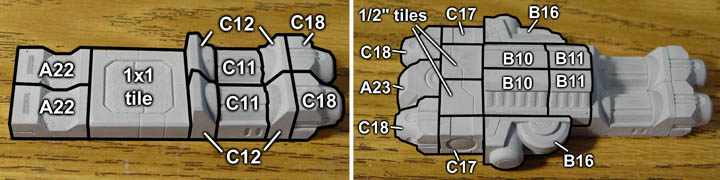 |
|---|
| 59. | The 1/2" and 1" tiles refer to floor tiles from mold #275. |
 |
|---|
| 60. | 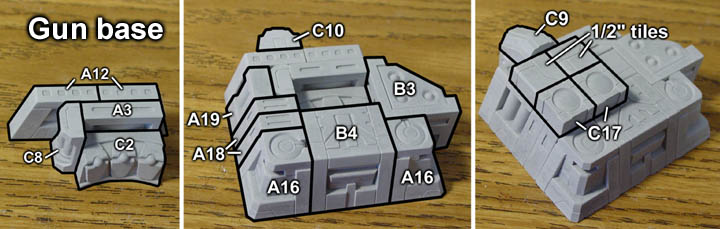 |
|---|
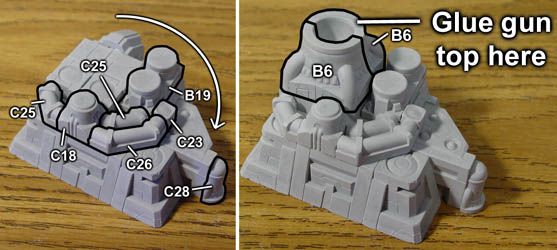
| 61. | The arrow in the first photo means that you need to rotate the base 90 degrees clockwise before you continue adding the pieces. Be sure to use lots of glue when attaching the gun top onto the base. You may need to support the gun while it's drying on the base. |
 |
|---|
Communications Towers
| 62. | Parts List Part# - Quantity
|
 |
 |
|---|
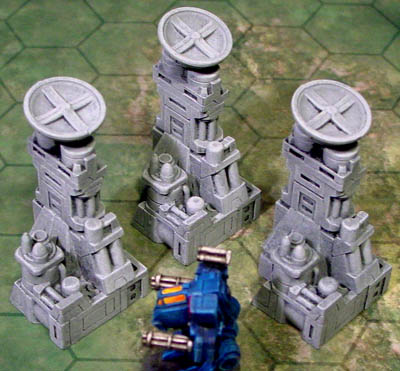
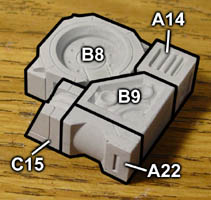
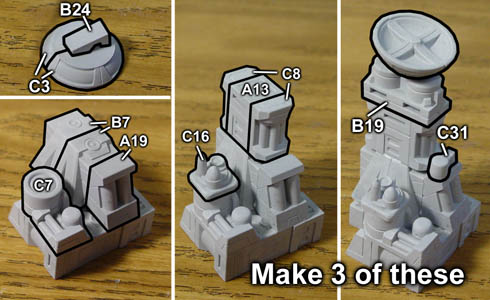
| 63. | On the very first photo, try and get the A14 piece to line up with the sides of the B8 and B9 blocks. On the lower left photo, the two B7 blocks are glued back to back. These blocks set directly on top of the B8 block. The A19 block is centered onto the front of the B7 block. The radar dish is mounted almost flat, with the small B24 block giving it a slight angle. Make 3 copies of this tower. |
 |
|---|
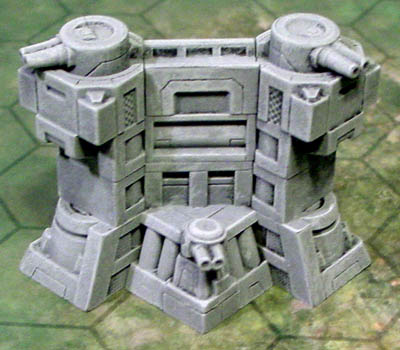
Twin Gun Towers
| 64. | Parts List Part# - Quantity
|
 |
 |
|---|
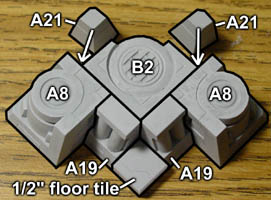
| 65. | On the upper right photo, the A21 blocks are glued down into the areas where the arrows point. On the photo directly right, try to center the group of three blocks as well as you can on top of the A8 blocks. |
 |
|---|
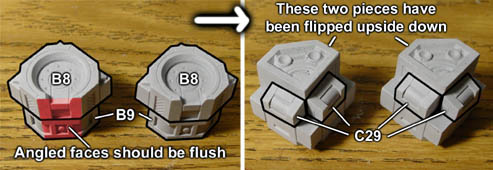
| 66. | Align the angled faces of the B8 and B9 blocks. Turn these blocks upside down and then glue on the C29 blocks under the edges. These blocks may extend just slightly past the edges of the B8 blocks. |
 |
|---|
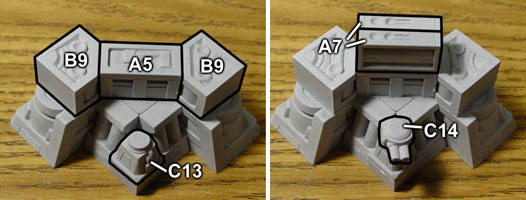
| 67. | Take the two block assemblies from step 66 above and glue them onto the tower base. Also glue the walkway between them and cap it off with the round guns. |
 |
|---|
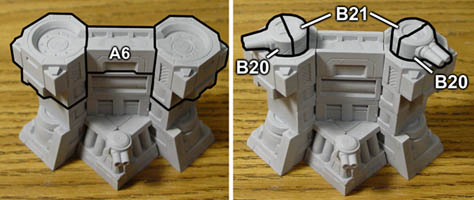
Missile Silo
| 68. | Parts List Part# - Quantity
|
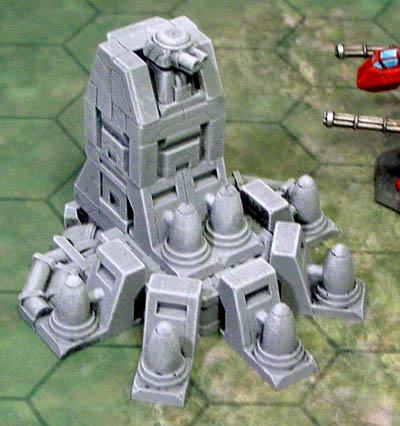 |
 |
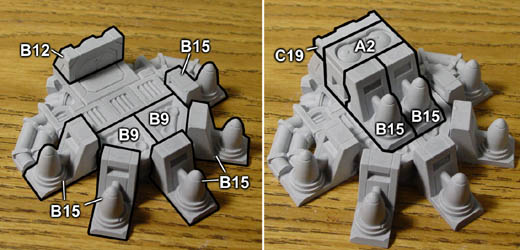
|---|
| 69. | On the left photo, the two B15 missiles are pushed back against the conduits. Center the other missiles around the octagonal base as best you can. The back edge of the B12 block is flush with the back edge of the 1" floor tile. The C19 conduit is facing away from you (right photo). |
 |
|---|
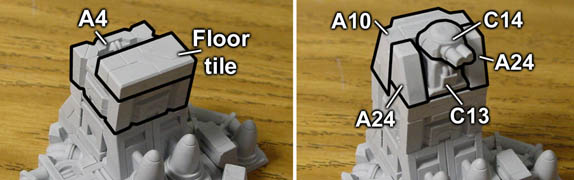
| 70. | Finish the top with the blocks shown here. |
 |
|---|