Making a Ship Diorama using the Skematic Molds
To build this diorama, you need to cast mold #311 twenty times and also cast mold #212 twelve times. For the best results using these molds, you should use the "wet water" method shown on the Advanced Casting Instructions page.
This ship diorama is meant to be used for a shelf display for your miniatures. The ideas shown here could also be used to make modular ship corridors similar to the dungeon building pieces shown on this web site. This display measures 20" wide, 7" deep and 6" high, which makes it easy to fit on most shelves.
This display can get fairly heavy, so we'll need to mount it on something strong. I've cut a piece of masonite 20" x 7" to glue the tiles to. You can also use 1/4" thick plywood or particle board.
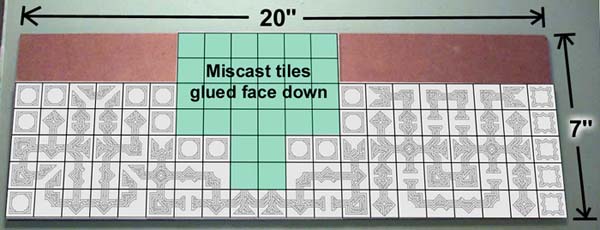
Assemble this floor last! The blank squares are miscast and unused tiles flipped upside down. Therefore, build all of the other pieces before you glue these blank ones down. Otherwise you might accidentally use up some floor tiles that you'll need later on. When you do finally get to this piece, glue the tiles down as the diagram shows. Be sure to get them straight and square.
| 1. | 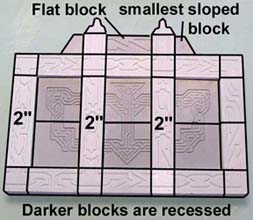 |
 |
|---|---|---|
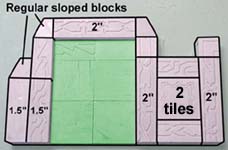
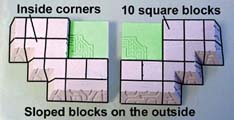
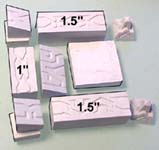
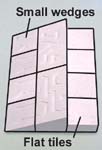
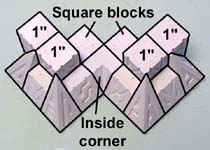
The first pieces to build are the walls. The floor tiles are raised halfway. The best way to do this is to place a piece of cardboard under these tiles to raise them up from the table surface slightly. This also goes for the flat tile and small sloped block on the top of the wall. Make 1 each of these. | ||
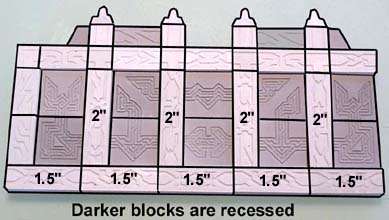
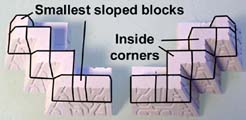
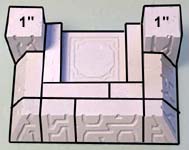
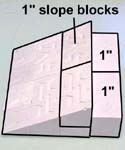
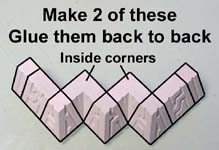
| 2. | For this wall section, do not glue the tiles shown in green! There are 2 floor tiles glued back-to-back on the wall. Add the blocks onto the bottom of the doorway. Make 1 of these. |
 |
 |
|---|
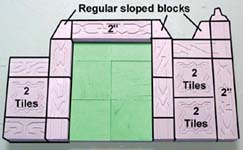
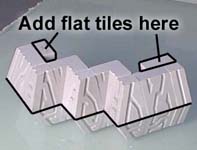
| 3. | We also need a second wall and doorway like this. Once again, don't glue the tiles in green. Glue 2 floor tiles back to back where they appear in a wall. This wall section will not have the decorative blocks on the base. We will be setting things up against this wall and the decorative blocks would get in the way. Make 1 of these. |
 |
|---|
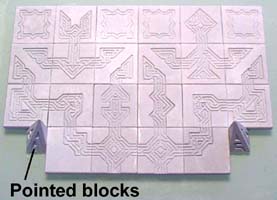
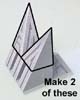
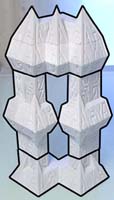
| 4. |
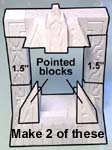
Also make the floor section with 2 pointed blocks in the corners. Be sure this floor section is completely dry before you try to move it. Make 1 each of these. |
 |
|---|
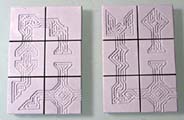 Next we need 2 small wall pieces made out of floor tiles.
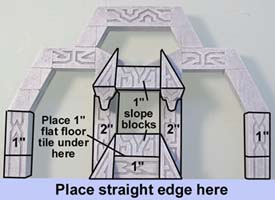
| 5. | The floor section will be supported by these two short sloped wall pieces. Do not glue the pieces shown in green. Make 1 of these. |
 |
 |
|---|
| 6. |
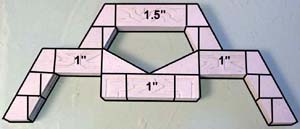
Be sure you place a straight edge on the bottom when you glue the pieces. It's very easy for the bottom to be crooked if you don't. Make 1 of these. |
 |
|---|
 This piece will end up being the view port for the bridge of the space ship.
| 7. | These pieces go together to make a control panel that can be moved anywhere in the display. To see how to make the printed parts, check out the Tips & Tricks 11 page. Make 1 of these. |
 |
 |
|---|
| 8. |
Make 2 of these. |
 |
 |
|---|
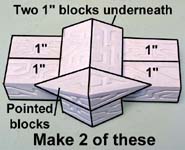
 We'll make 2 cryo units that we can set figures inside. The first photo shows the top, the second photo shows the base and the third photo puts them together with some additional blocks.
| 9. | Here's the ramp that goes up the front. The last photo uses four of the small flat tiles underneath the sloped blocks. Make 1 of these. |
 |
 |
 |
|---|
| 10. | These are pilot's chairs. They will be set up on the ship's bridge where the pilots can navigate the ship. Make 2 of these. |
 |
 |
|---|
| 11. | The last piece to make is the engine core. Start by making 2 supports shown in the first photo. Then make the base shown in the second photo. |
 |
 |
|---|
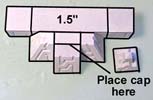
| 12. | The cap piece for the engine core is made in several steps. First, make 2 of the piece in the first photo. Glue them back-to-back and add on the flat block (1" x 1/2") behind as shown in the second photo. |
 |
 |
|---|
| 13. |
Finally, assemble all of the pieces together for the engine core. Make 1 of these. |
 |
|---|
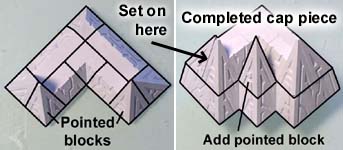 Make what you see in the first photo and set it on top. Add the pointed block to complete the cap of the engine core.
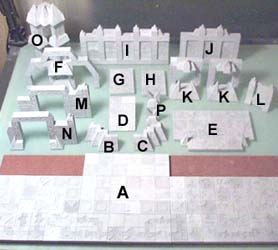
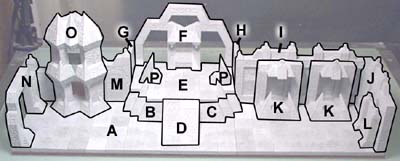
| 14. | Here are all of the pieces and where they are placed for the completed diorama. You will need to hold up piece E with a couple of floor tiles on end. |
 |
|---|---|---|
 |
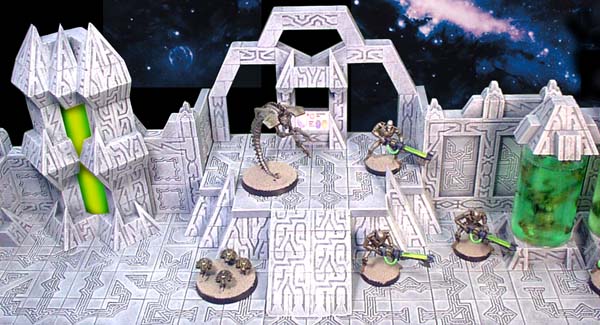
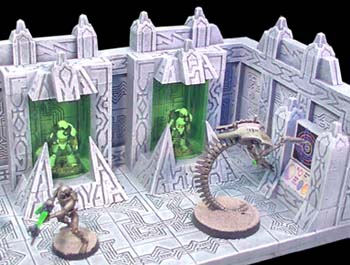
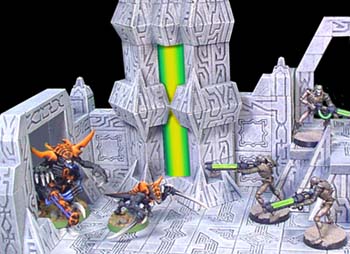
Here are a few finished photos from the ship diorama. The first photo shows a couple of unlucky travelers held as specimens in the cryo tubes. I'll show you how to make the green glass for the cryo tubes on the Tips & Tricks 11 page. Instructions for making the specimen tubes (photo at top of page) are also found here. The Necron models shown are from Games Workshop(TM). The Necron models were painted by Brian Morin. The wraith is at the controls making sure the specimens are secure. The other Necron soldiers are keeping guard because the ship is under attack. The second photo shows Tyranids breaking into the ship. The Tyranid models were painted by Joshua Bullock and he's done an excellent job on these. They've broken into the engine room and are swarming into the ship. Instructions on how to make the engine core the color you want, and to also make it light up are found on the Tips & Tricks 11 page. With a little work, you could use the same floor tiles and wall pieces to make modular ship corridors for Space Hulk, Mutant Chronicles, or any other futuristic board game. |
 |
 |