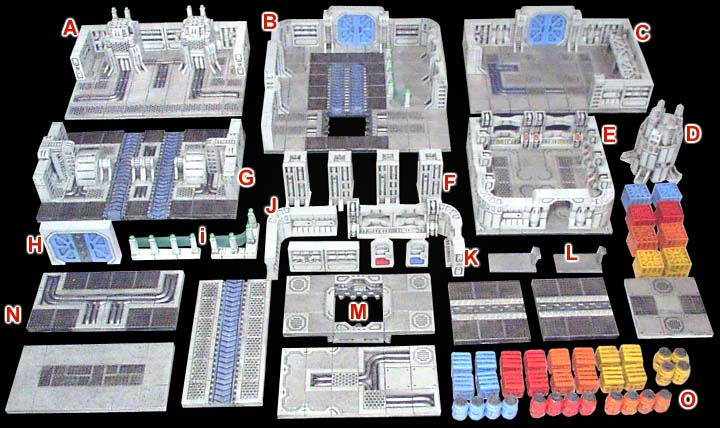
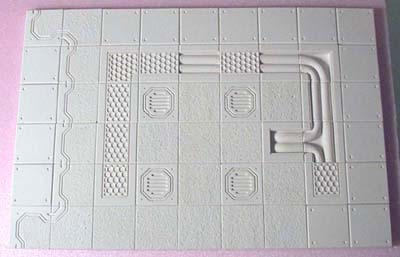
Cargo Bay Interiors
For this set, you will need to cast the #301 Starship Wall mold 16 times, the #270 Starship Deck mold 16 times, the #302 Cargo Bay mold 20 times, the #272 Service Area Floor mold 12 times, and the #273 Pipeline Floor mold 10 times. I cast these pieces out of white dental plaster. The casting will take the average person about 2 full days, and the pieces can be glued together in a few hours. After you complete these, feel free to make your own custom pieces any size you want. The beauty of casting pieces is that you can always make more and build whatever you want. |
 |
Building Tips
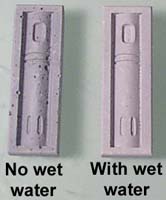
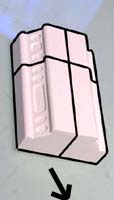
| 1. | When casting blocks, be sure to use the wet water method shown on the casting instructions page. These sci-fi blocks are very difficult to cast without air bubbles if you do not use it. The first block shown was cast without the "wet water" method and the second block is cast using "wet water". |
 |
 |
|---|
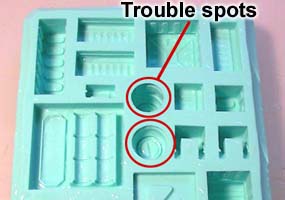
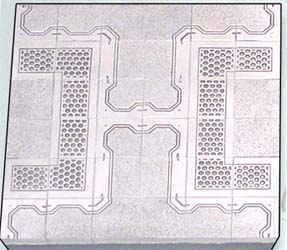
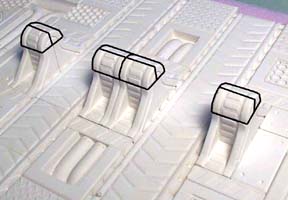
| 2. | On mold #302, the most difficult pieces to cast are the barrel halves. I've circled these in red on the photo. The problem is getting the plaster to flow into fine grooves on the top. To begin with, use the wet water method shown above. Pour a little plaster into these sections and use a blunt pencil or thin paint brush handle and work it in a circular motion inside each barrel half. It's almost impossible to get air bubbles out unless you do this. |
 |
|---|
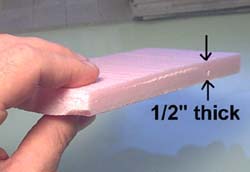
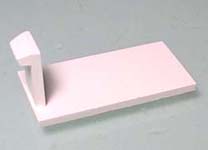
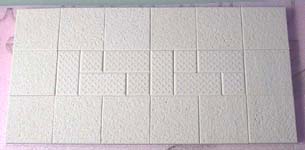
| 3. | To base these starship rooms, I'm going to mount the floor tiles on pieces of 1/2" thick polystyrene foam insulating board. This is the stuff they use for sheeting on houses before they put siding on. You can get it at most lumber yards and usually comes in pink or blue. It's easy to cut (with a sharp knife), and you can make pits and holes in the floor that actually look deep. For more instructions on using this for your floor, please look at the Starship Basic Interiors page. |
 |
|---|
Basic Set Pieces
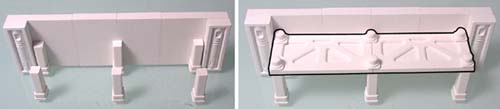
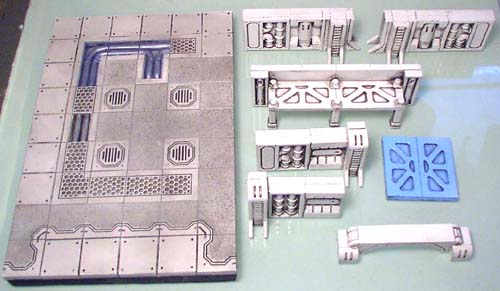
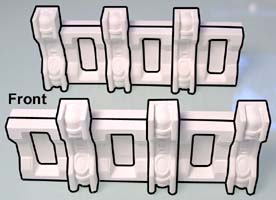
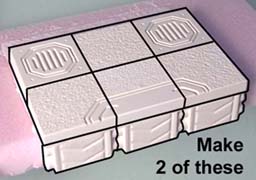
| 1. | The cargo bay set will consist of the pieces shown here. To build these pieces, you will need to cast the #301 Starship Wall mold 16 times, the #270 Starship Deck mold 16 times, the #302 Cargo Bay mold 20 times, the #272 Service Area Floor mold 12 times, and the #273 Pipeline Floor mold 10 times. The rooms shown on top of the floor sections are glued down to the floor. The other wall sections are separate so you can move them where you like. When making new pieces of your own design, notice that the floor sections are based on groups of 3 x 3 tiles. |
|---|---|
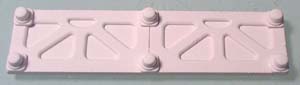
 |
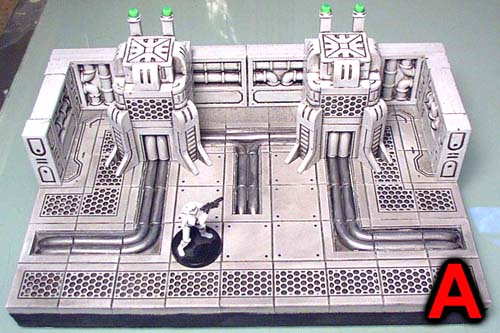
Power Terminals "A"
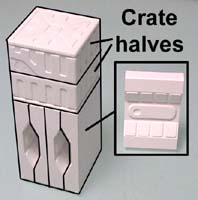
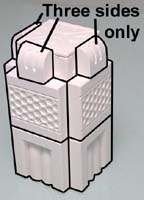
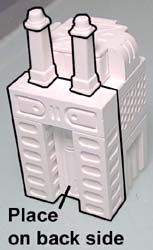
| 2. | We'll start by making the tower sections. Glue together 4 badly cast panels as shown. I'm using badly cast ones because you will never see them. Top it off with two crate halves. Add the floor tiles around 3 sides of the tower. Leave the back side open for the next piece we'll make. |
 |
 |
|---|
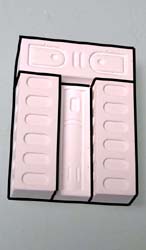
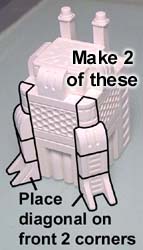
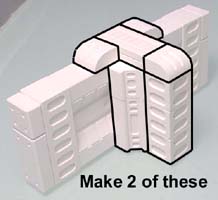
| 3. | Glue the panel shown in the first photo. Attach the panel to the back side of the tower. Add the posts on top of it. Turn the tower around and add the blocks in the last photo to the front 2 corners of the tower. You will need to use a good amount of glue to make them stay in place. Make 2 of these. |
 |
 |
 |
|---|
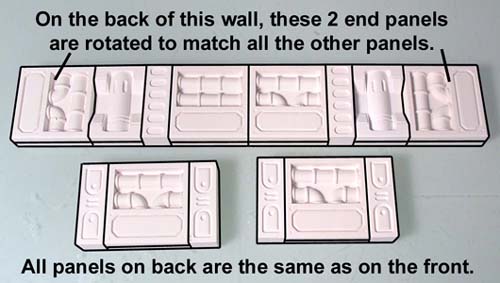
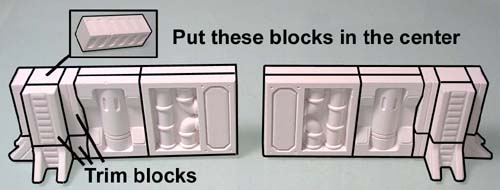
| 4. | On the double pipe panels I just chose them randomly whether to use the straight or elbow types. Use the same block types front and back on these wall sections. For the double pipe panels on the ends, be sure to rotate them on the back side of the wall so they go horizontal like all of the other double pipe panels. |
 |
|---|
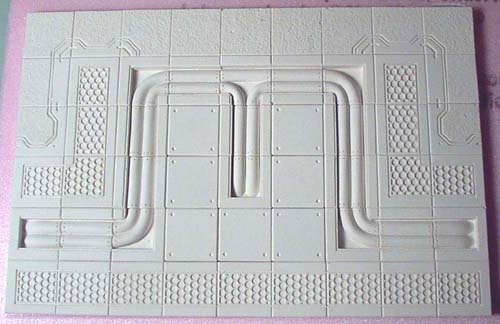
| 5. | For the floor, be sure to glue it down to foam as shown on the Starship Basic Interiors page. The top outside edge uses carpet tiles. The very center is made of rivet tiles. Both are on mold #270. The grate tiles are from mold #272 and the pipe tiles are from mold #273. |
 |
|---|
| 6. | Make sure the wall pieces are painted before you glue them down to the floor. You may decide not to glue the towers down to the floor in case you want to use the room for something else. For painting instructions, please visit our Painting Instructions page. For instructions on how to paint the pipe floor tiles, visit the Tips & Tricks 19 page. |
 |
|---|
Main Cargo Bay "B"
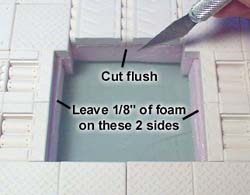
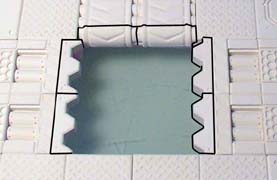
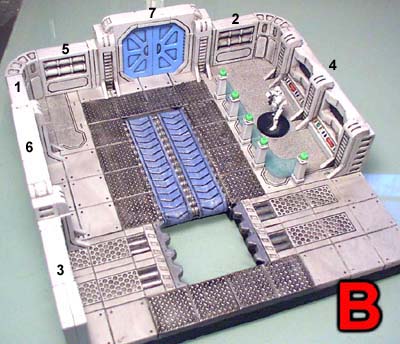
| 7. | Glue the floor tiles down onto foam. When cutting the hole, be sure to cut the hole flush on all edges except the left and right sides. On the sides, leave about 1/8" ledge. This will give you something to set the teeth tiles onto and will make it easier for you to glue them in place.
|
 |
|---|
| 8. | To finish the insides of the hole, glue 4 conveyor blocks together. When dry, glue them to cap off the edge of the conveyor belt. On the sides where you left 1/8" edge, glue tooth blocks on each side as shown. |
 |
 |
|---|
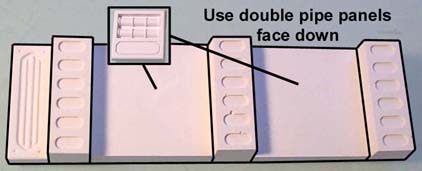
| 9. | For the first wall section, lay 2 double pipe panels face down and glue the other blocks around them. The double pipe panel photo has been reduced on this illustration so you'll know how to recognize it. |
 |
|---|
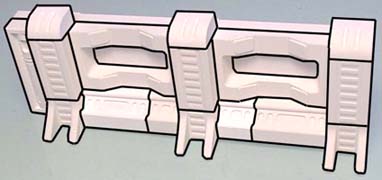
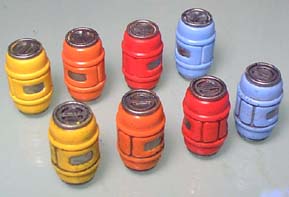
| 10. | When dry, stand the wall up and glue the remaining blocks around it. |
 |
|---|
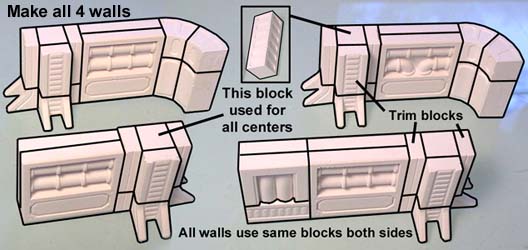
| 11. | Make all four of these wall sections. The center blocks (that you can't see the detail on) are the ones with the oval holes in them. For the double pipe panels, use either the straight or ell kind, whichever you happen to pick up first. The bottom center block is a floor tile from mold #273. |
 |
|---|
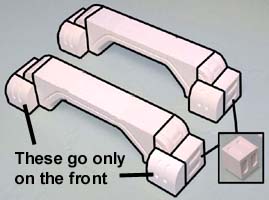
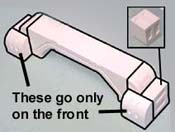
| 12. | Glue the doorway tops and let them dry. Turn them over and glue on the extra blocks shown. The curved decorative blocks go only on the front sides. |
 |
 |
|---|
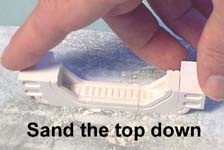
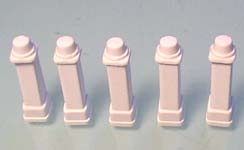
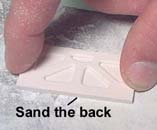
| 13. | Once dry, sand down the top so it will be smooth and clean. Assemble the posts shown by gluing the decorative tops on. |
 |
 |
|---|
| 14. |
Make 2 of these. Here is a photo of all the pieces to make the room. Be sure to paint them before you glue them down to the floor. I've painted the walls a brighter color than the floor here. For painting instructions, please visit our Painting Instructions page. |
 |
|---|
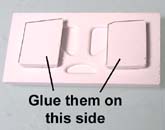
 Glue the steel panels back-to-back to make a complete steel door.
| 15. |
This way I can slide the steel door down into the groove and remove it for an open or closed doorway. You'll see the posts are connected with a plastic strip to form a barrier. To see how to make this barrier, visit the Tips & Tricks 19 page. You can see how I panted the conveyor belt also on our Tips & Tricks 19 page. |
 |
|---|
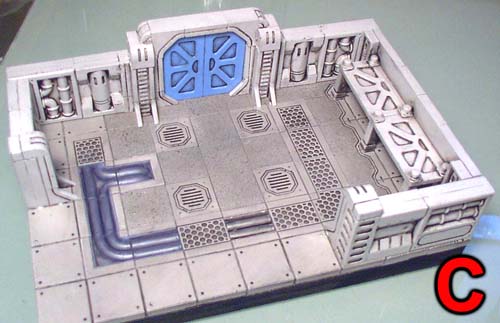
Cargo Storage "C"
| 16. | For the floor, be sure to glue it down to foam as shown on the Starship Basic Interiors page. The top and side edge uses rivet tiles. Most of the center is made from carpet tiles. The grate tiles are from mold #272 and the pipe tiles are from mold #273. |
 |
|---|
| 17. | The storage shelf is made by gluing two steel panels end to end. Finish the shelf by gluing six post tops on the center and corners. Let it dry completely before you try and move it. |
 |
|---|
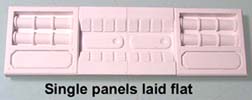
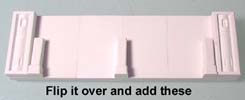
| 18. | Glue the panels shown flat on the table. Once dry, flip it over and add these pieces on the back. |
 |
 |
|---|
| 19. | Stand the wall up and place 3 posts in front. Finish the section by gluing the shelf top on. Use lots of glue. |
 |
|---|
| 20. | Glue the 2 wall sections as shown. The block you cannot see (surrounded by other blocks) is the one with ovals on the side. The decorative trim pieces are also used a lot here. |
 |
|---|
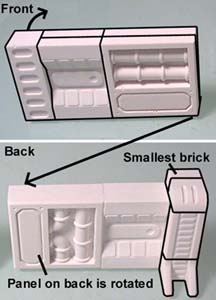
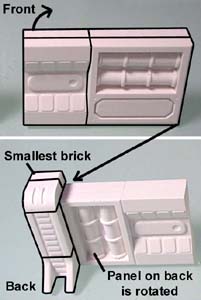
| 21. | These next 2 wall sections are very tricky. Notice that the double pipe panel is rotated 90 deg. on the back side of the wall. This will help the walls to fit together on the corners later on. I'm using the smallest brick to finish the top of the wall. You'll find this brick on mold #270. |
 |
 |
|---|
| 22. | Finish the pieces by making one doorway top and one steel door. Once again, be sure to sand the top of the doorway smooth so it will look good on the room. |
 |
 |
|---|
| 23. | Here is a photo of all the pieces to make the room. Be sure to paint them before you glue them down to the floor. I've painted the walls a brighter color than the floor here. For painting instructions, please visit our Painting Instructions page. |
 |
|---|
| 24. | 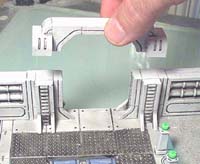 I've chosen not to glue the tops of the door frames on so I can remove the door for an open or closed doorway. To see how to cover the pipes with a sheet of plastic, visit the Tips & Tricks 19 page. |
 |
|---|
Antenna "D"
| 25. | This model uses the round pieces from mold #301. Alternate the 1" tall and the 1/2" tall pieces and form a ring with them. Add another row of 1" tall pieces, then add the smallest bricks into the recessed areas and center them as best you can. Add the next row of 1" tall pieces on top of the small bricks. |
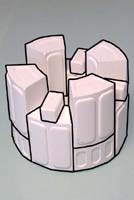 |
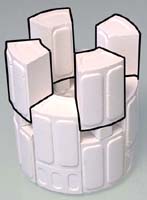 |
|---|
| 26. |
Top the piece off using the 1/2" tall curved pieces (placed on end), the angle blocks and small bricks. |
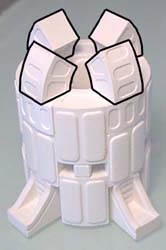 |
 |
|---|
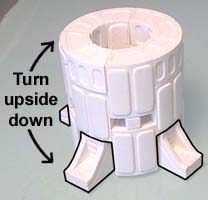 Turn the piece over and add the feet (doorway corners) under the bottom. Use lots of glue.
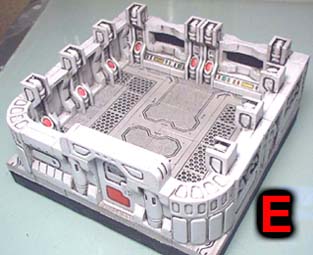
Control Room "E"
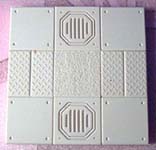
| 27. |
For the floor, be sure to glue it down to foam as shown on the Starship Basic Interiors page. It's mostly made of carpet tiles and grates from mold #272. |
 |
|---|
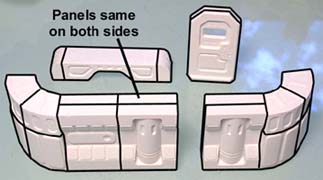 Assemble the wall sections shown. The panels are the same front and back.
| 28. | Make the back of these wall sections first. The double pipe panels can be either straight or ell type. Once dry, glue the pieces onto the front. These walls are mirror images of each other. |
 |
 |
|---|
| 29. | Make the back of this wall section first. Once dry, glue the pieces onto the front. The blocks on each end will be flush with the back of the wall. | |
|---|---|---|
 |
 | |
| 30. | Make sure the wall pieces are painted before you glue them down to the floor. For painting instructions, please visit our Painting Instructions page. Once the door is painted you can add color to the panels by following the Tips & Tricks 19 page. | |
|---|---|---|
 |
 | |
Support Pillars "F"
| 31. | Glue the front and back slabs of the pillar as shown. Glue together a center post. Glue the slabs on opposite sides of the post (the post will be a little short) and fill in the remaining sides with trim pieces. Make 4 copies. |
 |
 |
 |
|---|
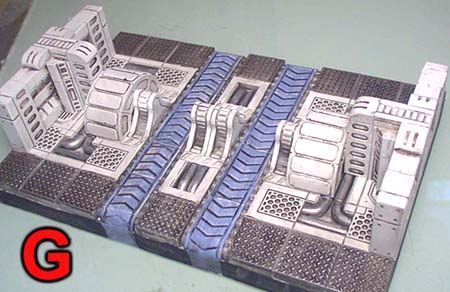
Processing Center "G"
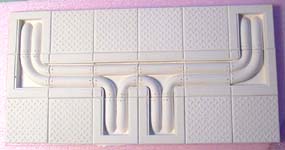
| 32. | For the floor, be sure to glue it down to foam as shown on the Starship Basic Interiors page. The top and bottom strips use the diamond plate tiles from mold #273. The pipes are also from this mold. The grate tiles are from mold #272. In the center I've put eight doorway corners from mold #302. These will stick up from the floor 1/2". |
 |
|---|
| 33. | Add the small rounded caps on top of the doorway corners. The next wall section (shown below) needs these two pieces added on to it. |
 |
 |
 |
|---|
| 34. | Glue together this wall section. Use the same panels front and back. Add the pieces shown above onto the wall, and finish it with the trim and round nosed pieces on the top. Make 2 of these. |
 |
 |
|---|
| 35. |
Be sure to paint the walls before you glue them down to the floor. For painting instructions, please visit our Painting Instructions page. You can see how I panted the conveyor belt and the diamond plate tiles on our Tips & Tricks 19 page. |
 |
|---|
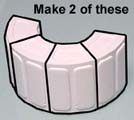 Glue together two half rings using the blocks shown.
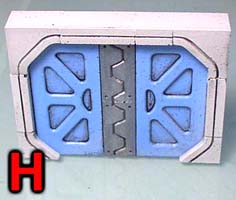
Extra Wide Door "H"
| 36. | Glue the doorway trim and corners together as shown. Glue the steel slabs back to back and put the teeth sections between them. I painted the teeth a silver color. You can see how I panted the door on our Tips & Tricks 19 page. |
 |
 |
|---|
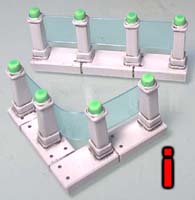
Shield Railings "i"
| 37. | These railings are made using the rivet floor tiles and the posts from mold #272. Glue the posts over the gaps between the tiles and glue on the post tops. Paint the post sections the same color as you would paint the wall sections as shown on our Painting Instructions page. The tops were painted using fluorescent green paint. To see how I added the plastic railing between the posts, visit the Tips & Tricks 19 page. |
 |
|---|
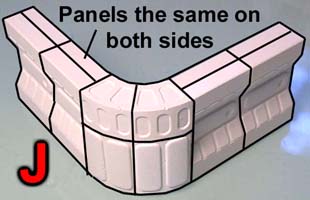
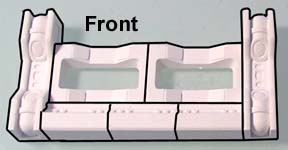
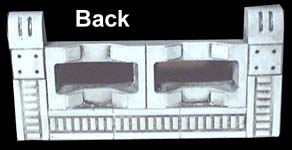
Spare Wall Sections "J"
| 38. | These two wall sections are very simple. They're used to add walls where you need them. Just paint them the same as the rest of the wall sections. |
 |
 |
|---|
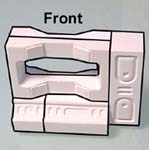
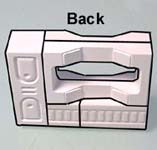
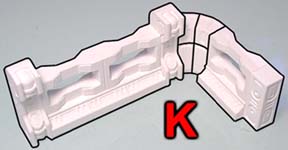
Control Panels "K"
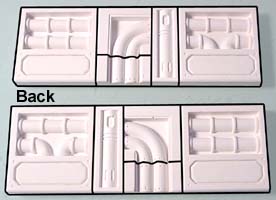
| 39. | Glue together this wall section and the one below. These photos show the front and back of each. |
 |
 |
|---|
| 40. | Glue these to each other with a curved wall in between to finish the piece. |
 |
 |
 |
|---|
Hover Carts "L"
| 41. | Sand down the back of a steel slab until it's smooth. Take 2 of the handles and break off the tips. Glue them onto the textured side of the slab. |
 |
 |
 |
|---|
| 42. | Flip the slab over and glue a handle onto the top side. Once dry, paint it silver. The spacers underneath will help it look like it's floating off the ground. Make 2 of these. |
 |
 |
|---|
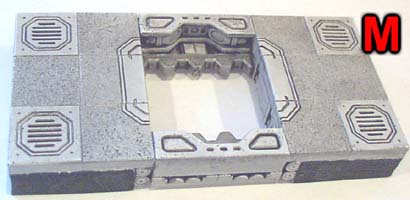
Floor Opening "M"
| 43. | Take a piece of 1/2" thick foam as shown on the Starship Basic Interiors page and glue on the carpet tiles from mold #270. Also glue short conveyor blocks under the front from mold #272. When dry, use a sharp knife to cut the excess foam off from around the three remaining sides. Make 2 of these. |
 |
|---|
| 44. | The floor panel (which looks like it should slide open) is made using the 1/2" wide pipe floor tiles from mold #273 and the teeth from mold #272. Glue two buttress blocks from mold #301 on top of them. |
 |
 |
|---|
| 45. | Glue the floor sections on each side of these pieces. The foam I was using was a little over 1/2" thick, so I had to glue these together face down on a flat surface. The finished floor section will look like it has a mechanical door which has slid open. |
 |
|---|
Remaining Floor Sections "N"
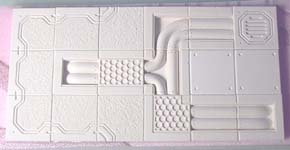
| 46. | Take a piece of 1/2" thick foam as shown on the Starship Basic Interiors page and glue on the tiles shown to make these floor sections. When dry, use a sharp knife to cut the excess foam off from around the three remaining sides. |
 |
 |
|---|
| 47. | Both of these floors use the diamond plate tiles from mold #273. The pipes are also from mold #273. The second photo uses the teeth and stripes from mold #272. Make 2 copies of the smaller floor section. |
 |
 |
|---|
| 48. | The second floor section has diamond plate in the center surrounded by carpet tiles. |
 |
 |
|---|
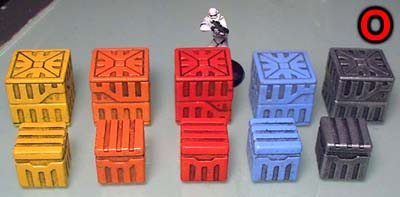
Barrels and Crates "O"
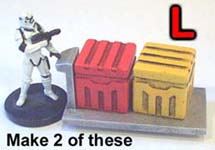
| 49. | The barrels and crates are fairly easy to assemble. The barrels come in two halves that simply glue together. The small crates are in one piece and the large crates are made by gluing duplicate halves together. To see how I painted them, visit the Tips & Tricks 19 page. | |
|---|---|---|
 |
 | |
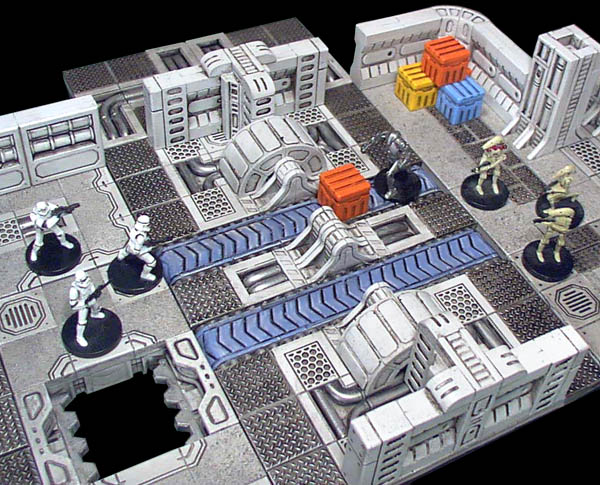
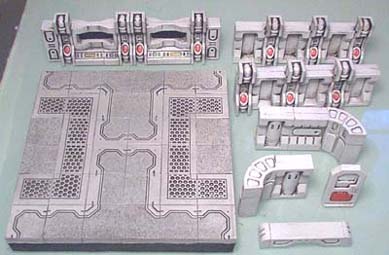
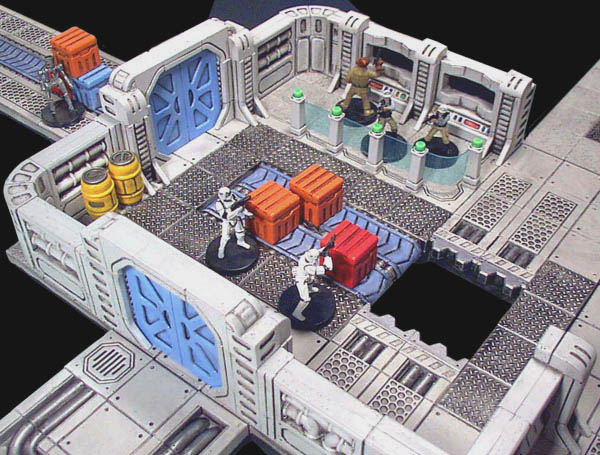
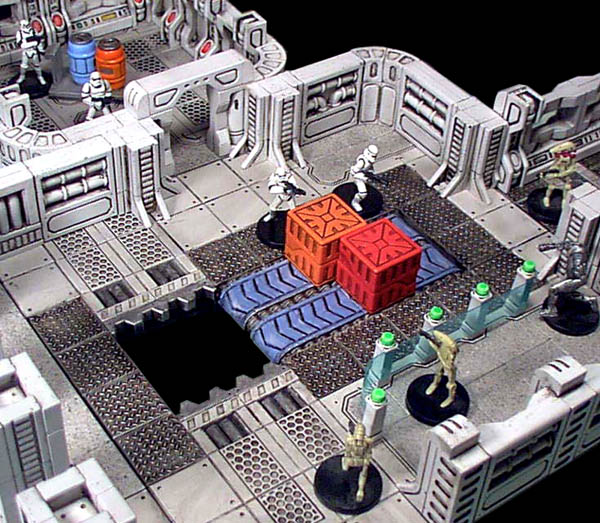
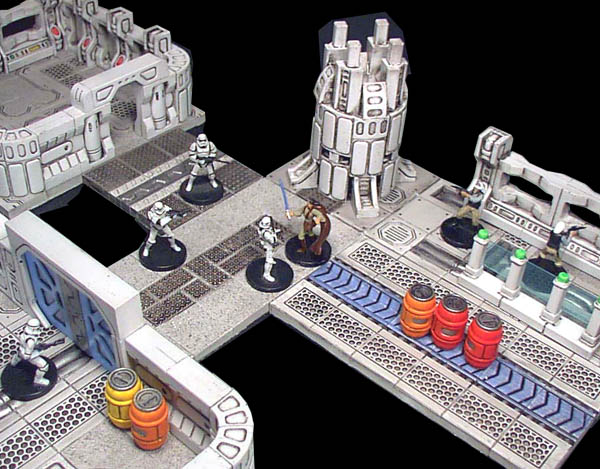
The floor sections and rooms can be easily rearranged into any kind of layout you want. As long as any additional floor pieces are based on a 3x3 size, then everything will fit together correctly. Here are a few photos of the finished pieces arranged in simple layouts. The Star Wars miniatures are from Wizards of the Coast. For instructions on how the pieces were painted, please visit our Painting Instructions page. To see how to painting was done on the conveyor belts and crates, see our Tips & Tricks 19 page. |
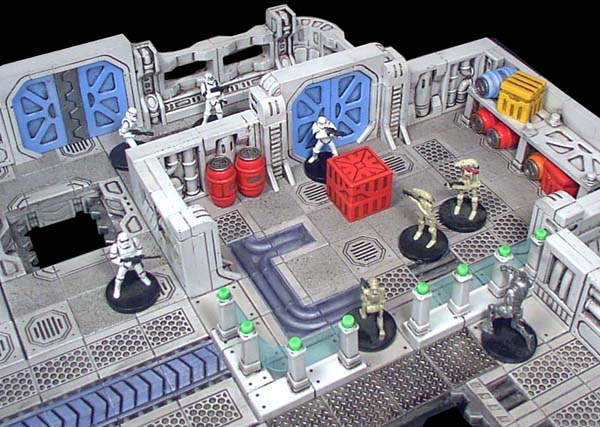
Click on the photos for a larger view. |
 |
 |
 |
 |