Painting Game Pawns
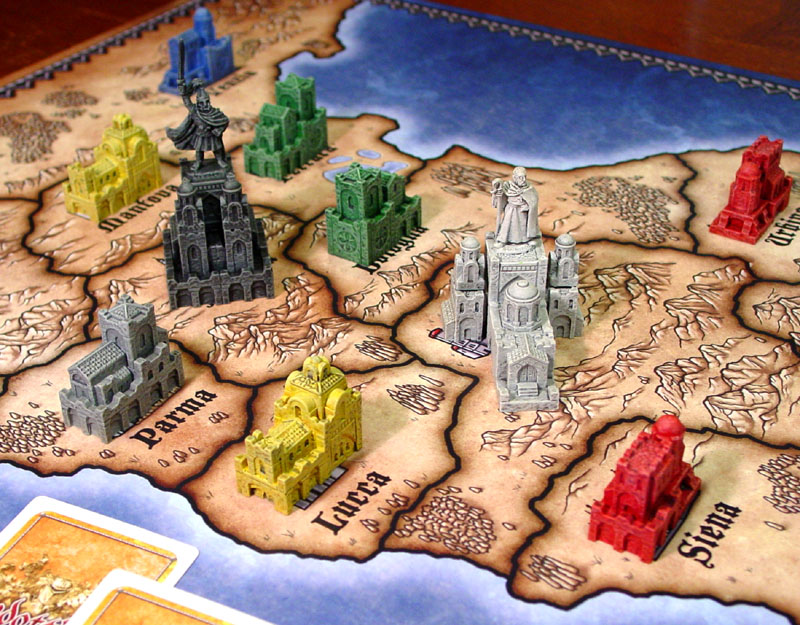


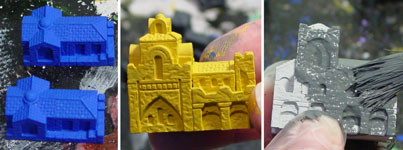
The photo above is from the Condottiere Castle Pawns projects page. The Condottiere Castle Pawns project page will show you which mold to use and how to construct the castle pawns shown in this article.
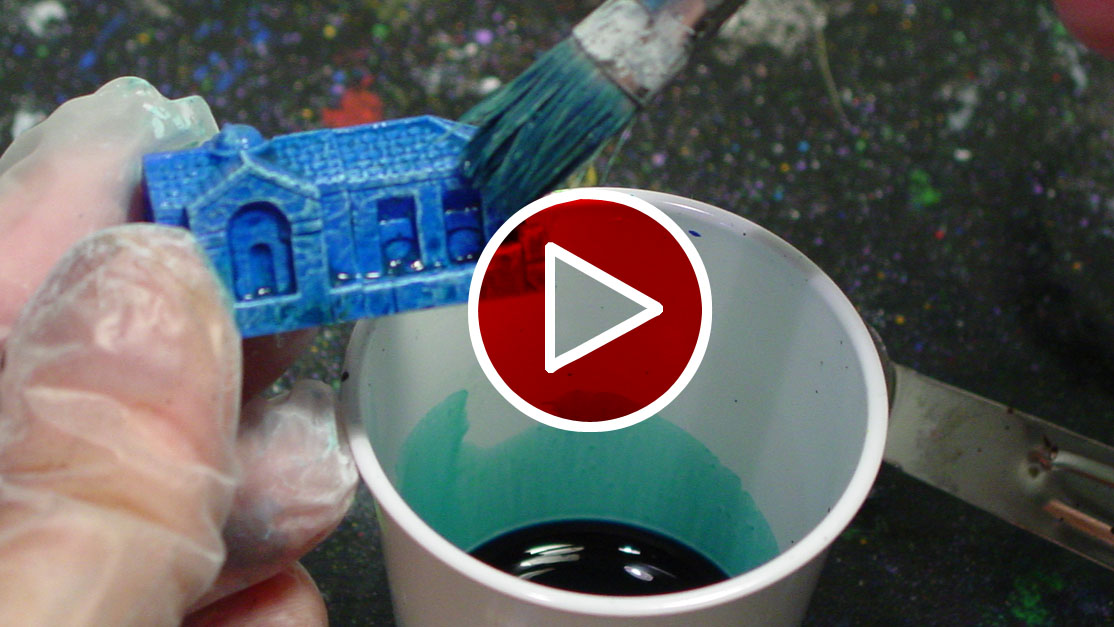
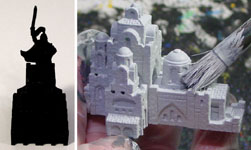
Click on the video to watch it on YouTube. This video demonstrates all of the painting instructions below. It starts with how to choose the base colors, apply an ink wash, how to dry brush the pawns and stain the pieces. This video and instructions page provides very basic instructions specifically written for board game players who don't do many craft projects. |
 |
About Paint
| 1. | Before you paint, I strongly suggest you glue together several test pieces to practice painting on. These are extra pieces made by gluing together left over blocks. Test pieces are great for seeing what your paint job will look like without messing up your good pieces. |
 |
|---|
| 2. |
You can use miniature model paints but they are way too expensive to use up on something like this. I purchased one of each color from Wal-Mart for about 50 cents each. | |
|---|---|---|
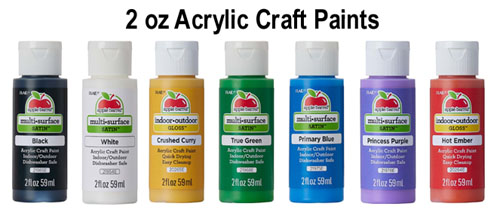 For these game pawns, I'm using inexpensive Acrylic Craft Paint.
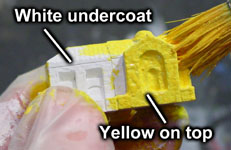
| 3. | A few colors of paint may be transparent colors. This means that they will not show up well unless you paint them onto a white surface. These colors are usually yellow and red but can also be other colors depending on the paint. If you are painting onto a gray or dark colored dental stone and your paint does not show up the same color as what you see in the bottle, then you may have to coat the piece with white paint first. |
 |
|---|
Paint and Ink Wash
| 1. | Applying an ink wash over your pieces will darken the windows and deep cracks to bring out the details. If you want to apply an ink wash then you will want to choose lighter colors for your base paint coat. |
 |
|---|
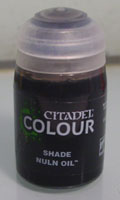
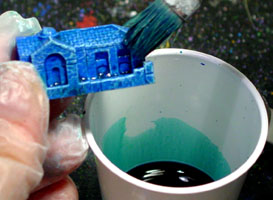
| 2. | The ink wash I'm using is called nuln oil from Games Workshop. This is usually used for gaming miniatures and runs about $7 a bottle. You will need two bottles for this whole project. This ink wash in meant to be applied directly onto miniatures to darken the shadows. You will need to thin this with water before applying it to the pieces. Otherwise it will be too dark and the pieces will appear dirty. I suggest thinning it 2 parts ink to 1 part water and then see how you like the look of the pieces. Of course, try it out on your test pieces first. You may want it stronger or weaker depending on how it comes out. |
 |
|---|
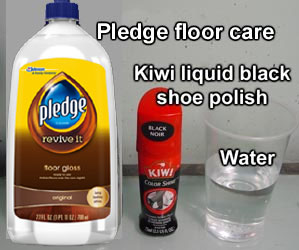
| 3. | You can also mix up your own ink wash instead. However, for this small of a project I've found that it's more expensive to do this because you don't need much. One of the main ingredients is pledge floor gloss which you can still find at the writing of this article. The problem is that this bottle costs about $25.00 alone. I have tried other types of floor finisher but nothing works as well as this stuff.
|
 |
|---|
| 4. |  |
For the black main Condottiere pawn, give it a base coat of dark gray paint made from 3 parts black paint to 1 part white paint. If you paint it solid black, you won't be able to see the ink wash at all. Also, don't thin the ink wash for the black pawn either. You'll need all the darkness you can get. For the white cathedral pawn, paint it solid white. You may need to thin down the ink wash slightly more than for the other pawns, otherwise it might appear too dark and dirty. |
|---|
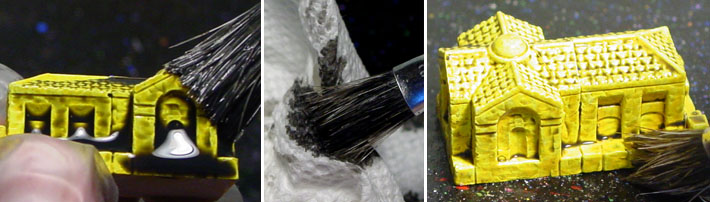
| 5. | It's a good idea to wear a plastic glove on the hand holding the piece. Load up the brush and liberally apply the ink wash all over the piece. I do this by holding it over the cup that you mixed up the wash in so the extra drips back into the cup. After the piece is coated, set it down and squeeze the excess ink out of the brush. Then dab up any large puddles of ink around the bottom. If you take off too much ink, you can always apply more ink back onto the piece. You can also control the amount of ink in the brush by soaking off the excess using a paper towel. |
|---|---|
 |
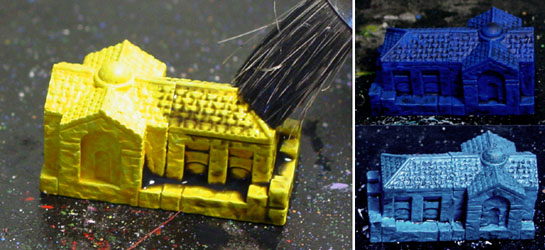
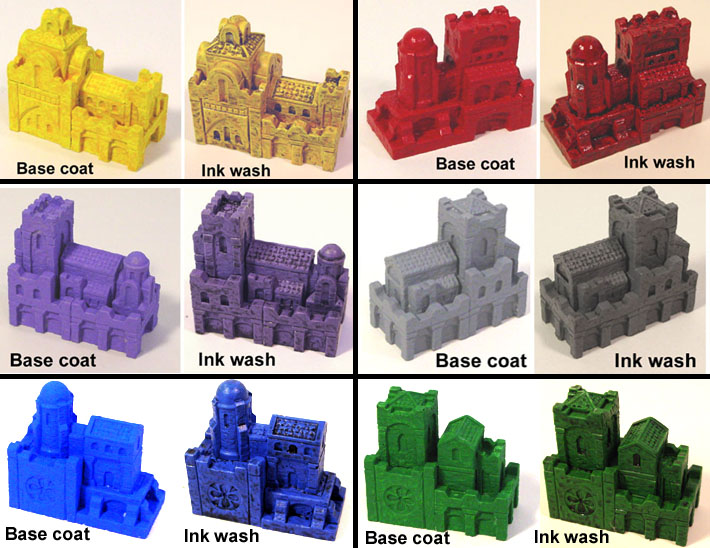
| 6. | Here is an example of each of the game pawns before and after the ink wash. |
|---|---|
 |
Dry Brushing and Staining
| 1. | The second method will be to dry brush the pieces with white paint and apply a glaze made of food coloring to bring the color back. Any time you dry brush a piece with a lighter color mixed with white paint, it will tend to gray out the color. The food coloring will restore and add color to the piece while still preserving highlights from the dry brushing. |
 |
|---|
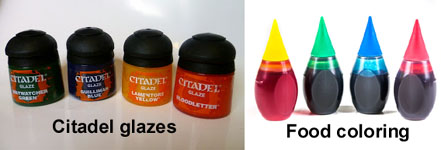
| 2. | You can buy miniature glazes for about $5 a bottle. However, this pack of food coloring has all the colors I need, it only cost $2 and you can buy it at Wal-Mart. |
 |
|---|
| 3. | For this method you'll want to use darker colors for the base coat. For a color such as yellow, I'm using a mustard or dark sand color. The gray pawns are base coated with paint made from 3 parts black to 1 part white. |
 |
|---|
| 4. | For the main Condottiere piece, paint it solid black. If you paint the cathedral piece solid white, you won't be able to see any of the dry brushing on it. Instead I'll paint it a light gray made of 1 part black and 3 parts white paint. |
 |
|---|
| 5. | 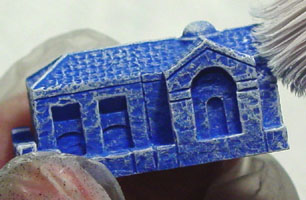
Dry Brushing WhiteThis is the exact same method I have used for all of my other projects. You can find more detailed dry brushing information on my Castle Gray Painting Instructions page. The only difference is that we will be using solid white for all the dry brushing here. You'll need a soft 1/2" wide paintbrush for this. Start by placing a couple layers of paper towels down on the table. Squirt some white paint onto the paper towel and brush it around until the brush is almost completely free of white paint. Practice with one of your test pieces by gently brushing across the surface. If you see a big streak of white then you still have too much paint on the brush. You want to lightly brush over the surface and maybe see a little something. Continue until more and more of the edges and details are revealed. At some point the paint on the paper towel and brush will be too dry to use. You'll know this because if you press a little bit nothing will happen. If you press harder you'll get a solid white blotch of paint rather than several thin coats. When this happens, wash out your brush, put down a new paper towel and dry your brush out completely to start again. When finished, the piece should look something like this with the entire piece frosted in white. With practice, you can get just the right amount of paint to highlight the fine details without covering surfaces with solid white. | |
|---|---|---|
| 6. | For the main Condottiere piece, do not use white to do the dry brushing. White would be too light of a color. Instead, dry brush using a dark gray made of 2 parts black and 1 part white. For the gray castle pawns, I'll use a light gray instead of white. This light gray is made of 1 part black and 3 parts white. There will be no color applied over the dry brushing to darken it down. |
 |
|---|
| 7. | 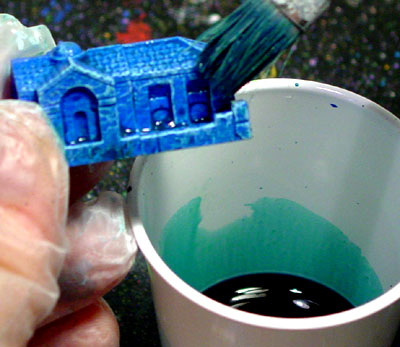
Applying StainThe final step will be to stain the white outlines using food coloring. I had good luck by mixing 1 part food coloring to 4 part water. Mix this up and apply it over the piece. Then squeeze out the brush and pull the excess back off of the piece. You can also soak the excess stain out of the brush by touching it to a paper towel. This will give you a rich highlight color on all of the edges. If the piece comes out too dark then you'll need to add more water to the mix. The outlines of the piece should be almost as bright as when they were white, only lightly stained in the color you've applied. | |
|---|---|---|
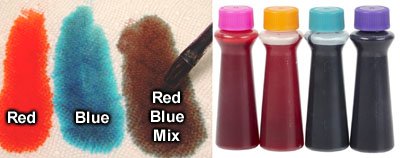
| 8. | I had a problem with purple. When I mixed the red and blue food colorings, they did not give me purple. Instead it ended up as an awful dark black/brown. I have no idea why this would not work but if you want a good purple, you may have to buy a food coloring that already has a purple mixed up. |
 |
|---|
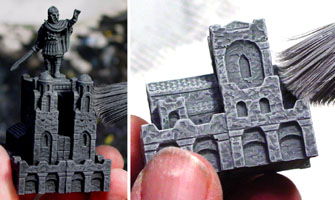
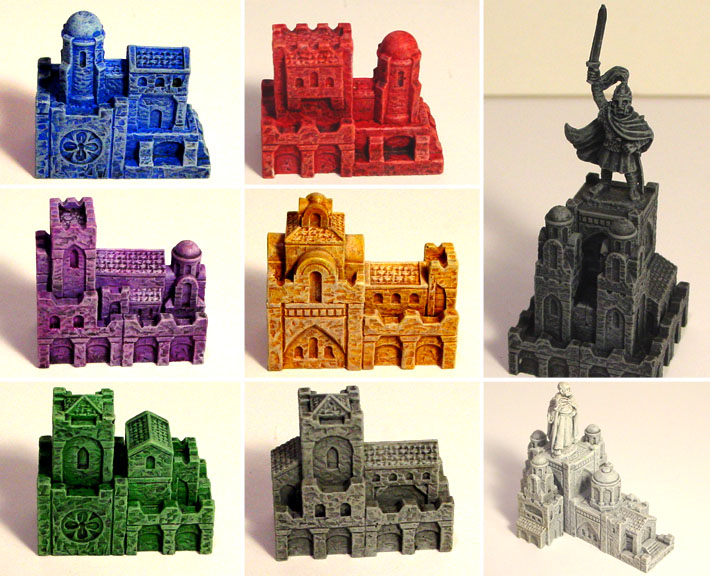
| 9. | Here are photos of the finished pawns using the dry brushing and staining method. |
|---|---|
 |
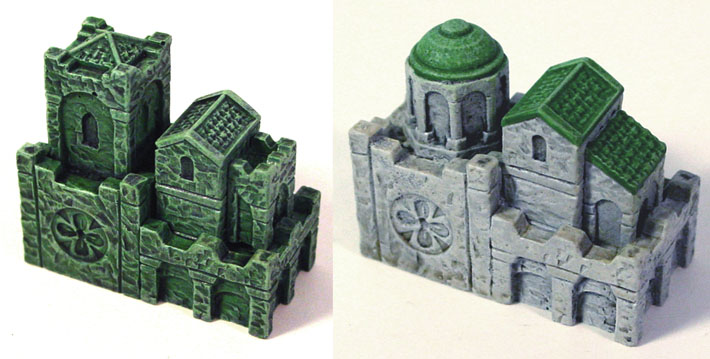
| 10. | For the piece on the left, I did both of the methods above by painting a medium color of green, applying an ink wash, dry brushing white and then applying a green stain of food coloring over the top. Feel free to paint different parts of the castles different colors. Painting the roof is a great way to make the pawns stand out on the table. You could even keep all the castle stone colors the same and only change the colors of the roofs. |
|---|---|
 |
Sealing the Pieces
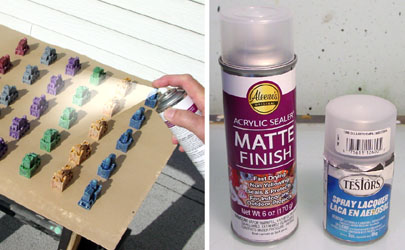
| 1. | Since these are game pawns, it's probably a good idea to seal these pieces so the food coloring does not come off on your hands. This will also protect the paint and make the piece more resistant to constant handling. This clear matt finish cost about $5 and will do a nice job. I prefer flat finishes on most of my pieces. I've found that the best flat finish is Testors Dull Coat, but it's pretty expensive for this small can and sometimes it's hard to find. |
 |
|---|