Abandoned Plant Finishing Instructions
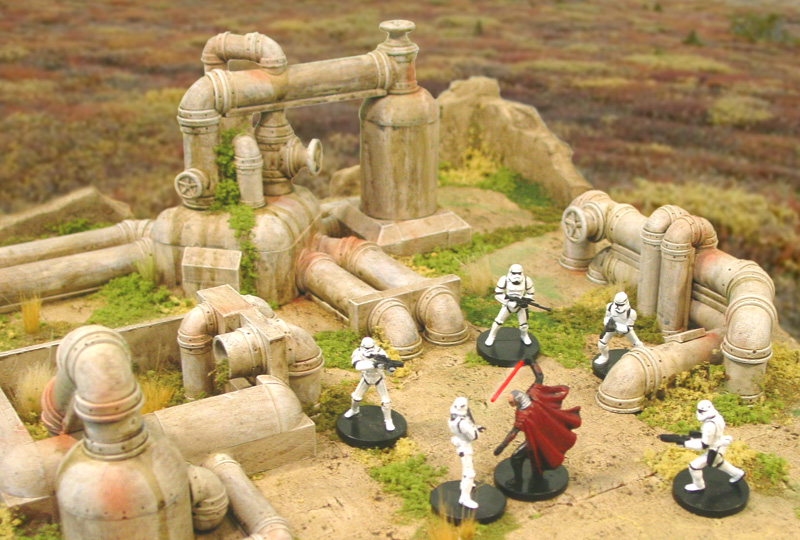
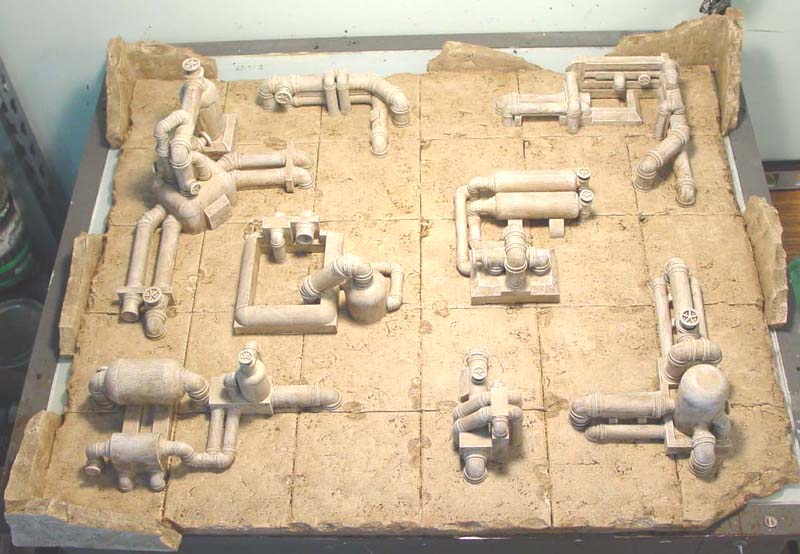
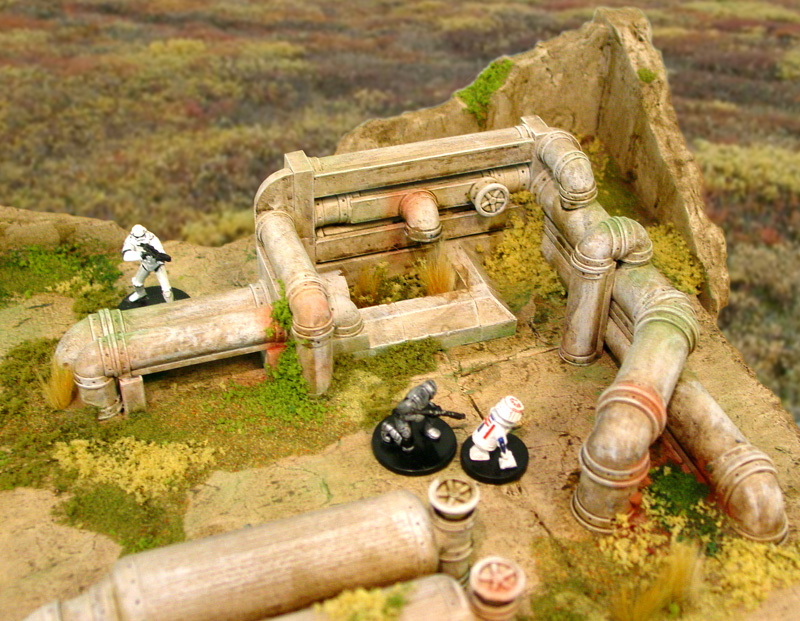
These instructions will tell you how to use the pipe pieces you've cast and assembled to create the full layout shown here. First, be sure you have cast and glued the small assemblies of pieces as shown on the Chemical Plant Building Instructions page. The instructions below will show how to paint and stain the pieces and how to build the walls and floor for the layout. The photo here has Star Wars miniatures in it to show the scale. The Star Wars miniatures are from Wizards of the Coast. |
 |
Ruined Floor and Walls
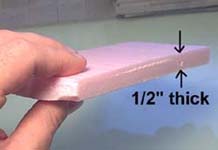
| 1. | I'm going to use 1/2" thick polystyrene foam insulating board for the ruined floor and walls. This is the stuff they use for sheeting on houses before they put siding on. You can get it at most lumber yards and usually comes in pink or blue. The main advantage is that it's stiff and doesn't warp easily. It's also easy to cut (with a sharp knife), and you can make pits and holes in the floor that actually look deep. |
 |
|---|
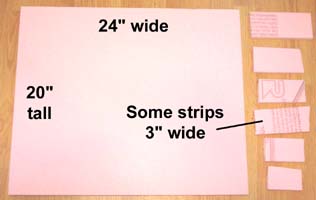
| 2. | Take a large sheet of 1/2" foam and cut it into the pieces shown. The length of the 3" wide strips doesn't matter. These will end up as pieces of broken walls anyway. The easiest way to cut the foam is to use a new sharp hobby knife. Lay a ruler or straight edge down and lightly cut down with one pass. Continue to cut a few more times. Finally, you can bend the board back and snap off the unwanted edge. |
 |
|---|
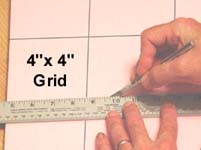
| 3. | The floor of the factory will have a 4" grid scored into it. This will give the impression of the floor being made of large concrete slabs. First, lightly draw a grid of 4" squares on the large piece of foam. Then, lay a straight edge on each line of the grid and lightly cut into the surface about1/8" deep. |
 |
|---|
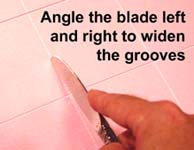
| 4. | Next, take the dull edge of a butter knife and lightly run it along the cut groove. What you want to do is widen the crack. Don't worry about being too forceful. It doesn't matter if you get cracks along the seam. Run the dull edge of the butter knife several times along each groove angling the blade with each pass so it will widen the groove. Don't be afraid to make the grooves really wide. The foam has a tendency to spring back together after each pass. |
 |
|---|
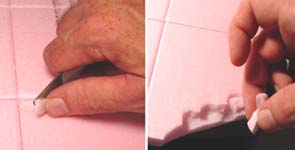
| 5. | To make the floor look ruined, I'm using a butter knife to pinch away parts of the floor. I'm doing this mostly in the intersections and seams because this is usually where the most damage happens to concrete floors. You might also break off one corner and pinch off a few edges to make it rough and broken. |
 |
|---|
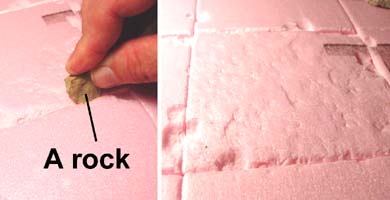
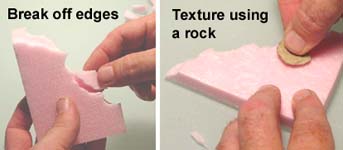
| 6. | Find a few rocks with some nice texture on them. Take the rocks and press into the foam really hard. This will give you a rough texture on the foam. Be sure to rotate and turn the rock so you don't get any repeated patterns on the foam. I must warn you that this takes a very long time to do the whole floor and your hand will probably get tired before you can finish it. |
 |
|---|
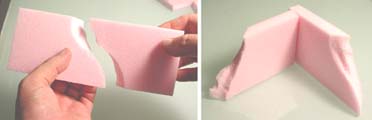
| 7. | Take a few of the 3" wide strips and break them diagonally as shown in the first photo. When you turn these and put their back ends together, they will form the wall corners. |
 |
|---|
| 8. | Break off the edges of the wall sections so they are irregular. Save the scraps if you want to use them as rubble. Finally, take a rock and press it hard into both sides of the foam walls to texture them the same way you did the floor. |
 |
|---|
Painting the Pipes, Floor and Walls
| 1. | The pipes, floor and walls are all painted using a light cream color of paint, then brushed with a special rock wash. The color of paint I use is the exact same color as shown on the Earth Tone Painting Instructions page. |
|---|
| 2. | Before I painted my pipe sections, I glued them together completely. Some areas were a little difficult to reach with a brush but painting it was faster this way. However, you may decide not to glue them together until after they are painted. It's really up to you. You may need to thin the paint slightly. Sometimes house paint straight out of the can is a little thick. You want a nice smooth even coat of paint. Use a soft brush and try to avoid leaving brush marks as much as possible. Brush marks will be picked up by the ink wash later on. |
 |
|---|
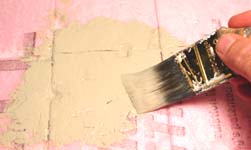
| 3. | Also paint the floor and walls using the same light cream color of paint. For the floor and walls I'm using a 2" wide paint brush. This paint will take a while to dry because the paint doesn't soak into the foam. Be sure to get the paint down into the cracks of the floor really well. |
 |
|---|
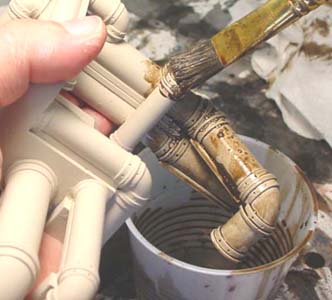
| 4. | When the paint is dry, I'm going to brush the pipes and floor with a special rock wash. You can find the recipe for this rock wash mixture on our Painting Instructions page. You will need about 1 cup of wash to do the entire layout so be sure to mix up enough. Use a 1/2" wide brush to do this. I found it easier to hold the pipe pieces over the cup while brushing on the wash. That way the excess drips back into the cup. You may also want to put a rubber glove on the hand holding the pipes or you will get wash all over it. Once you paint as much as you can over the cup, set the pipes down onto a trash bag or plastic and look over the piece to make sure you haven't missed any spots. |
 |
|---|
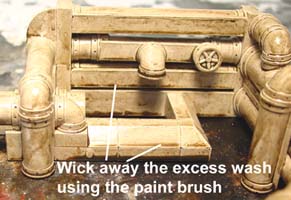
| 5. | Once the wash is applied everywhere, you will notice that it will pool at the bottom of certain areas. Take the brush and wick away the excess wash. If the brush is too full to pull the excess ink off, then you may want to touch the brush to a paper towel to pull off the excess. When the pipes are drying, you might move them occasionally so they don't stick down. I set mine on a paper towel to get rid of the excess wash on the bottom before setting them on plastic. |
 |
|---|
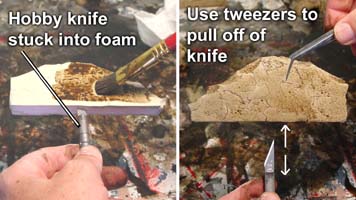
| 6. | It's possible to stain both sides of the wall without touching them. I took a hobby knife and stuck it into the bottom of the wall. I painted the rock wash mixture on and wicked away the excess wash. Then I pushed the wall off the knife from the bottom and used a pair of tweezers to catch the top and set the wall on a piece of plastic to dry. |
 |
|---|
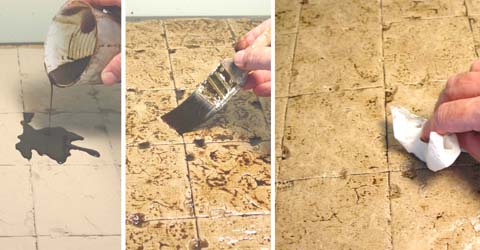
| 7. | For the floor, pour the wash straight out of the cup. Use a 2" wide brush to spread it across the whole floor. Be sure to get it into all the cracks. You might want to do this on a trash bag because wash is going to run everywhere. Dry the brush out and use it to soak up the excess wash that puddles in the holes. Finally, take a paper towel and dab up the excess wash from the deep holes. |
 |
|---|
| 8. | Once the pipes and floor are stained, you will notice that the pipes will blend in to the floor a bit too much. To fix this, I'm going to dry brush some light cream mixed with white onto the surface. I used 1/2 cream color paint and 1/2 white paint. This will help the corners and edges of the pipes stand out from the floor and walls. Gently dry brush this with very little paint on the brush. For more on this, see our Painting Instructions page. |
 |
|---|
The Finishing Touches
| 1. | Once the pipes, walls and floor are painted and stained, it's time to glue them all together. I am going to glue down the pipe pieces. You may prefer to leave them loose if you want to arrange them differently for various games. Click on the photo to see a larger version of it. This will show you how I put mine together. You will notice that the dry bushing helped the pipes to stand out. |
 |
|---|
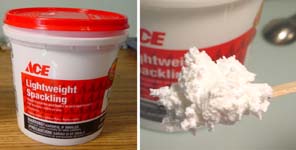
| 2. | Dirt PilesTo make piles of dirt, I'm going to use lightweight spackling compound. You can find this at most hardware stores or lumberyards. This is a very light fluffy substance that is used to fill small holes in walls. It air dries in about 2 hours and has a slight solvent smell. |
 |
|---|
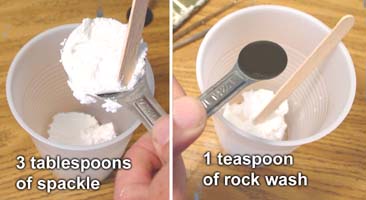
| 3. | To make the dirt mixture, I'm going to use 3 level tablespoons of spackle and 1 teaspoon of our special rock wash (shown in the article above on step 4). You might purchase a set of measuring spoons just for these kinds of things. Your spouse may not approve of you borrowing theirs. |
 |
|---|
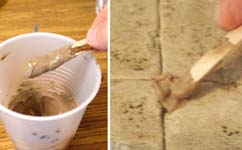
| 4. | Mix the spackle and rock wash together until smooth. It will end up being much more spreadable than the original fluffy spackle you started with. Use a wooden stick to dab and spread this dirt mixture into a large crack in the floor. Feel free to hump it up here and there. It should resemble a pile of dirt without the grainy dirt texture. |
 |
|---|
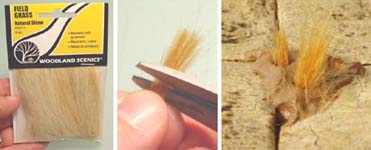
| 5. | Field GrassI'm going to use Woodland Scenics field grass to poke into the dirt. Take about a paint brushes' worth of grass and cut off a small amount with scissors. Then poke the grass into the wet dirt mixture. |
 |
|---|
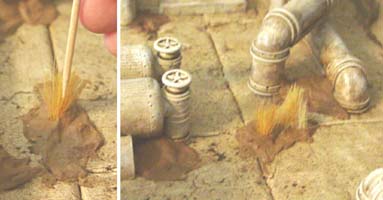
| 6. | Take a toothpick and spread the grass out to look more natural. Also, take the dirt mixture and spread it up against the pipes anywhere you think piles of dirt would collect. This especially works well in corners or where the walls join the floor. |
 |
|---|
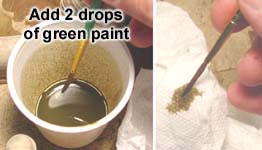
| 7. | Water StainsTo make water stains on the pipe pieces, I'm using our special rock wash and adding a couple drops of green paint to it. This will change the color just enough so that it won't blend into the rest of the ink washed background. Dip your brush into this wash, then dab it on a paper towel to get rid of the excess. |
 |
|---|
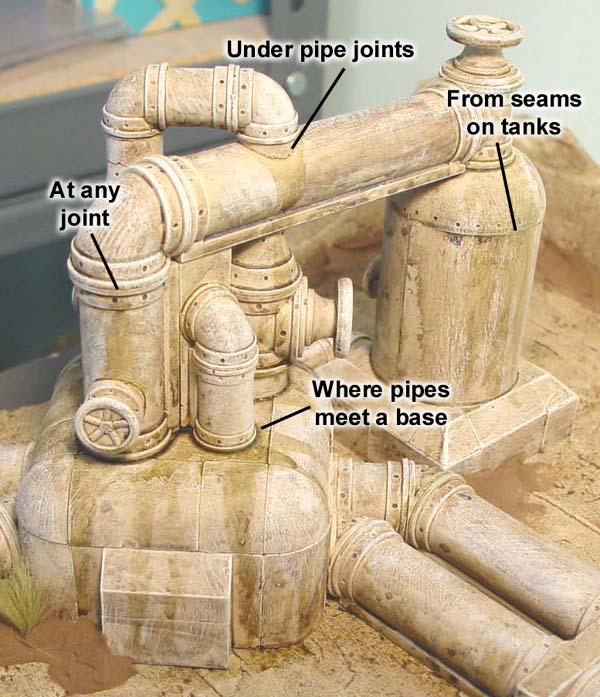
| 8. | Now that the excess is soaked out of the brush, use the brush like a magic marker. Paint a stripe down the side of a tank starting from the horizontal top seam. Make the stripe wider at the top gradually thinning at the bottom. Go back and forth over the line several times. The more times you paint, the darker the stain lines will become. Use this technique to put vertical stains on any place you think water would naturally drain down. |
 |
|---|
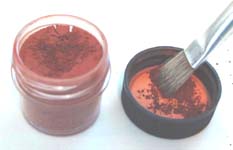
| 9. | Weathering PowdersI'm going to use some weathering powder to add some rust and various colors of dirt. The kind I'm using here is "Doc O'Brien's Weathering Powders" and they are a very good quality. Basically, weathering powder is very finely ground pigment used in paint. For more information on weathering powders, check out our Painting Instructions page. |
 |
|---|
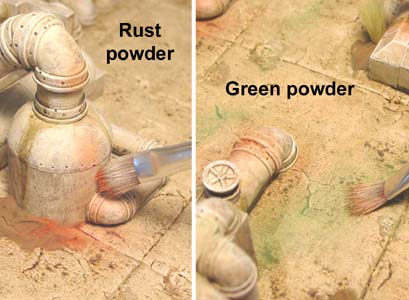
| 10. | Dip a soft brush into the rust colored powder and knock off the excess into the cap. Then gently brush random areas of pipe fittings and tanks with the powder. A small amount of powder will go a long way. This kind of powder is so fine that it seems to stick without needing a fixative (something to hold it on). However, you can spray it with some hair spray afterwards if you want it to withstand a lot of handling. Be sure to use other colors for a more natural look. I'm also using green on the concrete so it looks a bit like moss growing there. |
 |
|---|
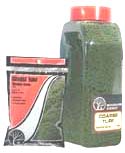
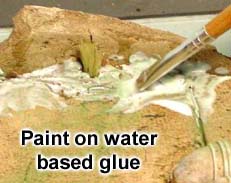
| 11. | Ground CoverI'm going to use Woodland Scenics coarse and fine turf which is colored ground foam. I'm using various colors of both textures, from the yellow color (dead foliage) to the nice dark green kind. I think a variety of colors looks more natural. To stick down the ground foam, you need to paint the area with water based glue. I use Aleene's tacky glue straight out of the bottle. Elmer's white glue would work fine as well. Be sure to wash your brush out well or it will be useless later on. |
 |
|---|
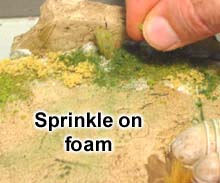
| 12. | Be sure to work in small areas at a time, otherwise the glue may dry on you before you get a chance to apply the foam. Next, sprinkle on the ground foam. I think it looks more natural to make clumps of one color in small areas. |
 |
 |
|---|
| 13. | In some areas, run a bead of glue up around the pipes to simulate vines or growth climbing up on them. You can even press it into the glue so it will hold better. Vary the colors and textures of the clumps. Clumps of one color will help it to look like one kind of plant growing in an area. Your layout is finished! |
 |
|---|
Here are a few photos of the finished pieces arranged in simple layouts. The Star Wars miniatures are from Wizards of the Coast. For instructions on how these factory pieces were built, please visit the Chemical Plant Building Instructions page. To find out more information on how to use and build with the pipe pieces from molds #320 and #321, please visit our Tips & Tricks 26 page. |
 |
Click on the photos for a larger view.
 |
 |