How to Use Mold #420
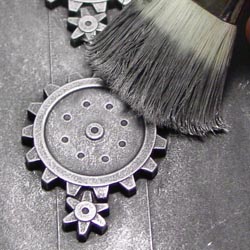
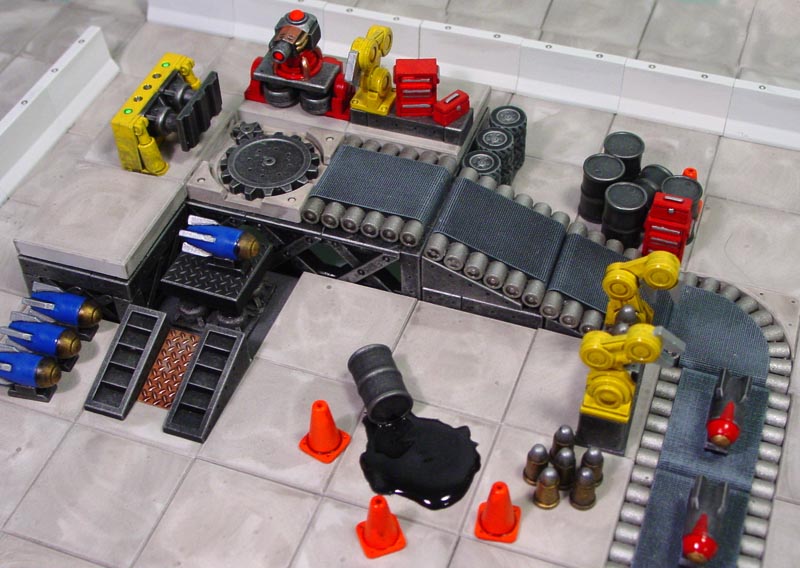
This page will show how to use Mold #420 to add 1.5" wide conveyors to your modern or sci-fi layouts. The example photo also has plain 1.5" concrete pieces from mold #280. This mold also works well when combined using molds #274 (Steel Bridge Mold), #280 (Concrete Floor Mold) and #331 (Factory Accessories Mold). The photo at the bottom of this page shows one possible layout using all four molds. Check out the Robot Factory Building Instructions page for more details. | 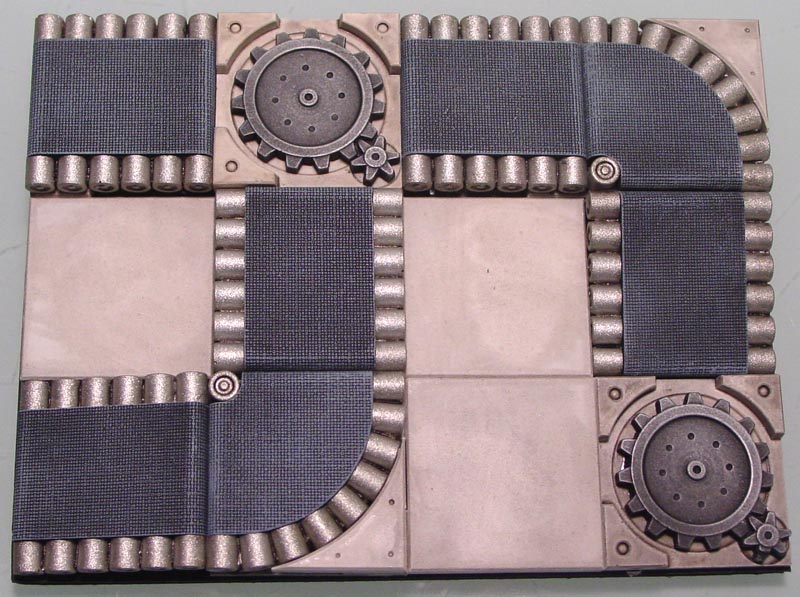 |
Casting and Demolding
| 1. | Since this is a mold of modern equipment, if you get any air bubbles in the castings they will look very odd. The best method of casting these pieces is to use a spray "surfactant" and a vibrating table of some kind. I show how you can use these on the Advanced Casting Instructions page. Using this method, most of the air bubbles will be eliminated giving you nearly perfect castings. |
 |
|---|
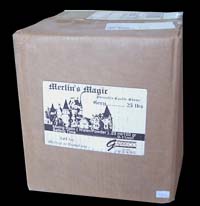
| 2. | For this mold, I suggest using a white dental stone such as Merlin's Magic. You can find out more about this product and where to buy it on our Dental Stone page. I suggest using white because it will be easy to stain it gray for the concrete base under the big gears and the concrete corners on the turning conveyors. I would not suggest using plaster of Paris because it's a softer material and the roller pieces would be difficult to get out of the mold without breaking. |
 |
|---|
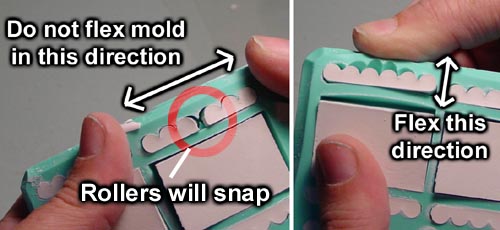
| 3. | When removing the blocks, the only pieces you may have trouble with are the rollers. The best way to remove these from the mold is to spread the mold from the top and bottom of the rollers, not side to side. Side to side flexing will cause the roller strip to snap in half. |
 |
|---|
Painting the Conveyors
Specific colors of paint will be shown at the bottom of this section, after the techniques are described.
| 1. | Materials Needed for PaintingTo paint the conveyors you may want a variety of paints and other supplies depending on the colors you like. I'm going to use spray paint for the main color on the conveyor belts and rollers. Permanent double-stick tape is used to hold small pieces down while spray painting them. I will also use washes made from shoe polish, future floor finish and water. You may also want some water based craft paints for other finishing touches. |
 |
|---|
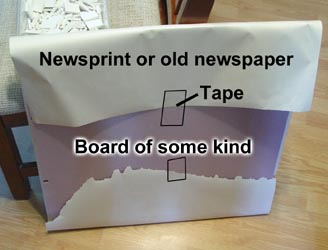
| 2. | Spray Painting the BaseThe base colors on the conveyors will be spray painted. I like to take a piece of board (I'm using a 1/2" thick piece of foam board) and tape a piece of newsprint down over it. If you don't have newsprint, old newspapers will work fine. You may also use plastic trash bags if you like but I think paper works better for this. |
 |
|---|
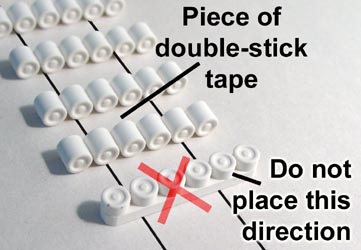
| 3. | Place a long strip of permanent double-stick tape down on the paper. Next stick your rollers down onto the paper, leaving about 1" between them. You want to leave enough room between them so the front face can be fully reached with spray paint. Orient your rollers as you would see them on the sides of your conveyors (on their sides, not on their backs). This will make the next step of ink washing easier. They will also stick to the tape better going this direction. |
 |
|---|
| 4. | Spray paint color options will be shown below. The larger pieces such as the conveyor belts do not need to be taped down. Spray a nice thin even coat on the pieces. If you put the paint on too heavy the paint will drip. Two thin coats is better than one thick one. Do this outside or in a well-ventilated area. |
 |
|---|
| 5. | Dry BrushingPersonally, I prefer to dry brush the conveyor belts with light gray paint (over a dark gray base) for the best look.However, this method is very difficult to do well if you are not used to dry brushing. The conveyor cloth texture is very fine and it's easy to ruin the look by getting in a hurry. If you do not want to dry brush, then skip down to step 8 and use that method instead. |
 |
|---|
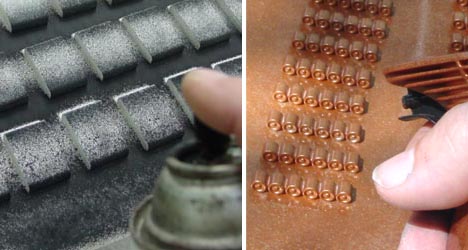
| 6. | For instructions on how to dry brush please look at our Painting Instructions page. For the gears, I spray painted them flat black. Afterwards, I dry brushed them with gunbolt metal paint from Games Workshop. I've found Games Workshop has the best metallic paint for dry brushing. They just seem to have more metal in the paint. |
 |
|---|
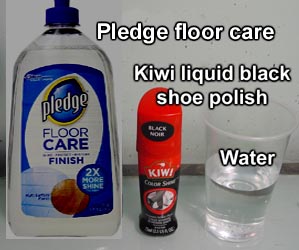
| 7. | Applying the WashesWashes will bring out the shadows in all of your pieces. My mixture uses Future floor finish, Kiwi liquid black shoe polish and water You should be able to find Future in the floor cleaning supplies area at your local department store. The shoe polish is usually found in the shoe department. You can use black India ink instead but shoe polish is much cheaper and works very well. You may also use regular ink wash from Games Workshop (now called Citadel shade paints) but these are very expensive for the amount you may need. You also cannot make them any darker than they are. |
 |
|---|
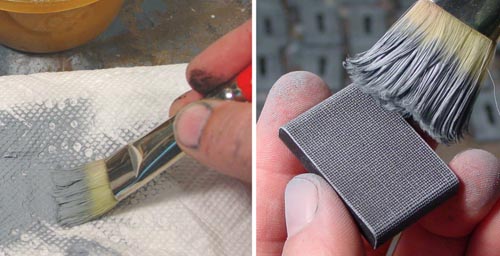
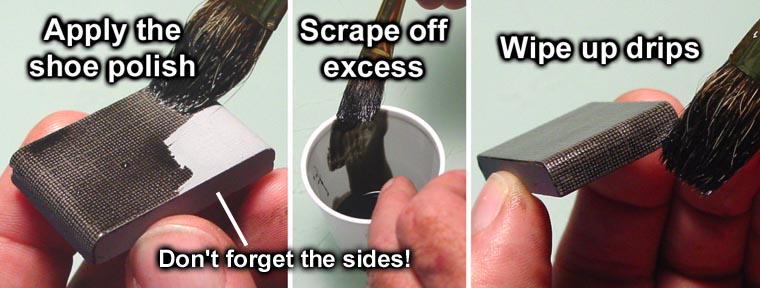
| 8. | If you do not want to dry brush the conveyor belts, you can spray paint them a light gray (or white) and apply shoe polish instead. I'm going to apply the shoe polish straight without thinning it or mixing it with anything else. For the example below, the base piece was spray painted with light gray paint. Use a 1/2" wide soft brush, dip it in the shoe polish and paint it over the surface evenly. After the surface is covered, scrape your brush against the side edge of the cup to remove any excess polish from the brush. Then wipe up any drips that happen on the sides of the belts. Be sure that you do not touch the surface of the piece until it's completely dry or you'll get fingerprints on them. |
|---|---|
 |
| 9. | For staining concrete, I'll mix up a concrete wash. For darkening shadows on the rollers, I'll mix up a roller wash. Here are the recipes for each:
How much you mix up depends on how many pieces you are washing. I would start with teaspoon measurements (4 tsp., 4 tsp., 1 tsp.) and see how it goes. It's always easy to mix up more if you need it. |
|---|
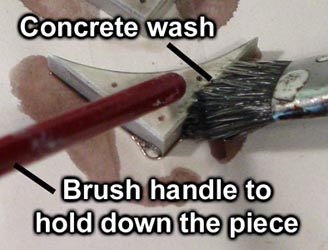
| 10. | Concrete WashI had cast all of these pieces in white dental stone. The main reason I chose white is so that I could apply the concrete wash straight on the pieces without having to paint a base coat. This saved me a lot of time. I'm using the concrete wash on the corner pieces and also on the gear bases. The corner pieces are fairly small and will want to move around on you while applying the wash. Use a spare paint brush handle to hold them down. |
 |
|---|
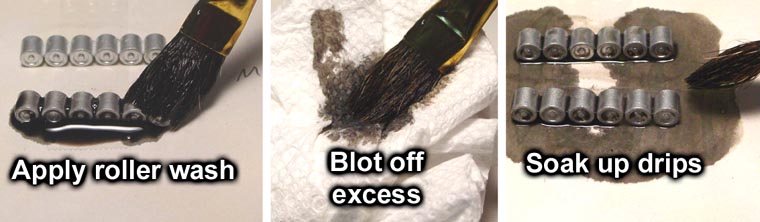
| 11. | Roller WashFor the rollers, leave them taped down to the original sheet they were spray painted on. There's no need to peel them up, just to stick them back down onto another sheet of paper. Brush the roller wash on heavily. You can do about 12 roller sets before cleaning up the drips. Blot off the excess roller wash out of the brush and then soak up the excess wash around the base of each roller group. Try to leave as much wash on the rollers as you can without having excess drips around the bottom. |
|---|---|
 |
Choosing Your Colors
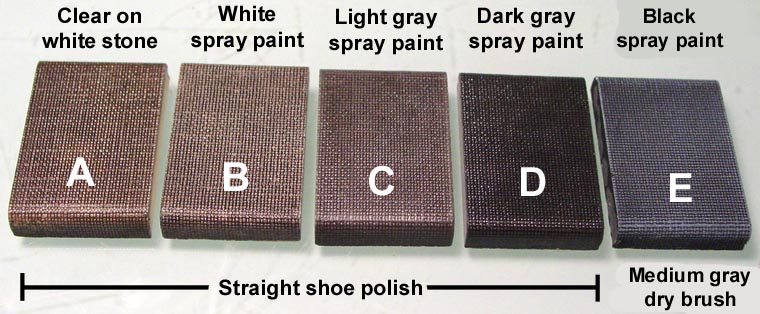
| 1. | You will need to decide what colors you want your conveyors and rollers to be. Below are a few tests that I did to see what the colors would look like. A) This was white dental stone spray painted with a clear sealer (Krylon clear coat) then painted with shoe polish. You will notice that the first four have a glossy sheen to them. If you don't like the sheen, you may have to spray them with "Testors dull coat" to get rid of it. Personally, I like the last example the best but dry brushing is more difficult to do. |
|---|---|
 |
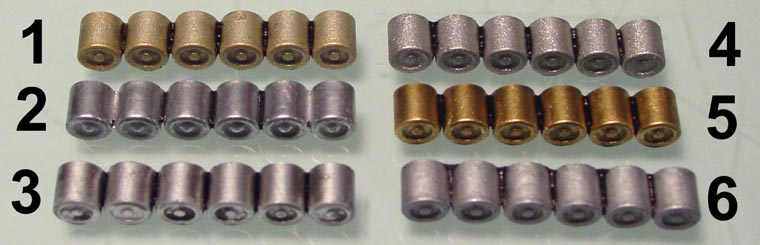
| 2. | 1) This was spray painted with cheap gold paint and brushed with roller wash. My favorite ended up being #4 which used the satin nickel spray paint. It kind of has a "glittery" look to it and held the ink was very nicely. |
|---|---|
 |
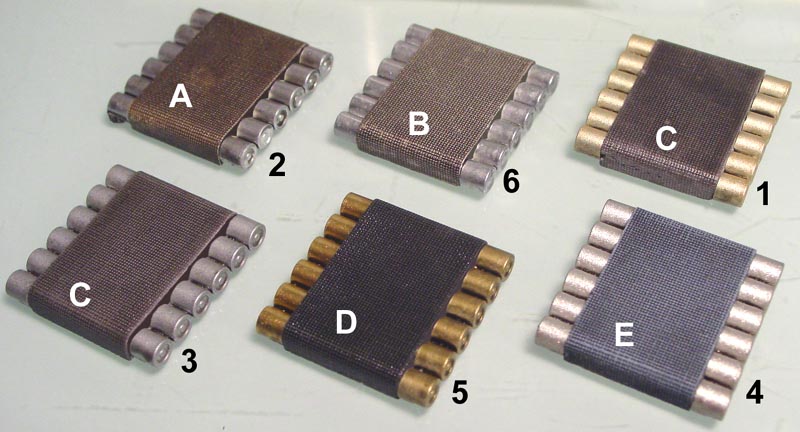
| 3. | Here are a few belt and roller combinations. Click on the image to see a larger version. The letters and numbers refer to the photos in the steps directly above. |
 |
|---|
This layout is made using mold #420, the concrete floor is from mold #280, the iron bracing under the concrete is from mold #274 and all of the machinery and other accessories are from mold #331. Click on the photo to see a larger version of it. Check out the Robot Factory Building Instructions page for details on how to use these other molds to make a complete factory layout. |
 |