Tips & Tricks 7
Making the Warlock House Base
| 1. | For instructions on how to build the Warlock House, got to the Warlock House Building Instructions page. The base will be made of polystyrene foam insulating board. This is the stuff they use for sheeting on houses before they put siding on. You can get it at any lumber yard and usually comes in pink or blue in thicknesses of 1/2", 1", 2" and even 3". Set up the house on the board and use a marker to draw the outline of the house on the board. Mark where you want your tree and rock faces. |
 |
|---|
| 2. | I'm using a hot foam cutter to shape the edges of the board. This one was called the "Hot wire foam factory" and was pretty expensive (about $100). You can probably find cheaper ones, but this included lots of useful tools and I've been really happy with it. I purchased it from www.micromark.com. |
 |
|---|
| 3. | When you cut around the rock areas (shown in pink), try to make them jut out like rock would at that point. We're going to add a thin layer of plaster over top of the foam, but the foam must be about the same size and shape of the finished rock. The remainder of the edges can slope away toward the bottom. Now it's time to make and use a rock mold. |
 |
|---|
Making and Using a Rock Mold
| 1. | The purpose of a rock mold is to make a realistic rock texture over an existing surface. To start with, you need a couple of good rocks. I picked these up in the local park, but many people have rock gardens you can borrow from (ask them first). It's important to get a rock with some good small texture on it, but also have some flat area around it too. |
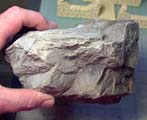 This rock has good texture, but it's on the corner which will make it harder to use. |
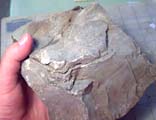 This rock has some good small texture along with some flat area all around. This is a good choice. |
|---|
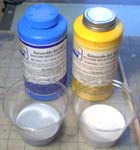
| 2. | You can use either latex or silicone rubber for the mold. For more information on kinds of rubber, look at the moldmaking page. The silicone I'm using for this mold is from Micromark. It's called ONE-TO-ONE/RAPID mold making rubber. To use this material you measure out equal parts of A & B and then mix them together. |
 |
 |
|---|
| 3. | Use a stiff bristled paint brush to paint a thin layer of rubber on the rocks. Make sure it goes into all of the cracks. Try to paint an area about the size of your hand. As the rubber slowly thickens up, paint on more layers. The thicker you can make your mold, the better it will work. This type of rubber starts to thicken in about 10 minutes, other kinds may take as long as an hour. |
 |
 |
|---|
| 4. | After the rubber cures completely (which can be from 4 hours to overnight) carefully peel the rubber off the rock. The rubber I'm using tears easily so I have to take my time and work around the edges. This rubber mold has all of the stone texture from the rock. |
 |
|---|
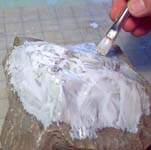
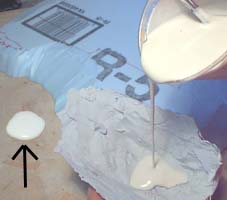
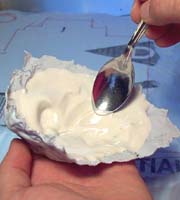
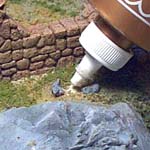
| 5. | Mix up some plaster and pour a blob about the size of a quarter on a work surface nearby. This is important! We will use it as a guide later on. Now pour the plaster in the mold. You want about 1/4" of plaster covering most of the surface. Set it aside for a few minutes until it thickens to the consistency of toothpaste. Use a spoon to spread out the plaster evenly inside of the mold. |
 |
 |
|---|
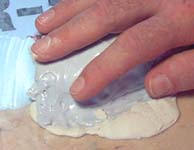
| 6. | Put the mold in the palm of your hand and push it down onto the foam base (where you want your rock to be). Press it firmly over the surface and hold it there for about 5 minutes. You will have to be patient and try not to move your hand. Check out the blob of plaster you poured on the work surface. When you can press on the blob of plaster without damaging it, then you can remove the mold. |
 |
|---|
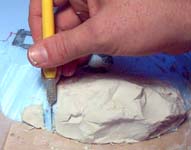
| 7. | While the plaster is still fairly soft, trim off the excess with a hobby knife. The more time the plaster has to dry, the harder it will be to trim off the excess. |
 |
 |
|---|
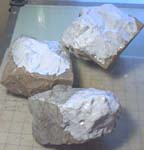
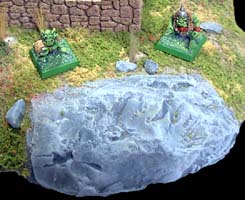
| 8. | I painted this rock exactly the same way I paint the buildings. I started with a thin mixture of dark gray underneath, a medium shade of gray brushed on with medium pressure, and then a light gray dry-brushed on top of that. The rock mold gives you the details and random shape of real rock which makes for a nice effect. The next time I do this, I will make the rocks look like they are embed into the hillside, rather than sticking out of the hillside. |
 |
|---|
Making an Autumn Tree
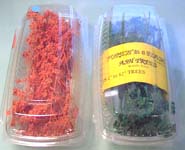
| 1. | To make trees, I'm using a product called Forest in a Flash. I picked it up at my local model railroad shop, but you can also find it at Jane's Tools. There are around 18 different colors available. A package costs about $8 and will make several trees. |
 |
 |
|---|
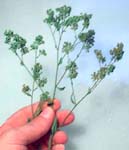
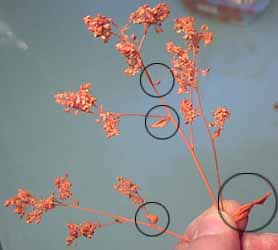
| 2. | Since I want an Autumn tree, I'm going to use an orange colored version. I don't know what kind if plant this is, but it's chemically treated to preserve it and stay flexible. I've had trees made from this stuff for 2 years so far and they're still in good condition. You will have to remove some leaves from the plant first. At the base of every branch a leaf forms (circled on the photo). Take a hobby knife and pull them off. I also wanted some variety to the color, so I took some red, yellow and brown paint, and dabbed it onto the leaves in a random manner. |
 |
|---|
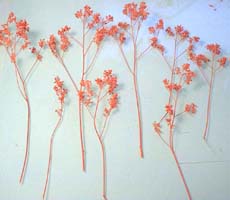
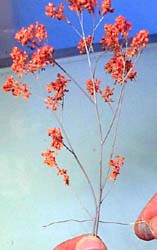
| 3. | Take a large piece and pull off some of the lower branches. You will need about 8 pieces for the tree. Paint the trunks and branches gray. I know it sounds like a pain, but it really doesn't take that long to do. At this point the pieces really start to look like trees. |
 |
 |
|---|
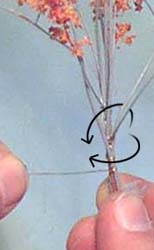
| 4. | Start with a large main piece. Using thin wire or thread, add pieces by wrapping them onto the main stem. You can make a branch shoot out at an angle, lash the wire above and below the branch (second photo). Don't worry if it makes the trunk lumpy, it will be covered up later on. To reinforce the trunk, I'm lashing a kabob skewer onto the bottom. |
 |
 |
 |
|---|
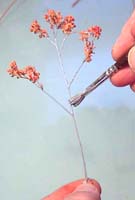
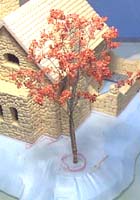
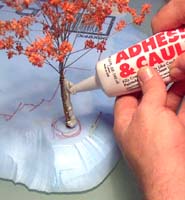
| 5. | Stick the tree down into the foam and glue it in place. The kabob skewer makes it easier to push into the foam. Now for the messy part. Take some cheap acrylic caulk and squeeze some onto the trunk. Use a toothpick to spread it evenly on the trunk. |
 |
 |
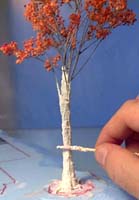 |
|---|
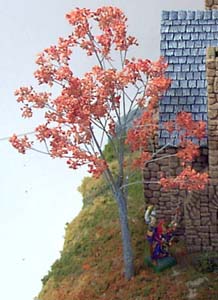
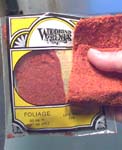
| 6. |
To simulate the fallen leaves under the tree, I'm using some stuff called "Foliage" from Woodland Scenics. You can find most Woodland Scenics products at any hobby or model railroad shop. The foliage comes in a sheet. I cut off a small piece, pulled it apart under the tree and let the bits fall to the ground. Then I sprayed under the tree with a mixture of glue and water to hold it in place. The tree is finished! |
 |
|---|
 Try to texture the caulking a little with the toothpick to resemble bark. Let the caulking dry completely (overnight) before painting it gray. If you like, you can even dry-brush some light gray over the trunk to bring out the detail.
Finishing the Warlock House Base
| 1. | To finish the base, I'm going to glue down the garden wall, but not the house. I may want to remove the house later on for display separately. Start by painting the base an earth color. The best way to get an earth color is to get some dirt, put it in an envelope and take it to the paint store. Find a color of paint that matches the dirt, but make it 2 shades lighter. Real dirt is too dark. It only looks lighter because it's outside in the bright sunlight. To compensate for indoor lighting, the paint color has to be lighter. |
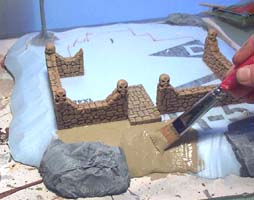 |
|---|
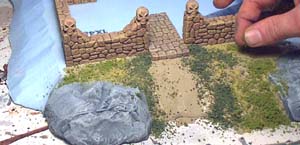
| 2. | Only paint a small area at a time. You want to sprinkle ground foam scenic materials directly into the wet paint. The ground foam I'm using for grass and weeds is made by Woodland Scenics. I'm using many of the dead colors for this layout. For Autumn, the medium green, light green and yellow shades work best. I'm also using dark green sparingly. For the path from the front walk, I'm going to let the earth color show through. It's important to sprinkle different colors around in clumps, like the spots on a calico cat. Most kinds of grass and weeds grow together in little areas, not spread out evenly over your yard. |
 |
|---|---|---|
 |
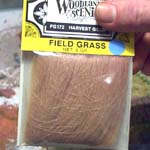
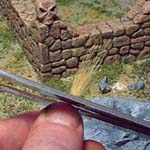
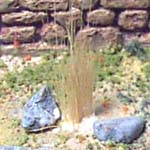
| 3. | To add weeds, I'm going to use a product called "field grass" by Woodland Scenics. Using a paintbrush handle, move the ground foam out of the way until you can see the foam base below. Put a dot of glue down on the foam base. Be sure to use a thick glue such as "Tacky Glue", otherwise the grass may not stand up. Pull out a small bundle of grass. Using scissors, trim the bottom and stick it down into the glue. If the glue is thick enough, it should stand on its own. However, you may have to shove the grass upright occasionally if it falls over. Once it dries it will stand on its own. |
 |
 |
|---|---|---|---|
 |
 |
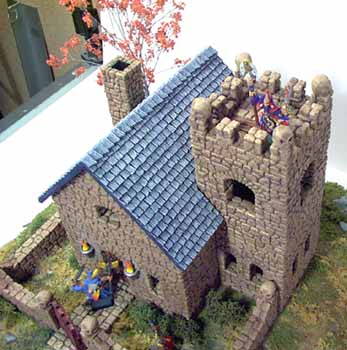
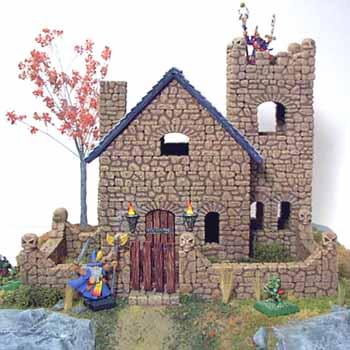
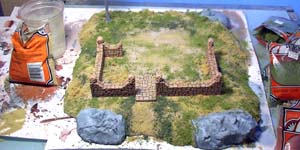
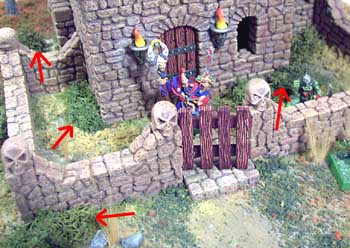
| 4. | As a finishing touch, I'm using lichen to represent bushes around the outside of the house and garden wall. I've put red arrows showing where the lichen is. Simply glue the bottom of a clump of lichen and stick it down to the foam base. The gate and door were made using the wooden plank mold #220. The flames in the torches were made using epoxy putty. Below are a few other photos of the Warlock House. |
 |
|---|