Tips & Tricks 10
Principles of Painting Futuristic Models
Painting futuristic model buildings is much different from how you finish fantasy or historical buildings. Please keep in mind that I am not an expert and I still have a lot to learn, but here are a few principles I have observed so far.
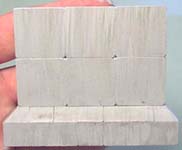
I guess you can if you're really good at it. Dry-brushing brings out all of the surface texture of the pieces. The problem with pieces from mold #300 is that there is no surface texture. If you try to dry-brush, the only thing you will see is the brush strokes. I've placed an example photo on the right. I guess it would work if you wanted a brushed aluminum texture or something like that, but it just doesn't seem to work otherwise. If you really wanted to highlight the rounded edges, an air brush would probably do it best. However, an air brush is hard to use on small items (unless you're really good at it) and it's also expensive to have one. It occurred to me that finishing a futuristic model was much the same as finishing a model car or airplane, and how many of those do you see dry-brushed? Instead, modelers use other techniques to bring out the shape and smooth texture of the piece. |
 Rule #1: You cannot use the dry-brush method.
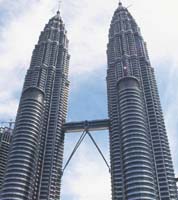
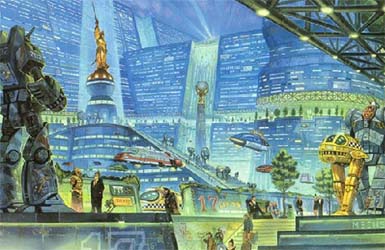
If you look at existing buildings (with a futuristic flare to them), you will see that they are usually only one color (either gray or tan) in a couple of shades. The difference between these two colors are used to help bring out the shapes and designs in the building.
|
 Rule #2: Use two solid shades of a single color.
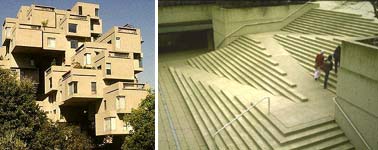 Most building colors are pretty boring. Since you can't depend on surface texture or color to add interest, you're left with making the shape or design of the building carry that burden.
Most model space ships or futuristic equipment is divided up into different shaped panels with a thin dark line or stripe in between them. These lines help bring out and separate the shapes. Shading is extremely hard to do on such small models because it would have to be very smooth to look good.
|
 Rule #3: Use dark lines or stripes to separate sections.
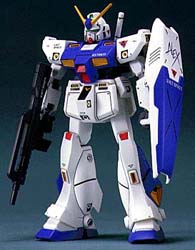
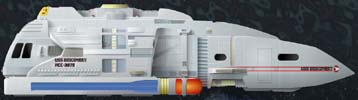 The lines that separate these sections need to be clean and sharp, which is sometimes difficult to do. I'll show you a couple of ways to accomplish this. The examples shown here are a Star Trek shuttlecraft and a Gundam model.
Many times buildings or machinery will use more than one color. If so, use them sparingly and only to add emphasis to an area or enhance the design. If you add too much color, the model will look too busy and basic shapes you're trying to enhance won't come out. Painting futuristic buildings are more time consuming because they're like painting miniatures. If you use different colors, you will have to keep the colors separate with a clean division between them. |
 Rule #4: If you want to add color, use no more than two or three.
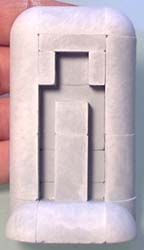
In the end, no matter how you paint and finish the model, you need a good design to make the building look good. It's nearly impossible to make a plain flat box look good. Adding a stripe here or a buttress there will help considerably in making the design work. The shapes need to flow together and look like they belong. Try making patterns with the blocks to see what you come up with. |
 Rule #5 It all comes down to the design.
Futuristic Finishing Techniques
| 1. |
While mixing up a thin wash, I discovered that the cheap watercolor wouldn't stay mixed. The pigment (which was kind of grainy) would always sink to the bottom. I also learned not to apply it directly to bare plaster. If you do, the plaster immediately soaks up the ink making it impossible to get subtle effects. I also tried wetting the plaster first, but anywhere glue was accidentally smeared repelled water and the wash. |
|---|
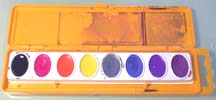 The first thing I wanted was to make walls look old and weathered, so I tried streaking an ink wash over them. I bought a cheap watercolor set (which cost about $2) because I thought it was something that everyone would have access to fairly easily.
| 2. |
Dilute the ink wash (a drop of ink to a teaspoon of water) and brush it lightly over the surface. It also helps to add a slight touch of brown or green to the wash. Brown is best used underneath handles, plates or machinery where rust would flow down the wall. Green is best used where water would run down an opening and stay wet most of the time. |
 |
|---|
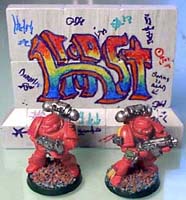
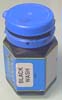 I got the best results by painting the wall a solid medium gray first. This time I used a good black ink wash from Games Workshop, but there are other quality ink washes that would do just as good of a job.
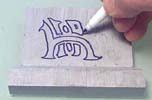
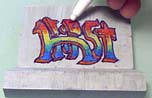
| 3. | You can add graffiti to the walls using a simple felt tipped marker. Feel free to use different colors and just doodle all you want. Most walls also have some white spray paint, but you would have to apply it with white paint and a brush. I tried using a "white-out" pen but it was too hard to control when writing. Be sure to use a spray flat sealer over the wall when you're finished! |
|
 |
|---|
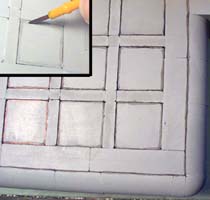
| 4. | Another technique is to add clean black lines between blocks. Black lines help bring out the block design in the floor and walls. The most difficult part is to get them straight. I tried using an ink wash to add the lines, but it's too difficult to get them clean and sharp. I was so unhappy with the paint job that I repainted it gray again so I could try something else. |
 |
|---|
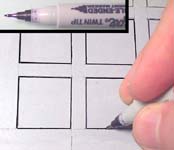
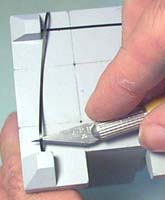
| 5. | This time I tried a permanent black felt-tipped marker. This one is a "Sharpie" brand. The tip is small and hard but it does put out a lot of ink and you can control it fairly well. The advantage of recessing the floor tiles slightly is that you can run a pen along the inside easier. Be sure the paint is completely dry before you try this. Sometimes the marker will stop drawing. When this happens, stick the tip down onto a piece of scrap paper and draw until it starts working again. |
 |
|---|
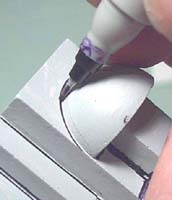
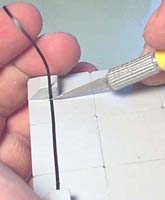
| 6. | I also noticed that when I tried to enhance the lines inside of a deep corner, the pen couldn't get down into the crack. Instead it would draw a double line, one on each side of the groove. To solve this problem, I had to angle the marker so that it would only draw a line on one side (second photo). |
 |
 |
|---|
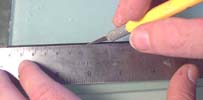
| 7. | Here's another trick to add straight lines to your model. Get a clean piece of glass and lightly place a strip of black electrical tape on it. Don't stretch the tape when you stick it to the glass. Now lay down a straight edge and use a hobby knife to cut a thin strip of tape. Be sure to use a sharp blade! Be careful when you pull it up not to stretch it and make sure your hands are clean. Any dirt, powder or paint will get on the adhesive side of the tape and it won't stick to the model. |
 |
|---|---|---|
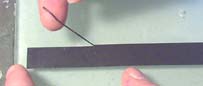 |
| 8. | To position the first edge of the tape onto your model, stick the end onto a hobby knife so you can put it where you want easily. When you position the other end, only stretch the tape just enough to get it straight. If you stretch it too much, it will shrink later and leave a gap. Use a hobby knife to gently push down and cut the other edge. |
 |
 |
|---|
| 9. |
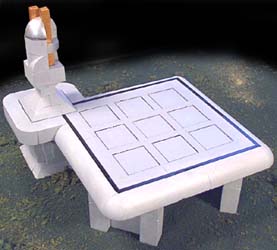
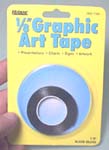
For wider stripes, I also tried some 1/8" graphic art tape. You can only find this tape at a large office supply or art store. On the landing pad, I placed a thick line of it around the outside border. I also finished the landing pad by painting gold and silver on the transmitter area. To see how to build the landing pad, check out the Landing Pad Instructions page. |
 |
|---|
 Don't run your finger along it. Instead, gently push straight down with your finger about every 1/2" to anchor it well. Then you can slide your finger along it without messing it up.
| 10. |
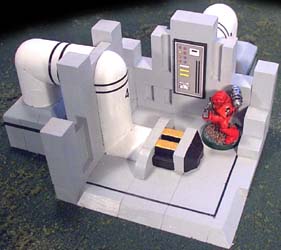
I finished the pump station by painting the pipes white and adding some electrical tape stripes to them. The floor also has a nice stripe to finish it off. I drew the control panel using CorelDraw, printed it out and glued it to a piece of matt board. To see how to build the pump station, check out the Pump Station Instructions page. |
 |
|---|
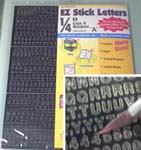 Another handy thing I found at the office supply store was some 1/4" stick-on letters & numbers. I used these on the pipes of the pump station.
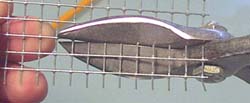
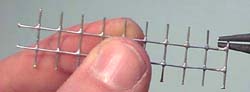
| 11. | To make a ladder, get a piece of 1/4" hardware cloth. You can find this at most hardware stores or lumber yards fairly cheap. Cut a strip the length you want the ladder to be and trim the sides as shown. Use a pair of needle nose pliers to bend the wires back on the sides. This will make the ladder stick out from the side of the building. Spray paint the ladder black and add it to your building. |
 |
|---|---|---|
 |
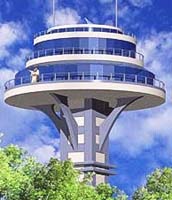
| 12. |
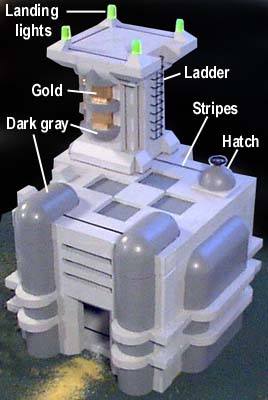
I finished the power station by adding the ladder to the side of the tower. There's also another ladder under the hatch (climbing up the inside wall below). The hatch was made from the rounded pieces glued to a square of matt board. The wheel on the hatch is a small Lego steering wheel. The tower top is painted gold and dark gray. I've used dark gray on several places which you can see in the photo. To see how to build the power station, check out the Power Station Instructions page. When looking for items to add to your model, be sure to visit a toy store. There are tons of cheap plastic toys with lots of useful bits on them. Levers, wheels, panels, lights and many other items can be made from these. |
 |
|---|
 For the landing lights I used some toy pieces. These are refills from a "Lite-Brite" set. It cost about $5 but I'll have enough for any other projects I want to do.
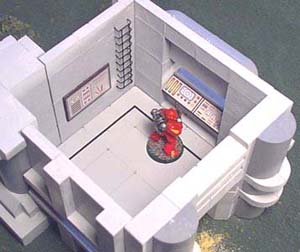
| 13. | On the inside of the power station you can see the ladder going up the back wall. The control panels were made on CorelDraw, printed out on the computer, glued to a piece of matt board and glued to the wall. I'm not sure if I'll have time to add a page of printable control panels to the "building instructions" page, but I might post some customer created ones. If you want to send me some, be sure they're your own creation. High resolution JPEG files will work the best. Different sizes and shapes would be handy, but they should look good when printed very small. Feel free to send them to me at bruce@hirstarts.com. -Bruce Hirst |
 |
|---|