Low Wall Dungeons
|
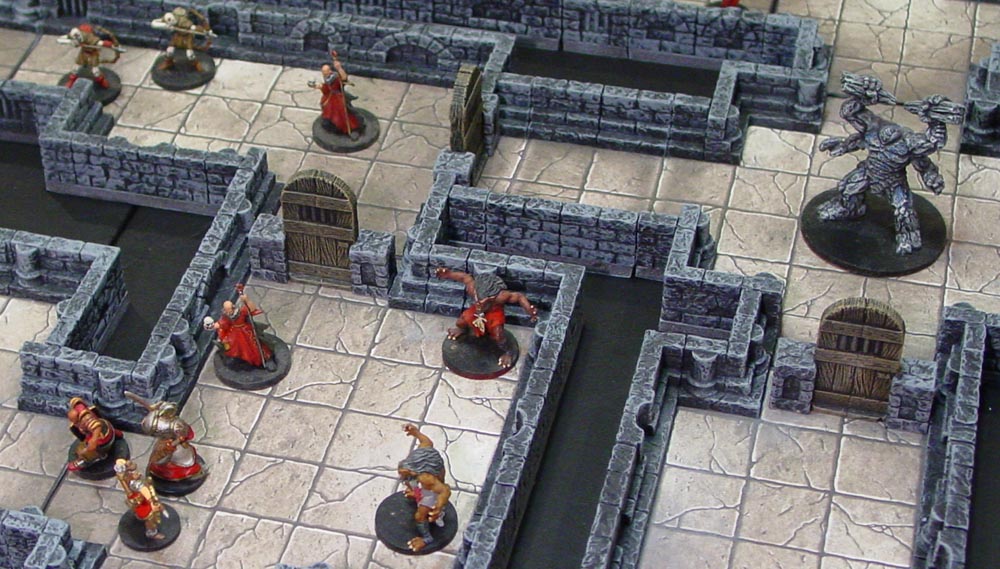
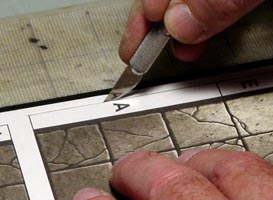
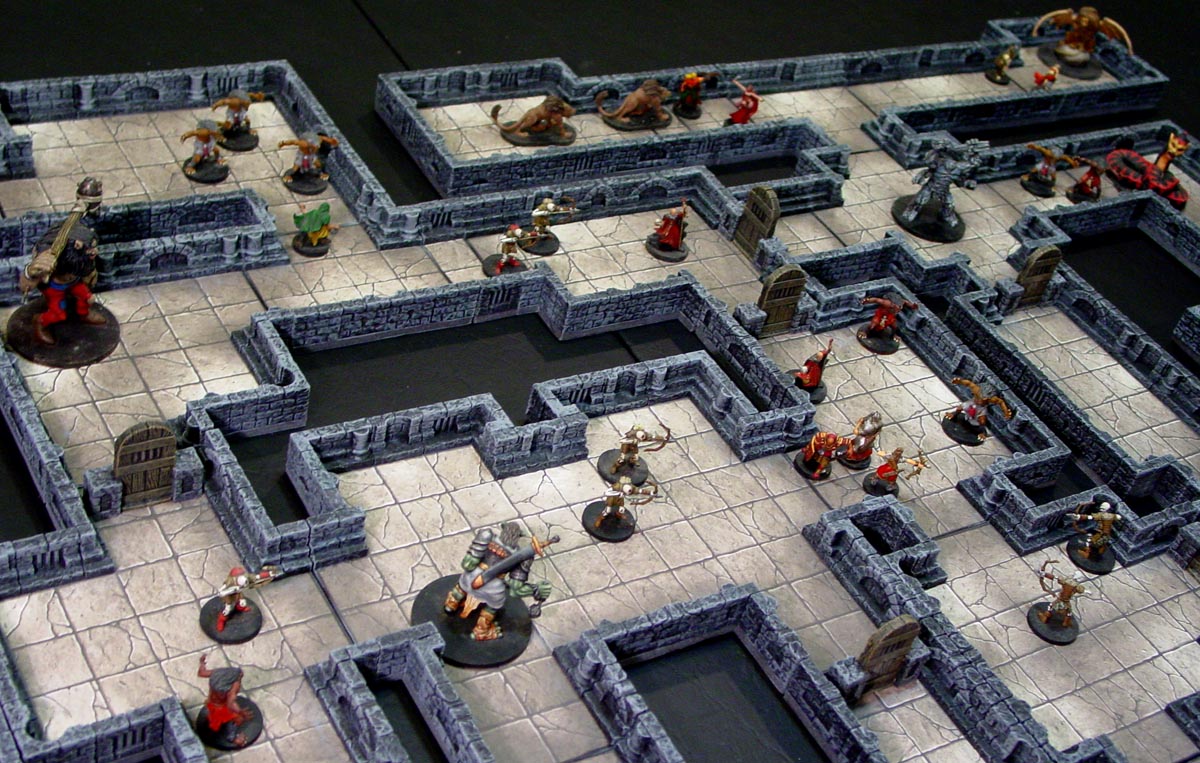
This article will show how to use the Low Wall Dungeon mold #350 to build various types of dungeons. The wall height on these blocks is 3/4" tall so you can create a dungeon where the floor, markers and chips are easy to see while playing a game. The low wall dungeon uses floor tiles that are cast from mold #203. The printed floor dungeon uses a color print for the floor and the wall blocks are glued on around the outside. |
|
About the Low Wall Dungeon Mold
| 1. | Click on the video to watch it on YouTube. This video shows suggestions and strategies when using mold #350 to design dungeons. |
 |
|---|
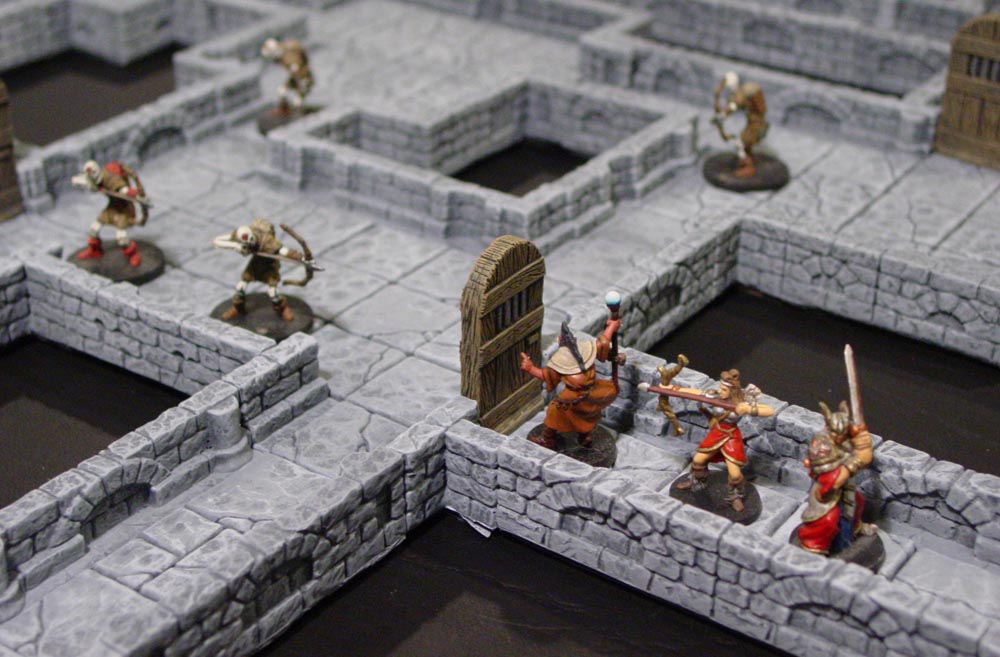
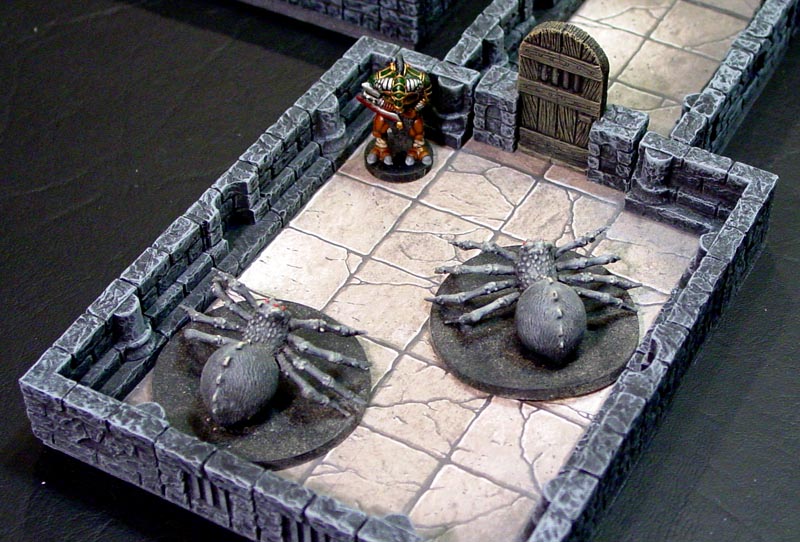
| 2. | This mold makes short dungeon walls that you can place around (or on top of) floor tiles to make dungeon rooms. These pieces are "L" shaped so that you have more room to fit miniatures that are a little larger than the floor tiles. |
 |
|---|
| 3. | These walls can work equally well for either 1" square tiles or 1.5" square tiles. The low walls are also helpful if you have miniatures with wings or weapons that extend out beyond its base. |
 |
|---|
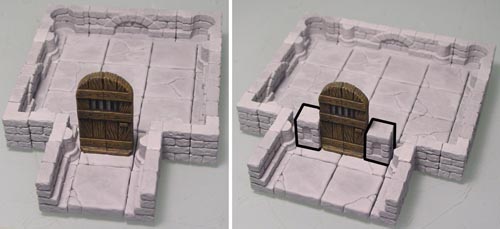
| 4. | If your dungeon hallways are one square wide, you can simply place a door anywhere on the hallway to block it off. If your dungeon hallways are two squares wide, you can glue blocks onto both sides of the door to fill the extra space. This allows you to place a door anywhere you like without building dedicated doorways. |
 |
|---|
Low Wall Dungeon Building Instructions
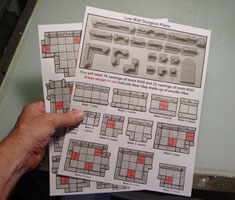
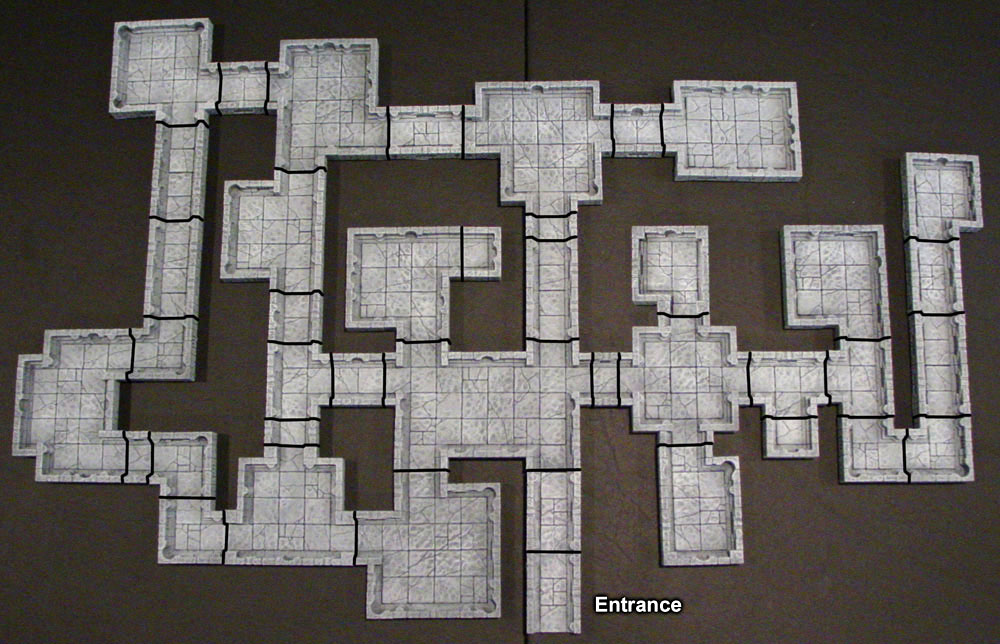
To build the dungeon shown here, you will need 16 castings of mold #350 and 22 castings of mold #203. You can use a different style of floor tile, just as long as it's 1" square. You will also want to print out the Low Wall Dungeon building plans. These printed plans show where every block goes. |
 |
| 1. | The Finished Low Wall Dungeon This video shows exactly what this dungeon will look like when finished and how to arrange the rooms and hallways. |
 |
|---|
| 2. | Low Wall Dungeon Building Instructions This video shows how to assemble the blocks from mold #350 and #203 to make dungeon sections. |
 |
|---|
| 3. | Before starting this project, you will need to print out the Low Wall Dungeon building plans. These show exactly where to place every block when gluing the floor tiles and walls down. To make this project you will need 16 castings of mold #350 and 22 castings of mold #203. |
 |
|---|
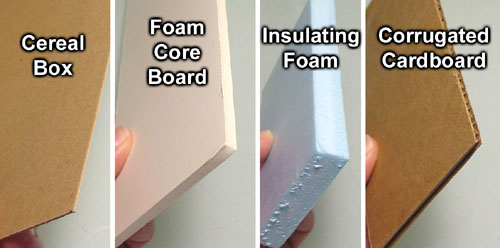
| 4. | You can mount your dungeon tiles on many types of materials. A few suggestions here are cereal box, foam core board, 1/2" blue or pink insulating foam or corrugated cardboard. |
 |
|---|
| 5. |
The edges of the cardboard can be cut at an angle so you don't see the corrugation when looked down on during a game. However, the cardboard just felt really cheap, especially after spending a lot of time casting, gluing and painting. The cheapness of the cardboard didn't seem to match with the quality of the walls and floor. These dungeon sections are small enough that cereal box would have been a good enough support for the floor. However, if you intend to make larger rooms than what I have planned, I would strongly suggest using either foam core board or 1/2" insulating foam. |
|---|
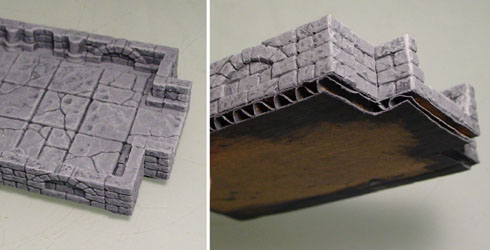 I chose to use corrugated cardboard for the base but I should have used cereal box instead.
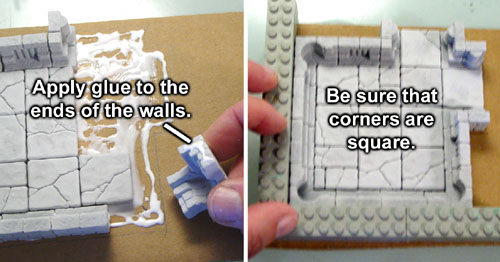
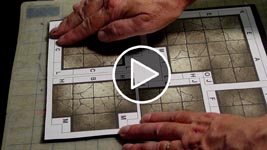
| 6. | To glue the sections together, place the blocks down onto your base material and draw around them. Slide the blocks to the side and apply glue to the base, staying within the pencil lines. Then spread the glue around with your finger. |
 |
|---|
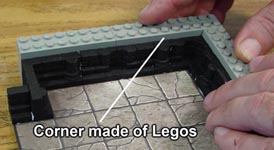
| 7. | Place the floor tiles and wall sections down onto the glue. Be sure to apply glue to the edges of the wall sections so the walls are glued together solid. I am using a corner made of Legos to square up the room before it dries. These rooms are so small that I did not bother to put glue on the sides of the floor tiles and it still worked fine. |
 |
|---|
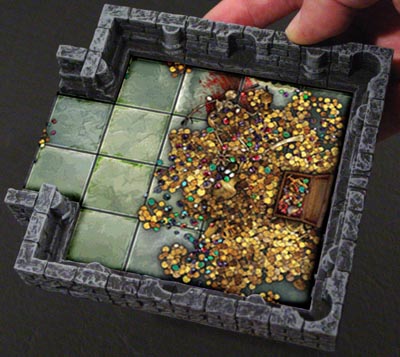
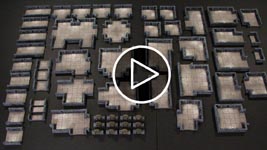
| 8. | What you see here are two different possible layouts that can be used with the pieces in this set. Click on each photo for a larger view. Feel free to make any kind of room shape you like. You may also prefer to make the hallway two squares wide instead of one square wide. If you do widen the hallways then you will need more castings of the walls and floor tiles (mostly floor tiles). |
 |
|---|---|---|
 | ||
 |
 |
Painting the Walls and Doors
| 1. | Click on the video to watch it on YouTube. This video shows how to cut masks to more easily paint the doors and basic information on painting the walls. |
 |
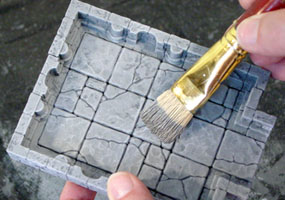
|---|
| 2. | To paint these dungeon sections, I'm using the Castle Gray color scheme found on the Painting Instructions page. This consists of three steps:
|
 |
|---|
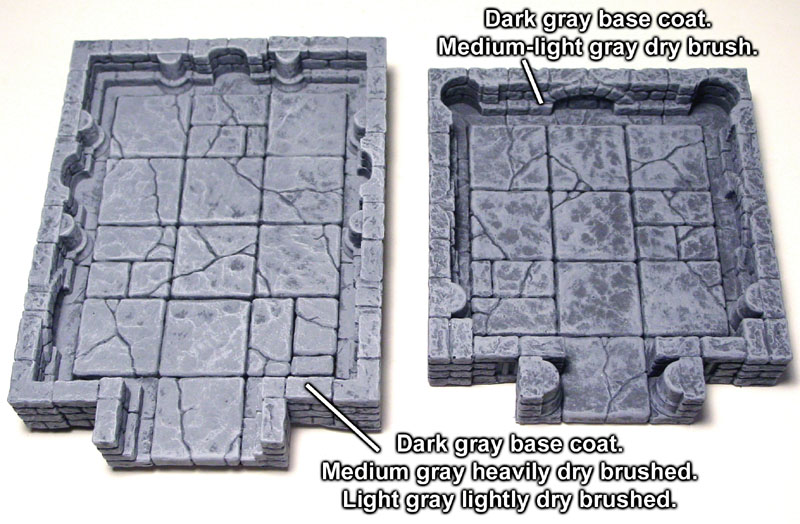
| 3. | For a faster paint job, you can always reduce this down to two steps of painting. Click on the photo to see a larger view of it. The examples shown here compare my usual method of 3 coats of paint (left) to reducing it down to just 2 coats of paint (right). The room on the right was painted with a dark gray base coat and a single dry brush of medium-light gray. You can see that the 2 step method has less color variation but also requires less work. |
 |
|---|
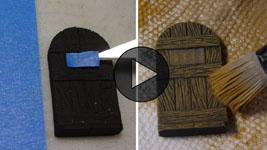
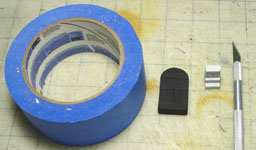
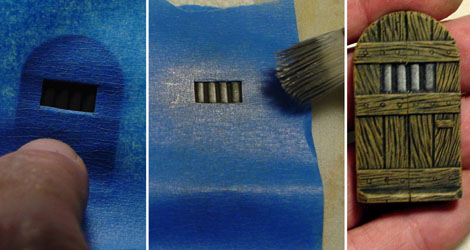
| 4. | To paint the door, I'm going to make a mask so the window bars can be painted a different color than the door. Start by spray painting the door flat black. You will need 2" wide masking tape, a hobby knife and a small wall block (labeled "i" on the printed plans). |
 |
|---|
| 5. | You'll need to cut a rectangular hole in the masking tape measuring 1/2" wide by 1/4" tall. I've done this by flipping a short wall block upside down and cutting around it as a guide. |
 |
|---|
| 6. | Place the little rectangle of tape over the bars in the window. Then dry brush the door using the Earth Tone Medium color. You may also use any color of light brown to do the same job but I like this particular color for it. When finished, move the tape to the back side of the door and dry brush that side also. |
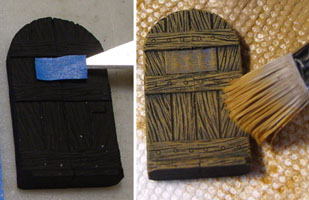 |
|---|
| 7. | Remove the small rectangle of tape and place the large piece of tape with the window cut out over the whole door. Dry brush the bars using a metallic paint. I prefer to use Games Workshop's Chainmail color. When you remove the tape, you will have your finished painted door. |
 |
|---|
Printed Floor Dungeon Basics
|
The idea behind a printed floor dungeon is to be able to print out graphics from your printer at home, mount them on a piece of foam core or cardboard and then glue painted walls around it to make a 3D dungeon. When doing this, be sure to check the copyright status of the art you are using. Most artwork can be used for personal projects but it's a good idea to check to be sure. This idea has a lot of advantages compared to making a dungeon where you cast the floor tiles:
|
|
| 1. | Printed Floor Dungeon Basics This video describes the basic idea behind printed floors, where to get images and how to use them. |
 |
|---|
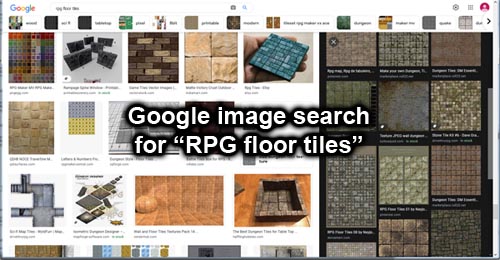
| 2. | One way to find images to use for your dungeon floor is to do a Google Image search for "RPG floor tiles". During this search you will also find many places where you can purchase images that will print out in exact one inch squares. Also, you will want to check the copyright status of the images you use. In most cases, there won't be a problem using images for your own personal use. |
 |
|---|
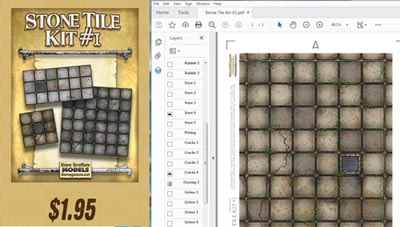
| 3. | Another source I found is from DavesGames.net. I was able to buy this floor tile set for $1.95 and download the PDF file. That's really cheap for a good floor tile texture. You'll need to get the free Adobe Acrobat program to open it with but the file has several layers so you can make lots of variations on the floor tiles before you print them out. These variations include different colors, cracks, moss, stains, checker patterns and many others. |
 |
|---|
| 4. | Another source I found is from HeroicMaps.com. Joseph and Sarah Bilton have been creating these maps for many years and have a huge library to choose from. |
 |
|---|
Printed Floor Dungeon Building Instructions
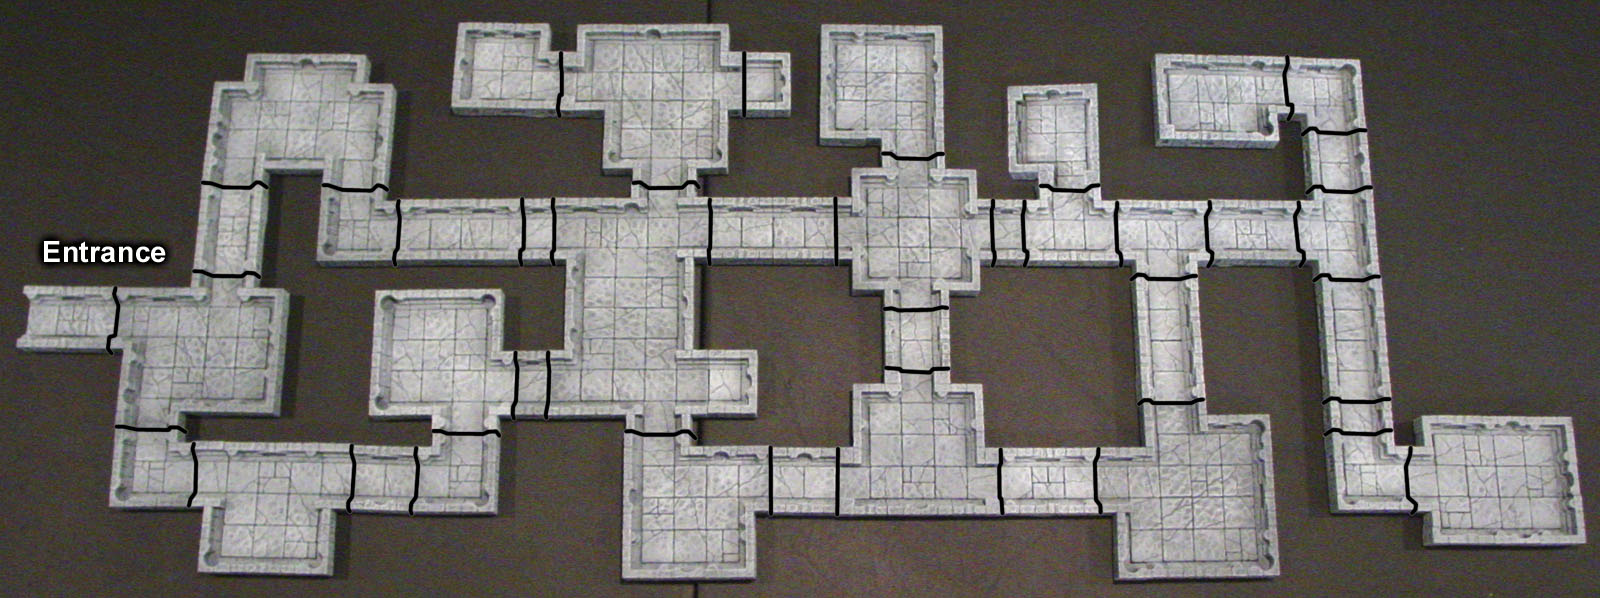
For this project you will need these building plans. They will be printed onto self adhesive label paper. You will also need 24 castings of mold #350 to complete this project.
| 1. | Click on the video to watch it on YouTube. This video shows what the finished dungeon will look like and how to arrange the rooms and hallways. |
 |
|---|
| 2. | Mounting the Printed Floor This video shows how to mount the printed floor sections onto foam core board. |
 |
|---|
| 3. | You'll want to print the building plans onto self-adhesive label paper. I'm using Avery #8165 which gives you 25 sheets of letter sized labels. But before you print all of these pages out, do a test print on regular paper to see if the inch squares measure exactly one inch. If they do not, then you may need to change a printer setting to "print actual size" somewhere. |
 |
|---|
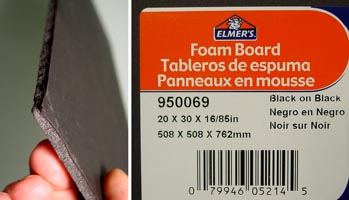
| 4. | I'm going to mount these printed floors onto black foam core board. I found sheets at Wal-Mart that measure 20" x 30". These sheets are 3/16" thick and cost a little over $3.00 per sheet. For this project you will need three sheets. |
 |
|---|
| 5. | Glue sticks do not work well.
I tried an experiment where I printed on plain paper and glued it down onto the foam core using a glue stick. I thought this might be a cheaper way without the expense of buying adhesive labels. However, the glue did not hold very well. I was able to easily tear the printed paper off of the foam core after it dried. |
 |
|---|
| 6. | After printing, peel the backing off and smooth them down onto the foam core. You want to press it down really well all over so it will permanently stick down. You should be able to fit at least five pages on each sheet of foam core (shown below). |
 |
|---|
| 7. | Most printers use a water based ink and if you spill water on the prints it will ruin them, so you might think about spraying at matt sealer over them. You'll want to do this before you cut them out, otherwise the spray will melt the foam. |
 |
|---|
| 8. | I'm using a hobby knife to cut the pieces out of the foam. Simply cut on the black lines around the outside of each piece. Be sure to put a cutting board or extra pieces of cardboard under the foam so you don't cut your table. I usually make two cuts. First, I cut through the top layer concentrating on making the cut as straight as possible. Then I go back for a second cut, making sure to cut all the way through. You may feel more comfortable using a ruler as a guide for all of the cuts but I just did them freehand. |
 |
|---|
Spray Painting and Gluing the Wall Blocks
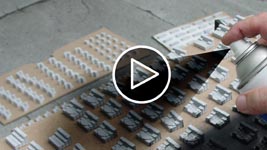
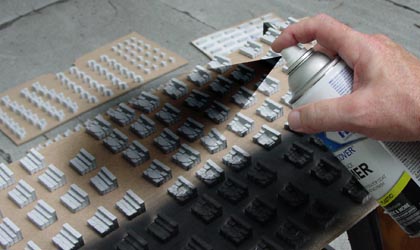
You will need 24 castings of mold #350 in order to complete this project.
| 1. | Spray Painting and Gluing This video shows how to spray paint the blocks flat black and how to glue them down to the foam core. |
 |
|---|
| 2. | You will need 24 castings of mold #350 to complete this project. Sort and arrange all of the blocks onto sheets of cardboard. Sorting them and putting them in rows will help you to do a more thorough job when painting them. You will need three cans of flat black spray paint for this project. I would not go with the absolute cheapest spray paint but a medium quality should do fine. |
 |
|---|
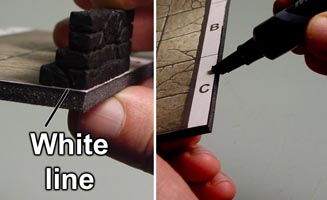
| 3. | You'll notice that when you place one of the black wall blocks onto the floor, it will leave a white line from the edge of the paper. To cover this up, take a black magic marker and draw around the outside of each section. I went around each piece twice and leaned the magic marker forward so that I made a thick black line around the edge, just in case a wall should slide when glued. Try not to make it so thick that it covers up the letters around the outside. |
 |
|---|
| 4. | Sort out the blocks and put all of the same blocks into rows. This will help the assembly part of the project go much faster. |
 |
|---|
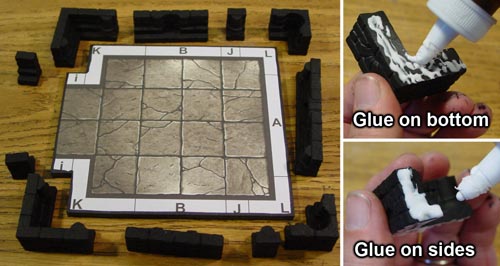
| 5. | Collect the blocks needed for each section and place them around the outside so you know where they go. Put a good amount of glue on the bottom but also glue the sides of the blocks together as well. |
 |
|---|
| 6. | You may want to use a straight edge of some kind to help line up the walls. Here I'm using a corner made of Legos to help keep the corners straight. |
 |
|---|
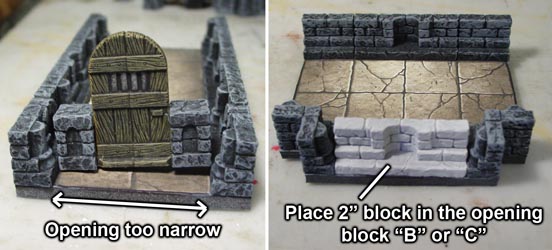
| 7. | Before the glue dries place a 2" long wall block into each room and hallway opening to make sure your doors will fit. The doors are shorter than 1" wide so they should fit just fine as long as you can fit one of the blocks "B" or "C" into each of the openings. |
 |
|---|
| 8. | Can you see which block is positioned wrong? Click on the photo for a larger view. All hallway and room entrances should have the blocks positioned with the flat walls on the outside. |
 |
|---|
Dry Brushing the Walls
| 1. | Click on the video to watch it on YouTube. This video shows how to dry brush the walls using a medium gray paint. |
 |
|---|
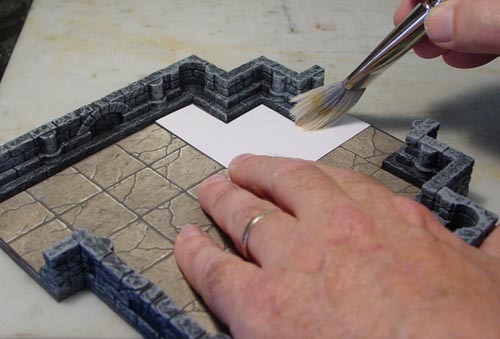
| 2. | Next we will dry brush medium gray paint onto the walls. I'm using the castle gray medium color from the Painting Instructions page. You can so see that I'm using a painting mask so that I don't get paint on the floors. You can find these painting masks on the last page of the building plans. If this is your first time painting, I strongly suggest you watch the painting video above. |
 |
|---|
| 3. | The final step will be to dry brush blocks "P" individually, then glue them onto each side of the doors. Click on the photo for a larger view. For instructions on how to paint the doors, refer to the Painting Instructions further up on this instructions page. |
 |
|---|
 |
 |
Planning the Printed Floor Dungeon
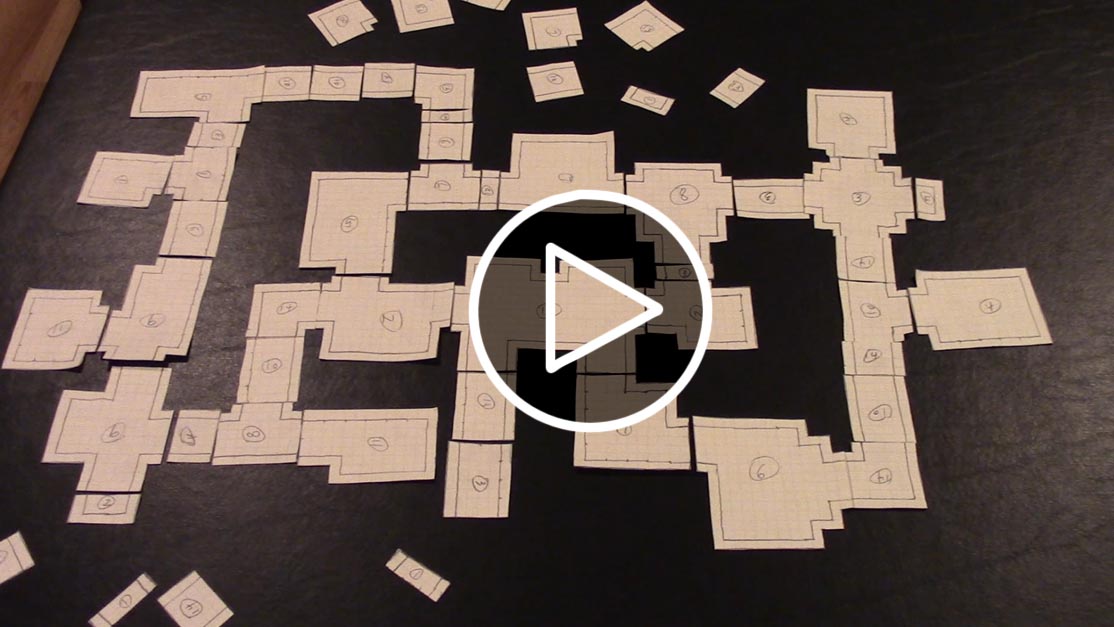
Click on the video to watch it on YouTube. This video demonstrates the steps taken when planning the printed floor dungeon. |
 |