Inn Building Instructions Page 3
 Casting Precautions Layout Basics |
 Assembling the Rooms |
 Hallways and Accessories Painting and Finished Photos |
Hallways and Accessories
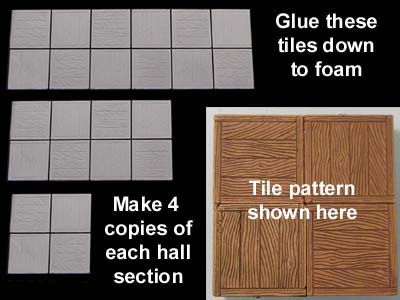
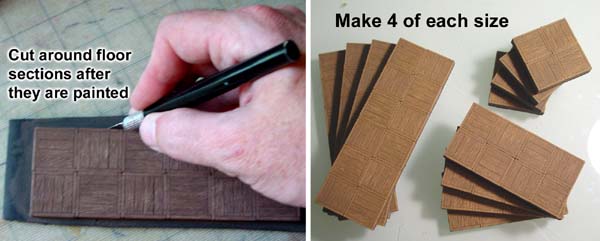
| 1. | The HallwaysThe hallway sections are very simple. Glue the tiles shown down to foam core board. You will want to make 4 of each size. In the end you will have 4 sections six squares long, 4 sections four squares long and 4 sections two squares long. After these are glued to the foam core board, you want to paint them brown. I have painting instructions further down on the page. |
 |
|---|
| 2. | After they are painted, cut around them using a hobby knife. Your hallway sections are finished! |
 |
|---|
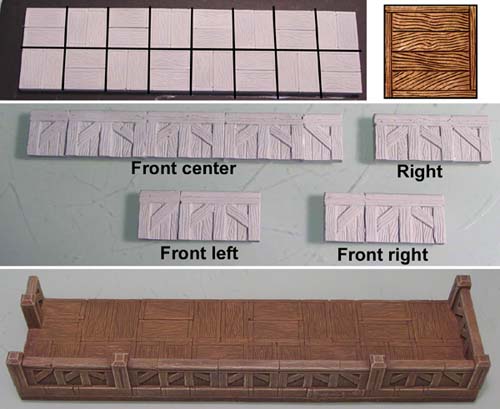
| 3. | The BalconyStart by gluing the tiles shown down to foam core board. Alternate the pattern, using the same pattern as shown on the hallway sections above. Then glue together the rail sections shown . Finally, glue the whole thing together as shown in the bottom photo adding the posts in between the rail sections. This will be painted using the painting instructions shown below. |
 |
|---|
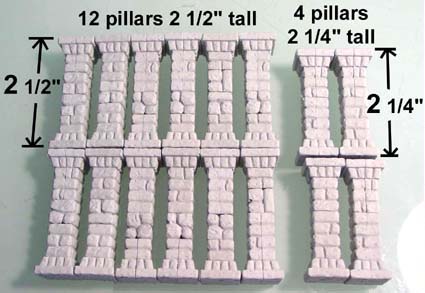
| 4. | The PillarsGlue together all of the pillars shown. Twelve of these will be 2 1/2" long and four of them will be 2 1/4" long. The left photo in step 5 shows you what pieces are needed to make each type of pillar. Start by making the shorter pillars first. After that you will need use a variety of pieces to make the remaining long pillars. Paint the pillars using the painting instructions further below. Afterwards, glue the long pillars to foam core board in groups of two as shown in the right photo in step 5. |
 |
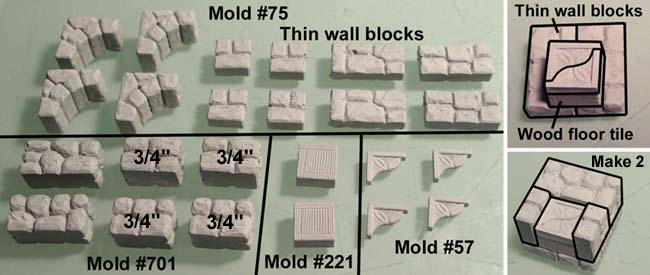
|---|
| 5. | 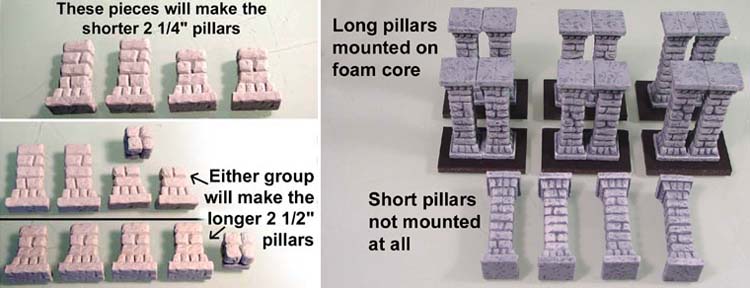 |
|---|
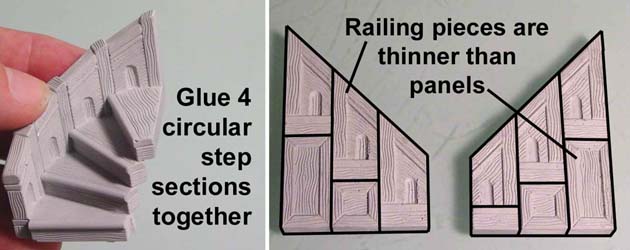
| 6. | Circular Top StairsGlue together 4 circular step pieces. Glue together the right and left railings and panels as shown. |
 |
|---|
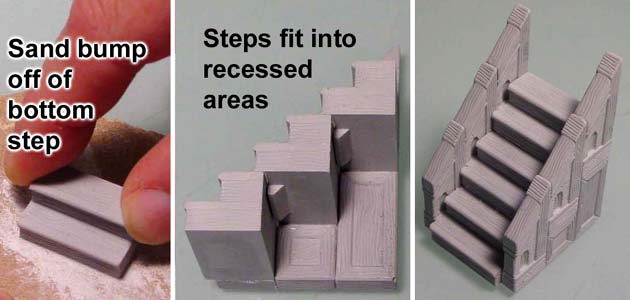
| 7. | Sand the bump off of the bottom step, then glue 3 step pieces onto the rails. Since the panel pieces below are thicker, this will give you a slight shelf to set the step pieces onto. Glue the other rail onto the steps. |
 |
|---|
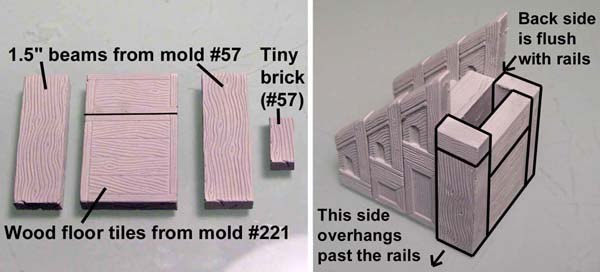
| 8. | Gather the pieces shown in the photo and glue them onto the back of the stairs. This piece will be wider than the stairs. Make sure the left side of the stairway is flush and the right side overhangs as shown in the photo. |
 |
|---|
| 9. | Next we will want to fit the circular steps onto the straight stairs. However, you will notice that the circular steps will be too wide to fit properly. To fix this, you will need to trim down the inside of the bottom step slightly in order to get it to fit between the rails. |
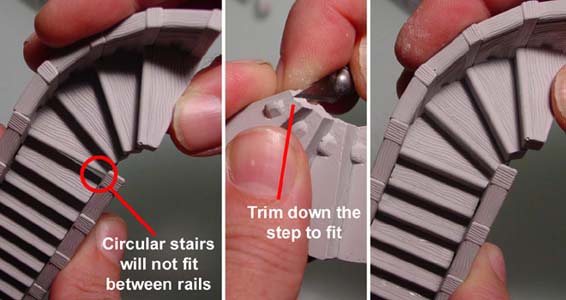 |
|---|
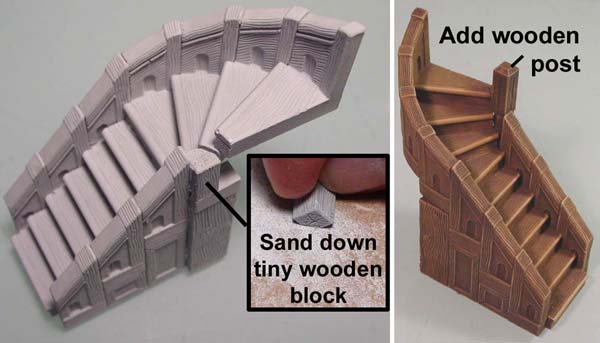
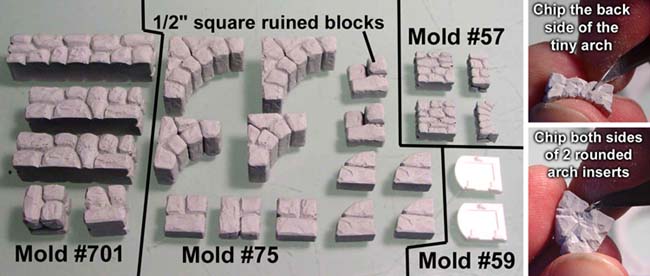
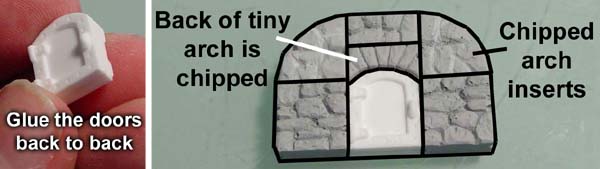
| 10. | After gluing on the circular steps, you will notice there is a gap in the center that needs filling. Sand down one side corner of a tiny wooden block to fill this space. Finally, add a wooden post on top of this tiny block to finish the stairway. |
 |
|---|
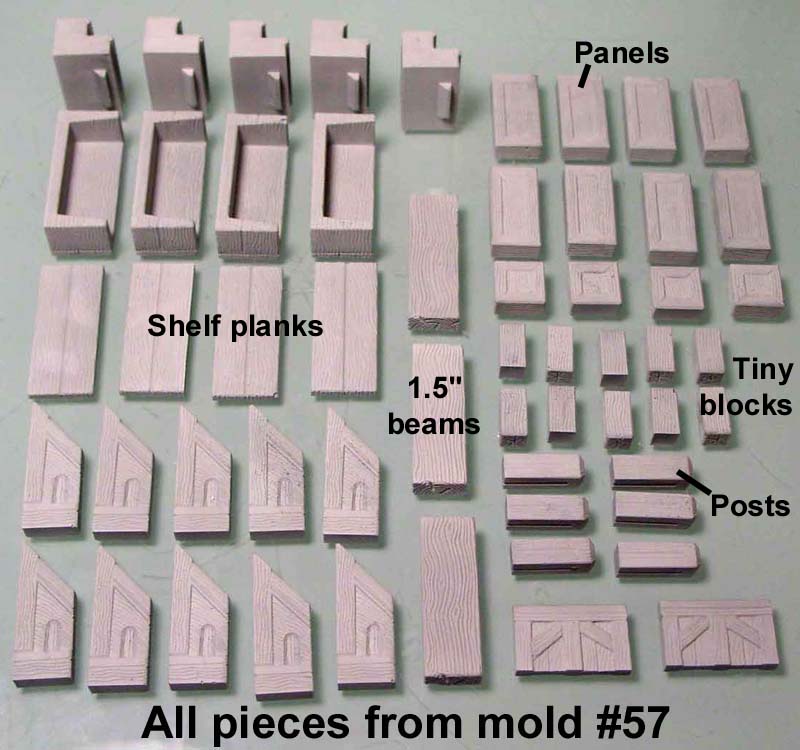
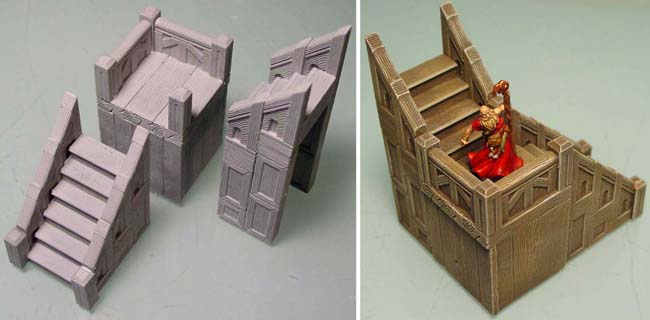
| 11. | Stairs with a PlatformCollect the pieces shown. All of these pieces are from mold #57. Glue the bottom of the stairway following instructions from step 6 and 7 above. Add the two front posts to the steps. |
 |
 |
|---|
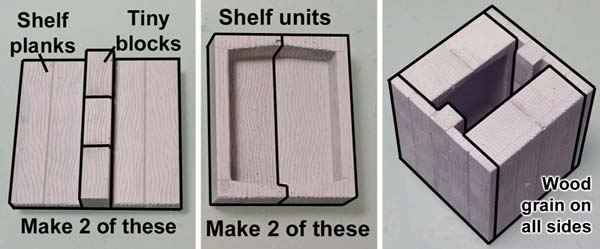
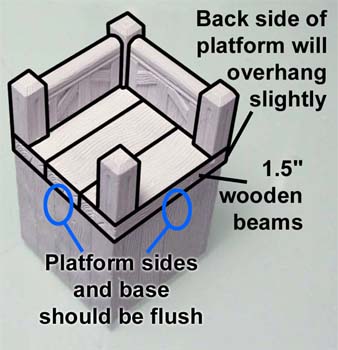
| 12. | The center platform base is made by gluing 2 each of the pieces shown. Be sure to let them dry completely or they will fall apart. Glue them together to make the square base. Be sure there is wood grain around all sides of the base. |
 |
|---|
| 13. | Glue together three 1.5" beams to make the platform top. When gluing this, you will probably notice that the platform is slightly larger than the base we have made. You want the platform to be flush on the 2 sides that the stair sections will rest against. The platform will overhang off the back sides slightly. Finally, glue the railings on top. The railings will be glued onto the sides of the platform that overhang. |
 |
|---|
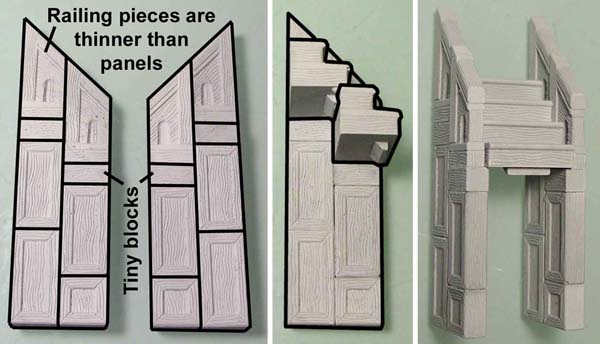
| 14. | The upper steps are made by gluing together the long rail pieces. Notice that I have used tiny wooden blocks to raise the panels up by 1/4". Be sure the rails sides are completely dry before gluing the 2 steps on. Then glue the other side of the rail on. |
 |
|---|
| 15. | Here are the 3 sections to make the stairway. Painting instructions are further down below. |
 |
|---|
| 16. | Wall EndsThis first wall end is the front door to the inn. The door you see is actually 2 doors glued back to back and the window has been cut out of it. Click on the photo to see a larger view with many of the pieces labeled. |
 |
|---|
| 17. |  |
|---|
| 18. |  |
|---|
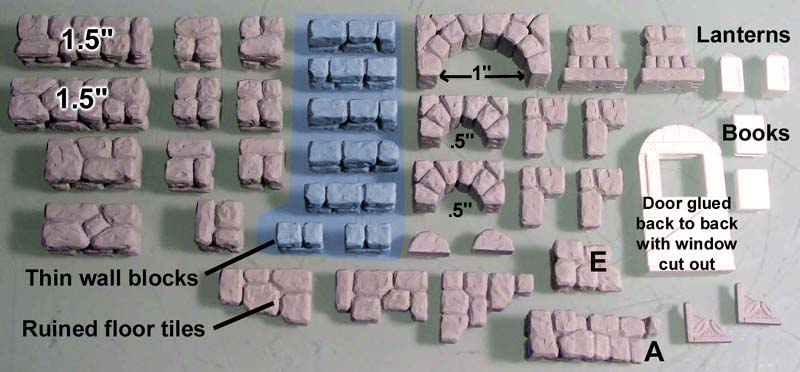
| 19. | On the main door above, be sure to paint all the pieces before you glue them together. The lanterns and books are found on mold #59. The decoration on the door (made from 2 bracket pieces) is found on mold #57. The round topped door is on mold #58. For the section on the right, the blocks shown in blue are thin wall blocks. |
 |
|---|
| 20. |  |
|---|
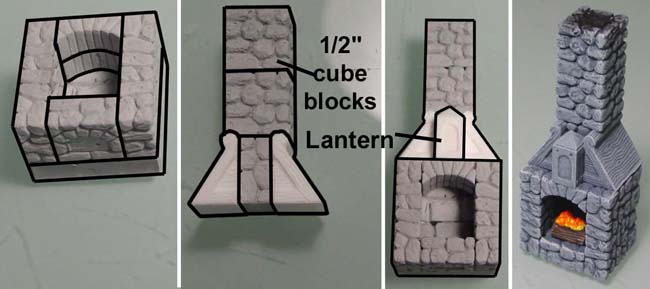
| 21. | Fire PlacesGather the pieces from the molds. Glue 2 thin wall pieces together to form the back of the fireplace. |
 |
|---|
| 22. | Glue the tiny fieldstone blocks on top to form the fireplace opening. The chimney is 2 cube blocks on top of a half cube with book supports on each side. |
 |
|---|
| 23. | 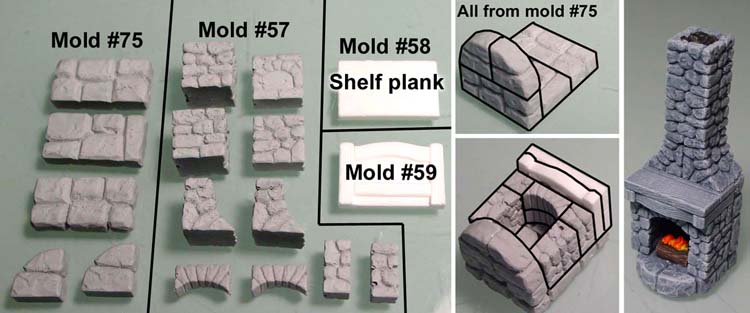 |
|---|
| 24. | 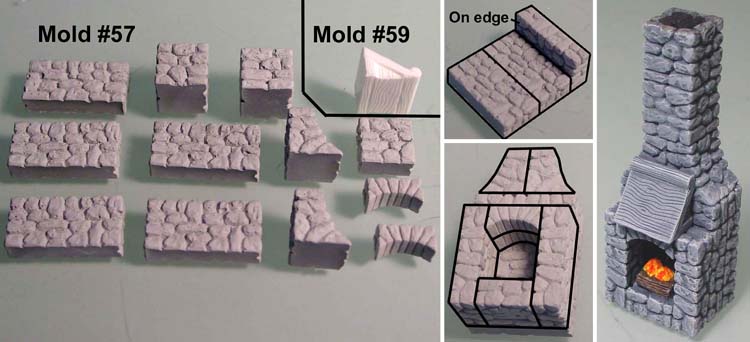 |
|---|
| 25. | Kitchen OvensGather the pieces from the molds. The small bowl from #59 is used as a spacer for the iron door. |
 |
|---|
| 26. |  |
|---|
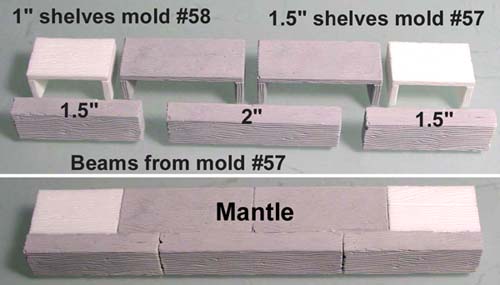
| 27. | Large FireplaceThis large fireplace is made in several smaller steps. The first shown here is the mantle. It is made from shelf sections and beams. Making the large mantle in this manner gives you wood texture on all sides (except for the bottom, which you will never see). |
 |
|---|
| 28. | 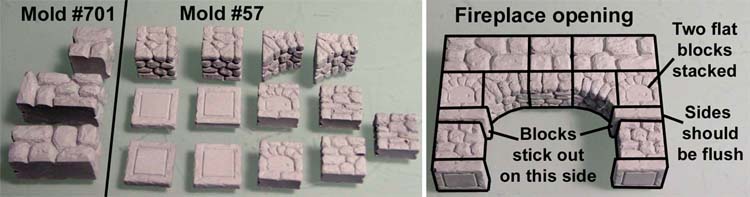 |
|---|
| 29. | These pieces are used for the main legs of the fireplace. These will be glued on either side of the fireplace opening. |
 |
|---|
| 30. | 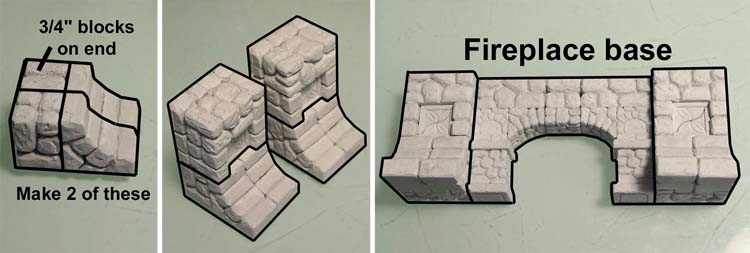 |
|---|
| 31. | These pieces are used for the top of the fireplace. You will need to chip the back side of the tiny arch as well as both sides of 2 of the rounded arch inserts. |
 |
|---|
| 32. | Glue 2 small doors back to back. This group uses blocks from mold #57, the chipped inserts plus the door. |
 |
|---|
| 33. | 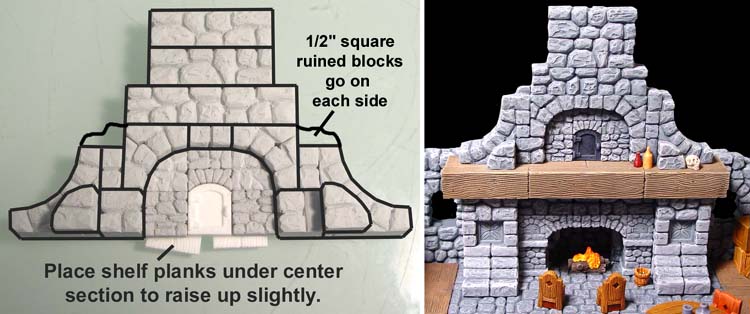 |
|---|
Painting and Finished Photos
| 1. | For the walls I used the Castle Gray Painting Instructions. All of the wall sections were painted separately before gluing anything together. For the floors I used the Earth Tone Painting Instructions but I only used the two darkest colors. This will make the floor darker than the other wood so your furniture will stand out more. |
 |
|---|
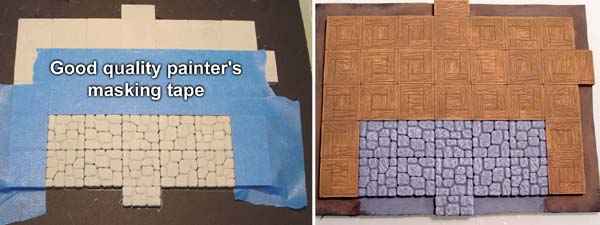
| 2. | Two of the rooms have stone floor sections next to wooden floors. To do this, get some good quality painter's masking tape to tape off each area for painting. |
 |
|---|
| 3. | For the main wooden objects that form part of the building, I used the Earth Tone Painting Instructions. However, I used all 3 earth colors so they would stand out better. Wood items that used all 3 colors are things such as stairs, balconies, railings, shelves, booth dividers and window frames. |
 |
|---|
| 4. | You will need to sand the window inserts to loosely fit into the window frames. Paint one side yellow and the other side blue. If you are inside looking out, you will see blue sky. If you are outside looking in, you will the yellow glow of lamps. |
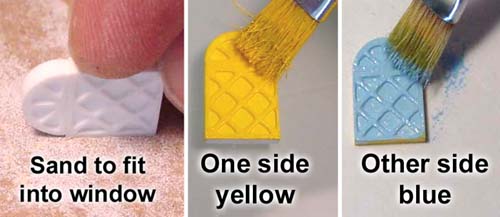 |
|---|
| 5. | When dry, use a stiff brush and gently paint the bars black. Looking back, I should have used a foam brush instead and it would have been easier. Use at toothpick to apply glue around the window frame before inserting the windows. |
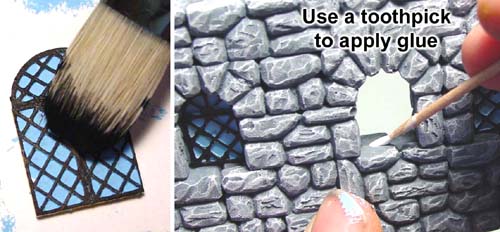 |
|---|
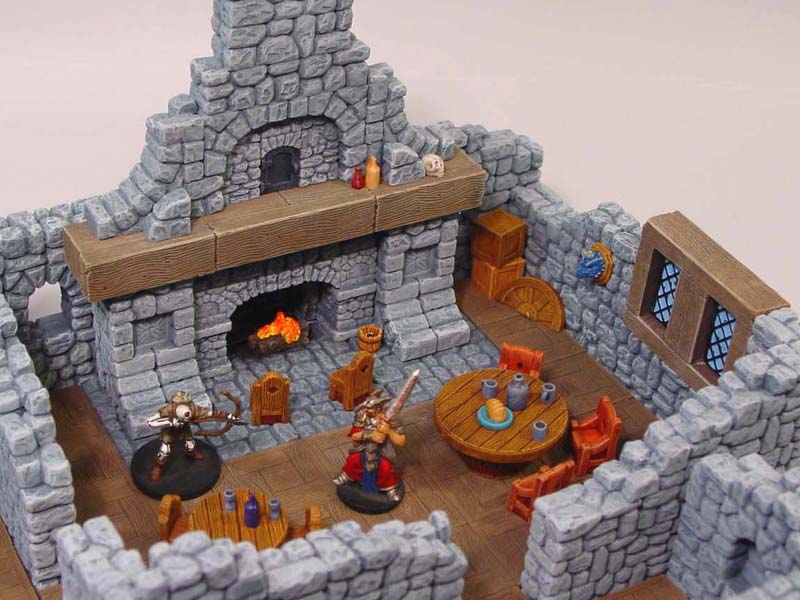
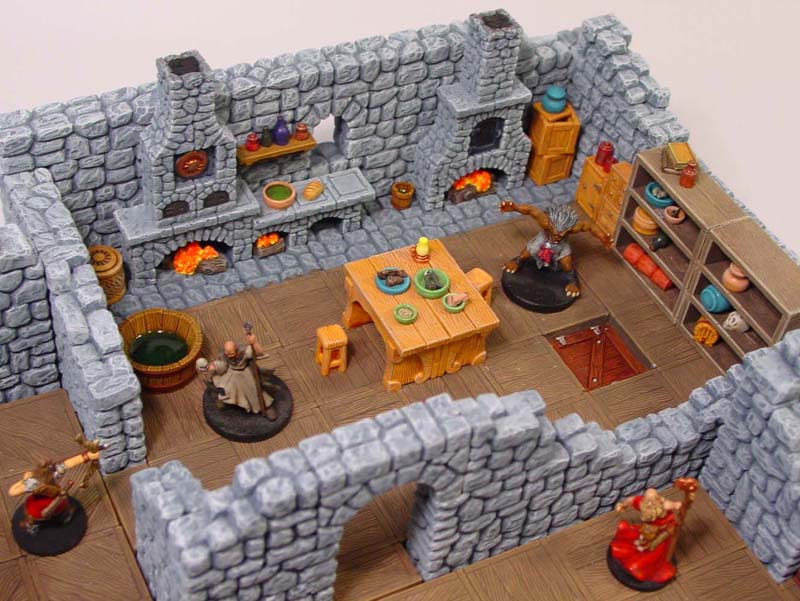
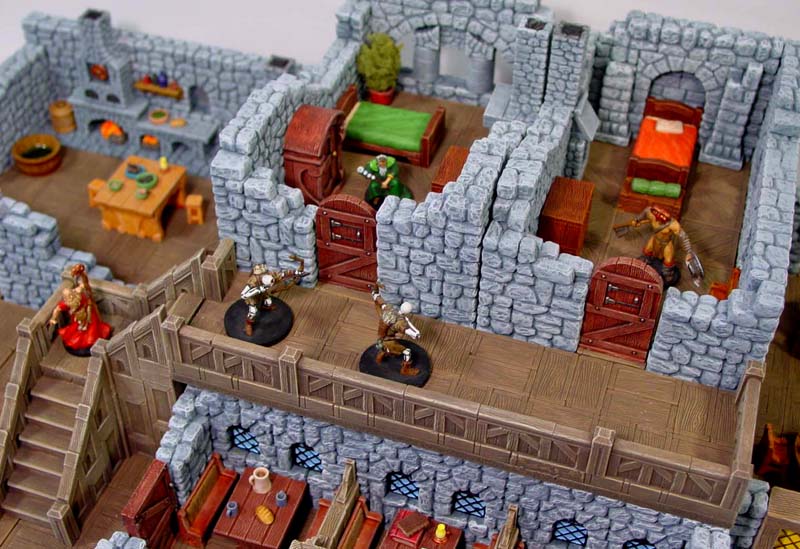
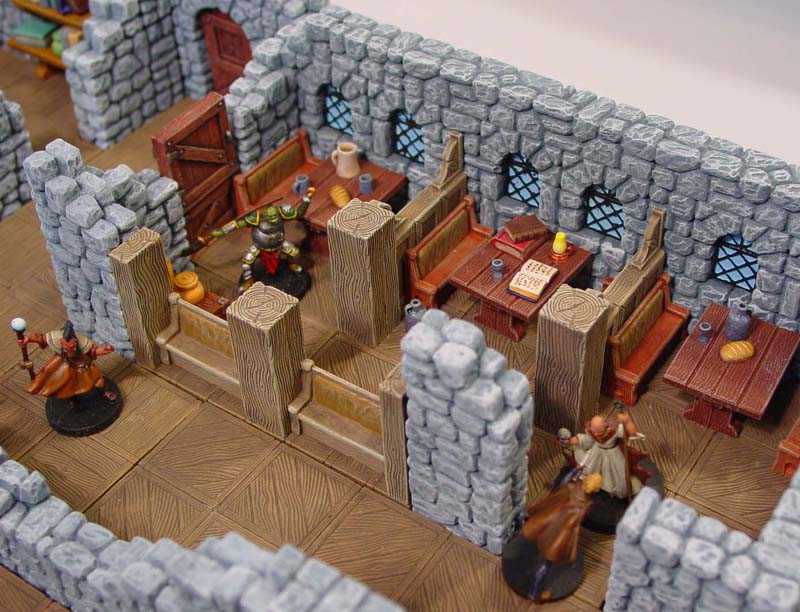
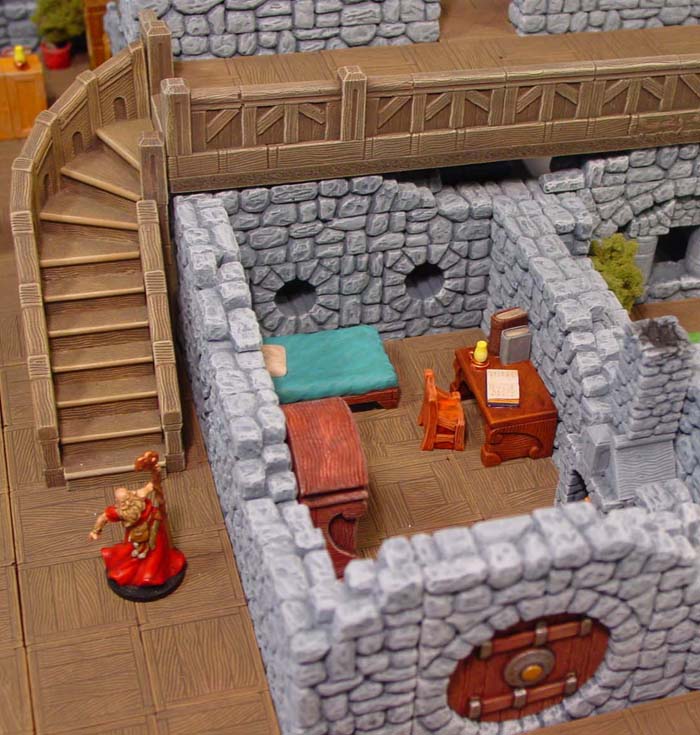
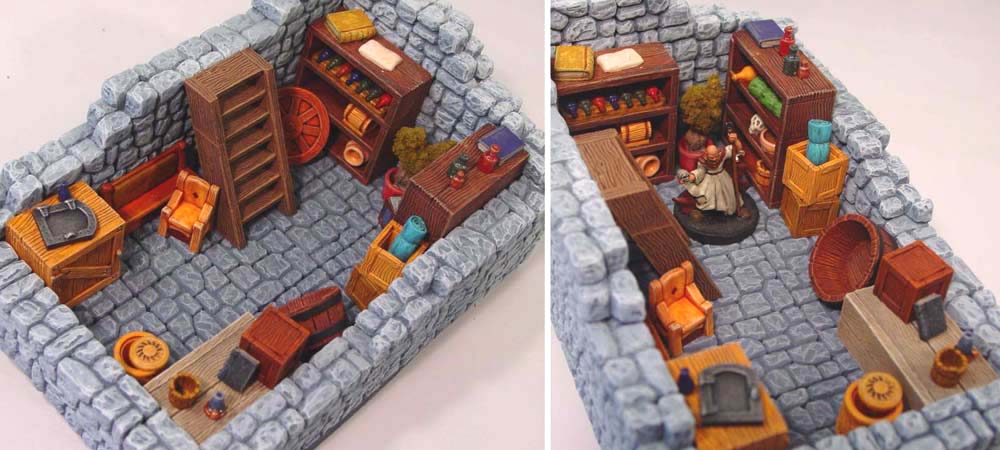
Here are a few photos of the finished inn layout. Click on a photo to see a larger version of it. You may notice that I did not include any painting instructions for all of the accessories. There is no way I could tell you every paint color I used so the best I can do is post these photos of the finished rooms. You will have to decide what colors to use on your own.
Directions on how to use the inn accessories can be found on our Tips and Tricks 29 page. The miniature figures shown below are from the Descent board game produced by Fantasy Flight Games.
 |
 |
 |
 |
 |
 |