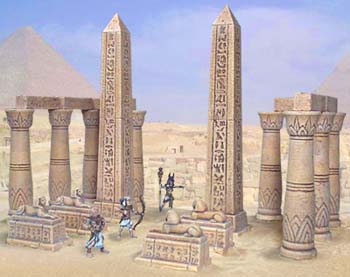
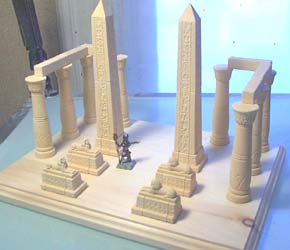
Temple Entrance
|
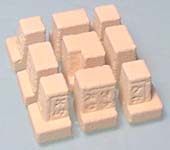
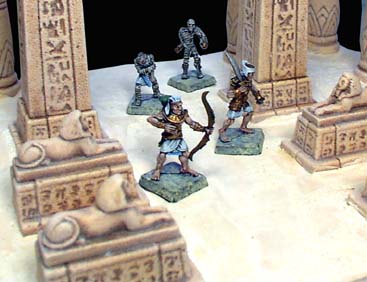
The temple entrance is made using mold #98. This mold includes all the pieces shown here including the obelisks, columns, 2" long solid blocks, sphinx lions and decorative base pieces. The obelisks are almost 8" tall. You will need to cast mold #98 eight times to build the entrance shown here. The Egyptian miniatures shown here are from www.crocodilegames.com. These miniatures were painted by Robert Sparenberg (aka Imahilus). |
|
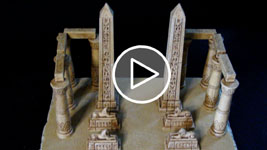
The Finished Temple Entrance This video shows what the entrance will look like which may help you to decide if you want to attempt this project. |
 |
Building the Temple Entrance
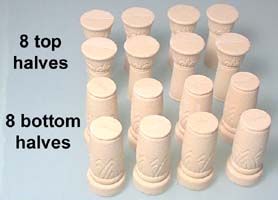
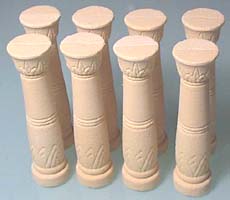
| 1. | Start by gluing together the bottom halves and the top halves of the columns. Then glue the tops and bottoms together to make 8 complete columns. |
 |
 |
|---|
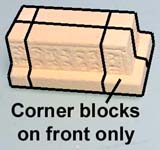
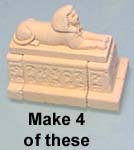
| 2. | Next will be the sphinx statues. Glue the base pieces together as shown. Notice that corner blocks are only used on the front. The back is made from thinner base blocks. You will need to cast extra corner blocks if you want them on the front and back. Afterward, glue the sphinx statue on top. Make 4 of these. |
 |
 |
|---|
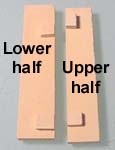
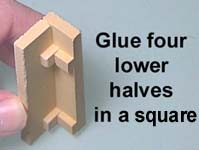
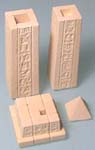
| 3. | The obelisk is made with the large slab pieces. You will have a larger lower half and a smaller upper half. Glue four lower halves together in a square to make the lower half of the obelisk. Glue four upper halves together as well. |
 |
 |
|---|
| 4. |
Make the obelisk base by gluing together the base blocks shown. The last photo shows all the pieces used to make the obelisk. |
 |
 |
|---|
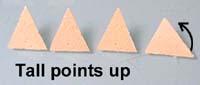 Glue four points together in a circle. Make sure the tall points are pointing up. I've tilted the last one so you can see the difference.
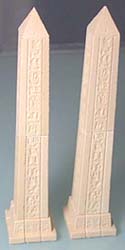
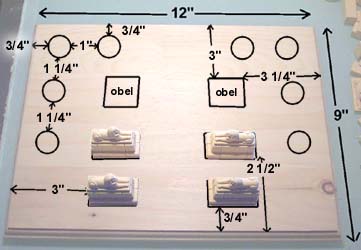
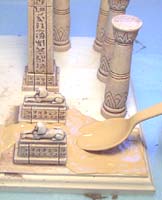
| 5. | The finished obelisks are shown here. I purchased this 9 x 12 plaque from Wal-Mart for $3.92 in the craft department, which I'm going to mount the pieces on. Place the pieces down until you are happy with the placement. I have exact measurements of my pieces below in case you want to use my layout. |
 |
 |
|---|
| 5. | Once you have decided on the layout of the pieces, trace around them using a pencil. Remove all of the items, but glue down the sphinx statues. This will make them much easier to paint. The measurements I used are shown on the second photo. |
 |
 |
|---|
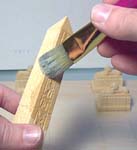
| 6. | I painted these pieces using the Antiquing method shown on the painting instructions page. Since I used tan colored plaster, I'm going to seal the pieces with clear varnish. Be sure to give the board a coat of varnish as well. It will help us later on. Then I used gel stain to antique these pieces. Finally, glue the pieces down to the board, except for the 2" long blocks across the top. |
 |
 |
|---|
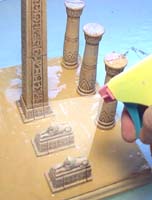
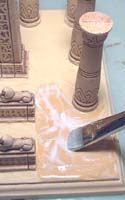
| 7. | I'm finishing the board using the method from the Tips & Tricks 8 page. This shows how you pour wet plaster on the board to give the ground an uneven texture. Be sure to either coat the board with varnish or spray it with water so the plaster doesn't dry immediately when it hits the board. If the texture is too lumpy, you can spray water onto it and tap the board from underneath to spread the plaster more evenly. Great care must be taken to not drip plaster all over the columns. |
 |
 |
|---|
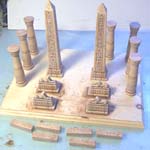
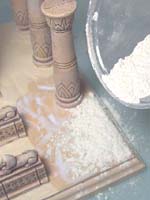
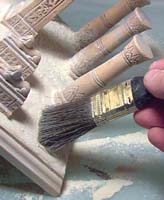
| 8. | When dry, you can add sand texture by coating it with thin glue (Elmer's white glue with a little water). I'm using tan plaster to sprinkle, but it ended up being fairly messy in the end. Let it dry completely then brush off the excess (do it outside so your house won't be covered in dust). |
 |
 |
 |
|---|
The Egyptian miniatures shown here are from www.crocodilegames.com. They have a wonderful selection of Egyptian miniature figures, creatures and accessories. These miniatures were painted by Robert Sparenberg (aka Imahilus). | |
 |
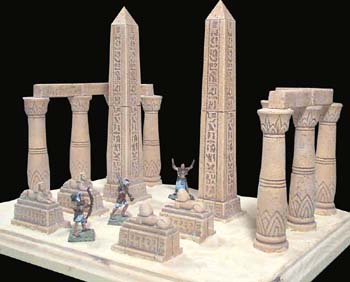 |
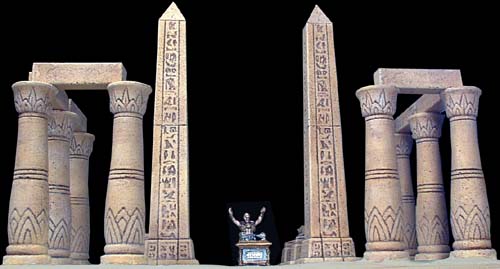 Here are some finished photos. These pieces can be used to enhance the other Egyptian mold projects and help you to build a complete city.