The Egyptian Temple
|
How to use Mold #94
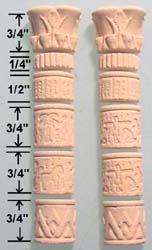
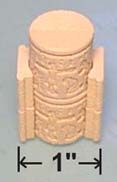
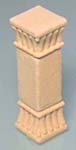
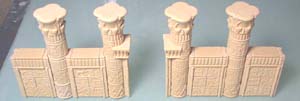
| 1. | The Egyptian Temple mold has half column pieces on it. You place the half pieces back-to-back to make a full round column, or glue them flat against a wall. The height of each column piece varies from 3/4" to 1/4" so you can make columns any height you like. |
 |
 |
 |
|---|
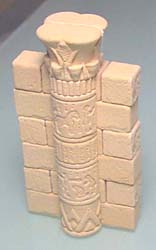
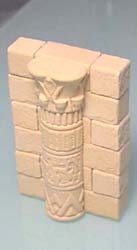
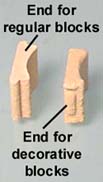
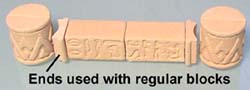
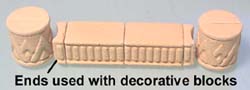
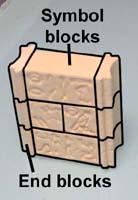
| 2. | The end blocks are used to tie round columns into straight walls. There are two kinds of end blocks shown in the photos. Once end blocks are put on each side of a column, the width becomes 1" across. This makes it easier to plan buildings in even measurements. |
 |
 |
|
|---|
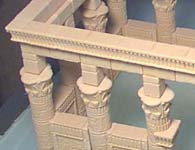
| 3. | If you're not concerned with putting on a roof, then you can arrange the columns and walls in all sorts of different shapes. However, if you want to add the roof, then you'll need to keep the walls in 90 degree angles to each other. |
 |
 |
|---|
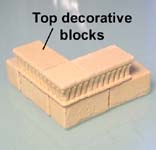
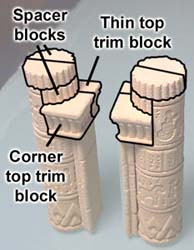
| 4. | The top decorative trim blocks are used to add a roof. These are placed on top of the regular sand blasted wall blocks to finish the top. You can also use these for the bases and caps of square pillars. |
 |
 |
 |
|---|
Egyptian Temple Building Instructions
This Egyptian temple is made using mold #94. You will need to cast this mold 17 times to have enough blocks to build the temple. There are no printable building plans for this model. Instead, print out this instruction page which shows the placement of each block.
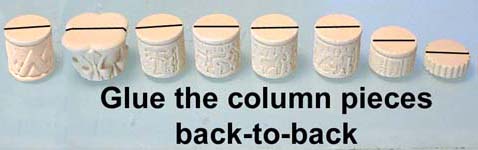
| 1. | Start by sorting out the column pieces. You'll notice that the larger pieces have a picture on them. Glue the same picture blocks back-to-back and make 16 full column blocks for each picture. Also glue 16 each of bases, tops, and spacers. |
 |
|---|
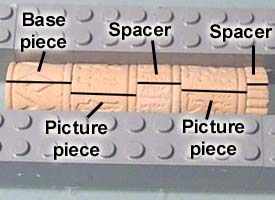
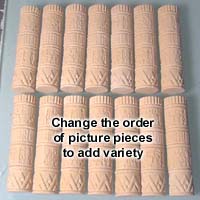
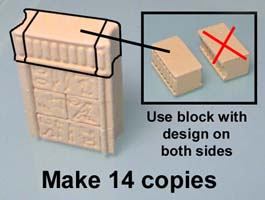
| 2. | Build 14 columns by gluing the pieces shown. I placed the column pieces between Lego blocks to help keep them straight when glued. Notice that I have the seams on the same side of the column. These seams will be placed where they're harder to see when assembling the temple. |
 |
 |
|---|
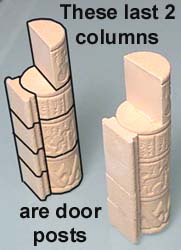
| 3. | The remaining two columns are built a little differently. These will end up being the door posts to the temple. |
 |
 |
 |
|---|
| 4. | The connecting walls use the blocks with hieroglyphs on them. When I made these walls, I tried to vary the block designs so there wouldn't be a repeating pattern. The top decoration blocks are the ones with designs on both sides of the block. If you want to be sure the rounded part of the end blocks are straight on each end of the wall, you can use a 3/4" dowel rod as a guide. |
 |
 |
|---|
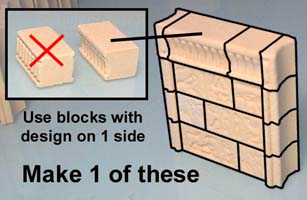
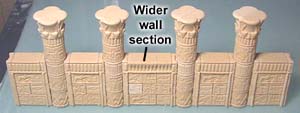
| 5. | You will need 1 connecting wall that is wider than the rest. For the top of this wall, you will use the decorative top pieces that have a design on one side. The reason you have to use them here is because there are no 1/2" long blocks with a design on both sides. However, I guess you could sand a block down to 1/2" long, so that this wall segment would match the others if you wanted to. This way is just easier to build. |
 |
|---|
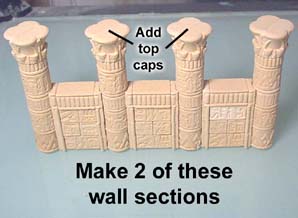
| 6. | Assemble the wall sections. You will need 2 of the smaller sections. Add the top caps as shown. I chose to face them diagonally. |
 |
|
|---|
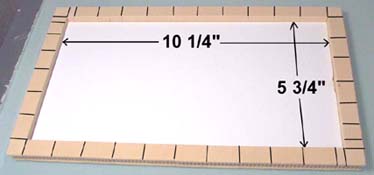
| 7. | Cut a piece of cardboard or foam core board the size shown. Glue the top decorative edge blocks around it. If you want your temple to have no roof, then simply glue the ring of blocks together without the cardboard. |
 |
 |
|---|
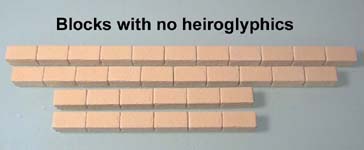
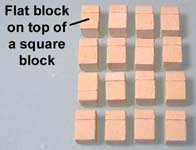
| 8. | Glue the rows of blocks shown out of plain blocks. Also make 16 blocks by gluing a flat block onto a square block. |
 |
 |
|---|
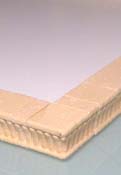
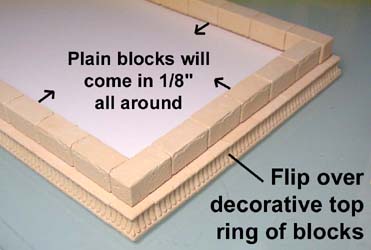
| 9. | Turn over the decorative ring of blocks and we will add the smooth rows of blocks to the under side. The ring of plain blocks will come in 1/8" all the way around. This will make the decorative blocks stick out slightly, and make the temple roof look a little better. |
 |
|---|
| 10. | Now glue the small blocks on top of the plain ring of blocks using the spacing shown. At this point, all of the temple pieces are built and you need to paint them before gluing the temple together. |
 |
|---|
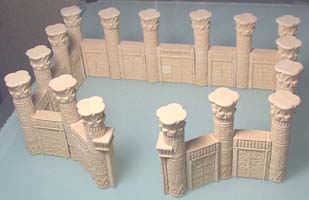
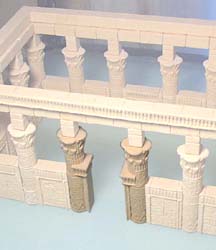
| 11. | This is how the pieces assemble. Do not glue them together until after the model is painted. It's your choice whether to include the roof slab or not. |
 |
 |
|---|
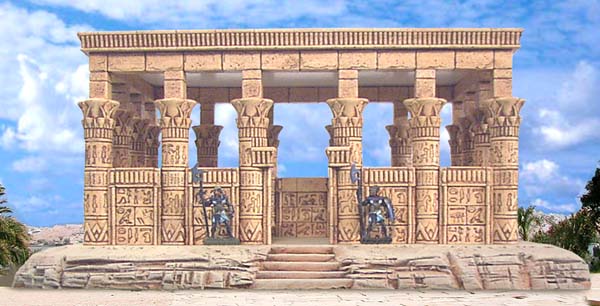
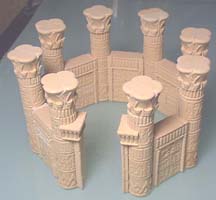
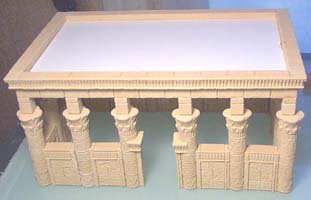
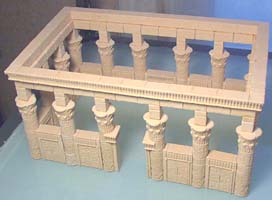
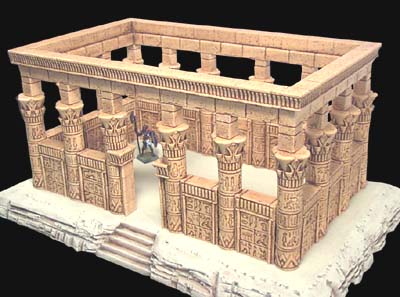
Here is a finished photo of the Egyptian Temple. This is what the temple looks like without the roof slab. For instructions on painting this model, refer to the Antiquing method shown on the painting instructions page. Instructions for making the sand textured base are found on the Tips & Tricks 16 page. |
 |