Basic Dungeon Pieces
For this set, you will need to cast the #260 Flagstone mold 21 times, and the #70 Fieldstone mold 18 times. The casting will take the average person about 1 full day, and the pieces can be glued together in about two hours! After you complete these, feel free to make your own custom pieces any size you want. The beauty of casting pieces is that you can always make more and build whatever you want. Once you get the hang of it, check out the Detailed Dungeon Pieces page for more ideas. |
 |
Building Tips
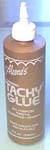
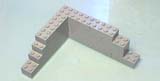
| 1. | You'll need a few things to start out with. Gather up a few cereal boxes to glue your dungeon pieces on. These will help hold the floor together and give you a solid foundation. You'll also need some glue. My favorite choice is "Aleene's Tacky Glue". It's a water based craft glue that's really thick. You can find it at most craft stores or at any Wal-Mart. Lastly, you might want a guide to help get your corners straight. I built a simple "L" shape using Legos. When you set your blocks against this guide, they will line up straight. You can also build forms by looking at the Tips & Tricks Page. |
 |
 |
|---|---|---|---|
 | |||
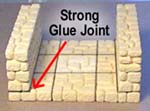
| 2. | All of these pieces are made with the walls setting on top of the floor tiles. I've done it this way for 2 reasons:
Second, you get a much stronger joint when you glue the wall blocks down on the flat floor tiles. |
 |
|---|---|---|
 |
 First, you'll end up with one full square in the center of the hallway pieces. This will allow you to move figures with larger bases in even 1" squares and be able to see exactly which square they occupy.
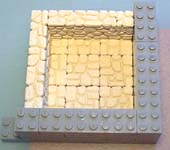
| 3. | Start by gluing your floor tiles down to a piece of cereal box. Use the Lego "L" shape to get them straight. Be sure to apply glue to the edges of the blocks also. This will make the floor nice and strong. If the floor section warps a little from the wet glue, lay a heavy book on top until it dries. |
 |
 |
|---|
| 4. | Also use the corner guide to line the walls up straight while gluing. Be sure to use the guide on all sides of the piece. Remember, other sections will have to butt up flat against this one. |
 |
 |
|---|
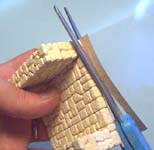
| 5. | When the piece is dry, take a pair of scissors and trim off the excess cereal box around the outside. The next section shows you how to build each of the pieces for the basic dungeon set. |
 |
|---|
Basic Set Pieces
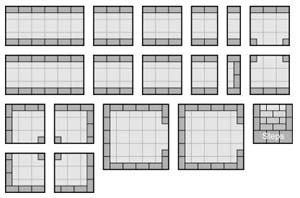
| 1. | The basic set will consist of the pieces shown here. To build these pieces, you will need to cast the #260 Flagstone mold 21 times, and the #70 Fieldstone mold 18 times. You don't have to use the exact block arrangement that I show to make the sections, but you may have to cast the mold a few more times if you don't. |
 |
|---|
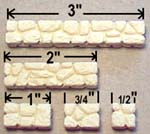
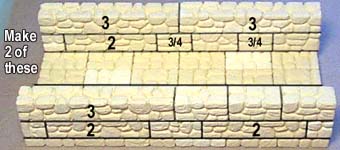
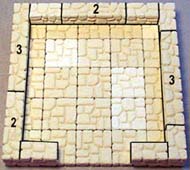
| 2. | When looking at the building instructions below, keep in mind the sizes of the blocks on the fieldstone mold. I will place numbers on the 3", 2", and 3/4" blocks so you can easily identify them. I think you can figure out which ones are the 1" and 1/2" blocks without them being labeled. |
 |
|---|
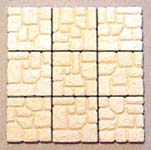
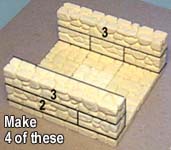
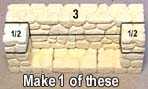
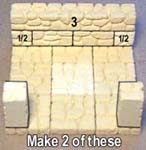
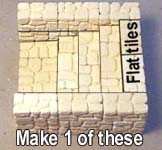
| 3. | The first piece to make is the 3" hallway section. Start by gluing down a grid of 3 x 3 floor tiles. Next glue the wall pieces directly onto the floor. Be sure to use a guide to get the walls nice and straight. Make 4 of these sections |
 |
 |
|---|
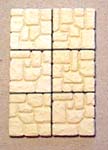
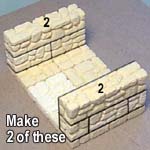
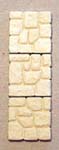
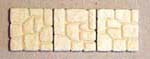
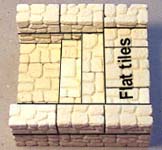
| 4. | The next photo is a 2" hallway. Make 2 of these sections Following that is a 1" hallway. Make 1 of these sections |
 |
 |
 |
 |
|---|
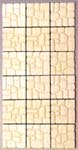
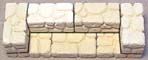
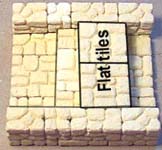
| 5. | For this 6" hallway section lay out a grid that's 3 x 6. Make 2 copies of this piece. |
 |
 |
|---|
| 6. | Here's the dead end section. Make 1 copy of this piece. |
 |
 |
 |
|---|
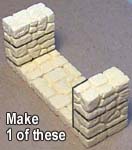
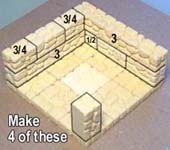
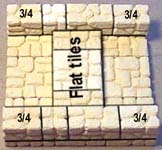
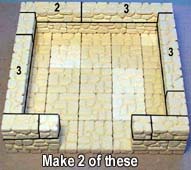
| 7. | These sections both use a 3 x 3 grid for the base. First is the corner section. Make 4 of the corner pieces. Next is the tee section. Make 2 of the tee pieces. |
|
 |
 |
|---|
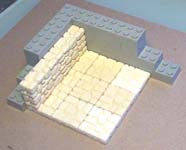
| 8. | This step section starts with a 3 x 3 floor grid. It's used for the entrance to the dungeon. Make 1 of these. | |||
|---|---|---|---|---|
 |
 |
 |
 | |
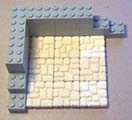
| 9. | The last piece starts with a 5 x 5 grid of floor tiles. Make 2 of these rooms. Feel free to make any additional pieces you want. You can also leave floor tiles out to make pits, or leave a tile loose (don't glue it down) to make a secret passage below the floor. That completes all of the pieces for the basic set. |
 |
 |
|---|
Painting Instructions
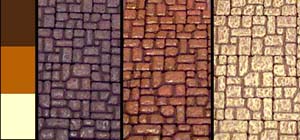
| 1. | I paint the dungeon walls in 3 steps. A dark brown, a medium reddish brown and then a light cream color. For instructions on mixing these colors exactly, please visit our Painting Instructions page. I list the formulas there and can also send you color samples so any place that sells paint can mix up the exact colors. |
 |
|---|
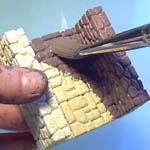
| 2. | The first color is a dark brown. Mix it as thin as milk and slop it on with a 1" wide brush. Be sure it runs into all the cracks (and there's a lot of them with these blocks). Since you might be building additional sections later on, I suggest buying a quart of house paint. Satin or Semi-gloss works the best (gloss paint looks strange on a building and flat paint isn't as durable). |
 |
 |
|---|
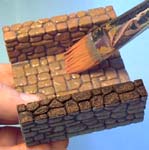
| 3. | The second color is about the color of pumpkin pie. It gives a good red undertone (similar to Arkansas river rock). I also suggest buying a quart of house paint for this. Don't thin the paint! Dip the brush in the paint, wipe a good amount off on a rag and brush over the surface using a medium heavy pressure. The brush won't reach into the deep cracks which will remain dark brown. |
|
 |
|---|
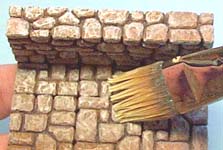
| 4. | The last color is a cream color. Since it takes very little paint for this last color, buy a small bottle of acrylic craft paint for this. Dip your brush into the paint, then wipe most of it off on a paper towel, then lightly brush over the stone. Don't try and rush this last step! More brush strokes with very little paint in the brush looks much better than a few brush strokes with lots of paint. |
 |
 |
|---|
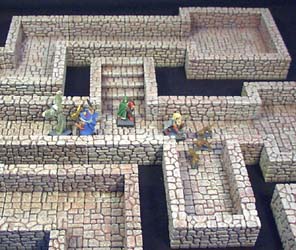
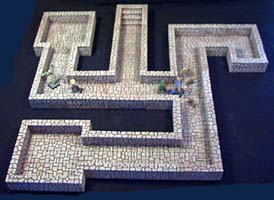
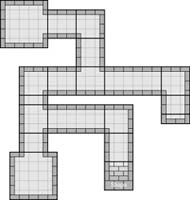
When you're finished, here are a few layouts you can make with this simple basic set. Remember, you can make as many additional pieces as you want so your dungeon can continue to grow. For more decorative pieces you can build, check out the Detailed Dungeon Pieces page.
 |
 |
 |