The Traveler's Bridge |
|
Casting Tips
For complete instructions on pouring the blocks, see the Casting Instructions Page. Below are a few tips to help you with the Traveler's Bridge mold.
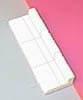
Due to requests for more ornate pieces, I've included decorative rail pieces. When casting these small ornate pieces, the following tips will help you eliminate air bubbles.
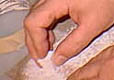
 When pouring plaster into the small pieces with sharp corners, flex the mold to stretch out the area. This will leave fewer narrow crevices to form air bubbles.
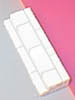
Also, tap the mold sharply with the handle of a tool often to release air bubbles. Mixing the plaster slightly thinner will also help.
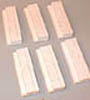
The angled rail pieces are the hardest to get the air bubbles out of. If small defects occur, don't worry; real stone buildings also have defects. Besides, when you put the whole building together you'll be so impressed with the result that you won't be able to find them anyway!
Building Instructions
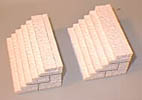
The bridge is probably the easiest model to build. You will need to fill this mold 18 times to have enough blocks to build the bridge. Also, the blocks should be completely dry before gluing them together. Placing them in front of a fan will speed the process. If they feel cool or look darker than the other blocks, they're still wet.
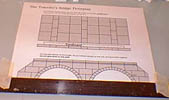
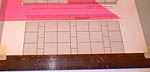
| 1. | You can download the plans shown here from the Building Plans Page and print them out yourself. Start by taping a straight edge down across the bottom of the bridge. This will give you a flat surface to set your blocks against so the bottom of the bridge will be straight. |
 |
|---|
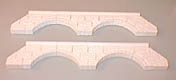
| 2. | Lay the blocks down directly on the plan to see how they fit. In the picture I am using a triangle as a straight edge to help me get the top of the bridge straight. |
 |
|---|
| 3. | The blocks should fit together exactly. Due to the casting process, you may need to sand a block occasionally to make it fit right. Glue the blocks together but do not glue them down to the paper! Make 2 copies, one for each side of the bridge. |
 |
 |
|---|
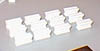
| 4. | Now we'll make the steps. Using a straight edge as a guide, glue 3 step blocks together, then 3 flat blocks, then the remaining flat blocks to form this step section. Make 6 of these step sections. |
 |
 |
 |
 |
|---|
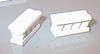
| 5. | Stack up 9 regular blocks as shown on the picture but do not glue them together! These will be used as a temporary support when we glue the step sections together. |
 |
|---|
| 6. | Now glue the step sections together but do not glue them to the support blocks. As you can see from the second picture, the support blocks will be removed from under the steps later. |
 |
 |
|---|
| 7. | For the floor of the bridge, tape a straight edge along the floorplan to line your blocks up against. Place your floor tile blocks upside-down on the floor plan. Do not glue them down to the paper! |
 |
|---|---|---|
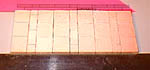 |
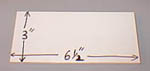
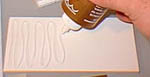
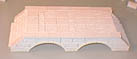
| 8. | Cut a piece of cardboard or foam board 3" wide by 6 1/2" long. Apply glue to the back of the cardboard and glue it to the floor tiles you have assembled on the sheet. The floor tiles should extend over 1/2" on the short edges. |
 |
 |
|---|---|---|---|
 | |||
| 9. | Now it's time to assemble the pieces. Place a couple blocks under each side of the steps so they'll stand up on their own. Glue the flat floor of the bridge onto the steps. Glue the 2 halves of the bridge onto the steps and center them so they're even on both sides. |
|
|---|---|---|
 |
| 10. | Now we'll put the railings on the bridge. Pick out 24 of your best straight rail pieces and glue them together back-to-back. When you finish you should have 12 complete rail sections. |
 |
 |
|---|
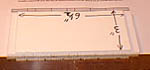
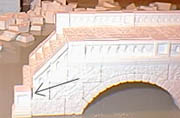
| 11. | The slanted rail sections glue back-to-back the same way. I'm sure I calculated the size of the slanted rails correctly, but when I put them together, they seemed a little short. Notice the small gap the arrow is pointing to. To remedy this, simply trim a little off the block underneath using a hobby knife. |
 |
|---|
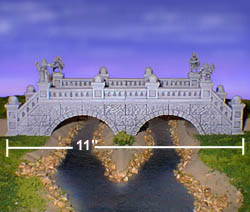
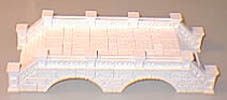
| 12. | When all of the railings and trim blocks are glued on, your finished bridge should look like this. |
 |
|---|
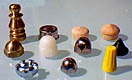
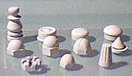
| 13. | Everyone has different ideas on how to decorate the statue stands on the bridge. For my own bridge, I went down to the local hardware store and spent a few cents on a variety of items that would work great as decoration. These include cap nuts, castle nuts, small wooden plugs, wire nuts, and anything else I could find while wandering around. When these are painted white, they fit onto the bridge quite well. I decided to use some cap nuts on my bridge. As a nice finishing touch, I will also add a few miniatures to the bridge. When they get painted the same color as the bridge, they'll look like stone statues. |
 |
|---|---|---|
 |
| 14. | The whole assembled painted bridge looks like this. If you would like to see instructions on how to create the river and terrain that this bridge sets on, check out the Tips & Tricks section. This bridge was painted in the castle gray color scheme. Please refer to the Painting Instructions page for types of paint and step by step painting instructions. |
|
|---|