Starship Basic Interiors
For this set, you will need to cast the #301 Starship Wall mold 24 times, and the #270 Starship Deck mold 30 times. I cast these pieces out of gray dental plaster, but you can use white plaster instead if you like. The casting will take the average person about 2 full days, and the pieces can be glued together in a few hours. After you complete these, feel free to make your own custom pieces any size you want. The beauty of casting pieces is that you can always make more and build whatever you want. |
 |
Building Tips
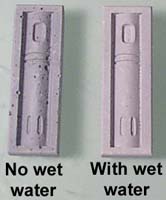
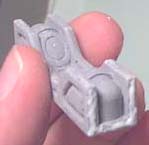
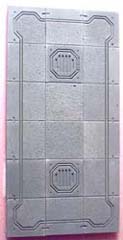
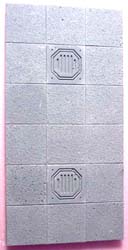
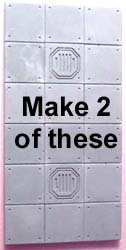
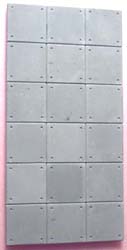
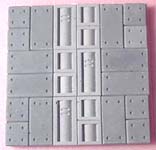
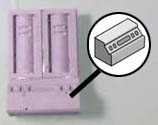
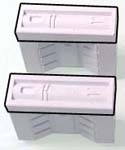
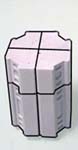
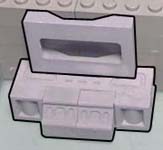
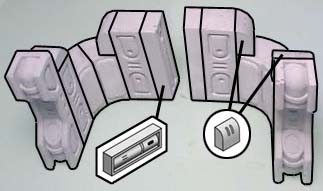
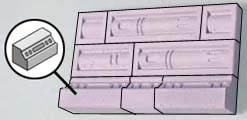
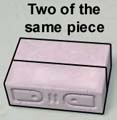
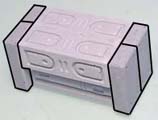
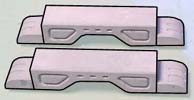
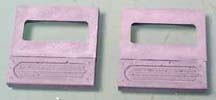
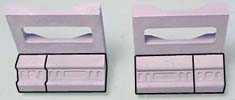
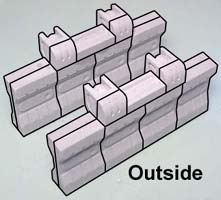
| 1. | When casting blocks, be sure to use the wet water method shown on the casting instructions page. These sci-fi blocks are very difficult to cast without air bubbles if you do not use it. The first block shown was cast without the "wet water" method and the second block is cast using "wet water". |
 |
 |
|---|
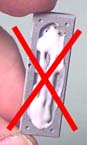
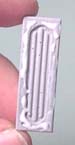
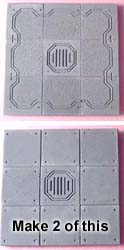
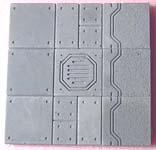
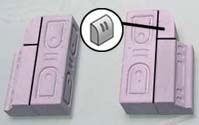
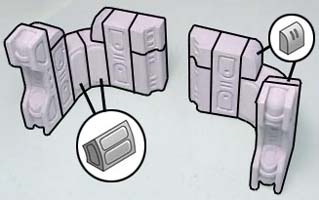
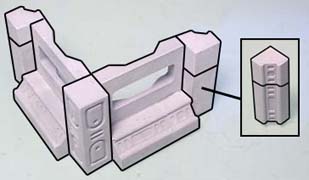
| 2. | When gluing blocks, be sure to put glue on the highest flat area you can find. In the first photo, the grill design is recessed. Putting glue there won't stick it to anything. You also want to use as little glue as possible. Use just enough to put the pieces together. Any glue squeezed out between the blocks can ruin the looks of the finished model. |
 |
 |
 |
|---|
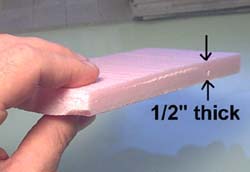
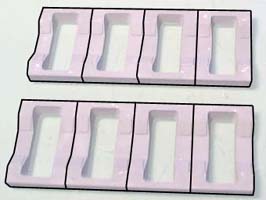
| 3. | To base these starship rooms, I'm going to mount the floor tiles on pieces of 1/2" thick polystyrene foam insulating board. This is the stuff they use for sheeting on houses before they put siding on. You can get it at most lumber yards and usually comes in pink or blue. The main advantage is that it's stiff and doesn't warp easily. It's also easy to cut (with a sharp knife), and you can make pits and holes in the floor that actually look deep. |
 |
|---|
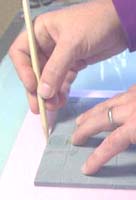
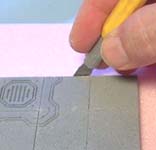
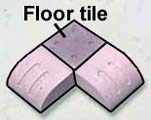
| 4. | I'm going to show a new faster way to glue down tiles. This method also helps to keep glue from squeezing out between the tiles. Lay the tiles down on the pink foam and line them up, arranging them in whatever pattern you want. Take a pencil and draw around the outside edge. This will leave a groove around the tiles. |
 |
 |
|---|
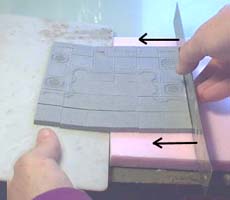
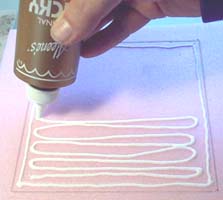
| 5. | Use a stiff board of some kind (I'm using a cutting board but cardboard will do), and slide the tiles onto the board using a ruler. When the tiles are safely out of the way, squeeze a bead of glue onto the foam. Stay inside the pencil line that you have drawn. I'm using "Aleene's Tacky Glue". |
 |
 |
|---|
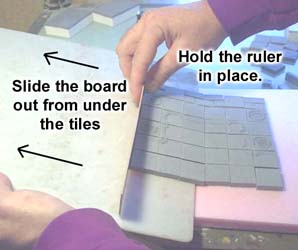
| 6. | Using a ruler, slide the tiles to the end of the board. Place the end of the board over the glued area on the pink board. Now hold the ruler in place and slide the board out from under the tiles. The board will have to be very close to the glue or the floor tiles will fall and flip over (you'll probably accidentally dip it into the glue). You might want to practice this a few times before you put the glue down. |
 |
|---|
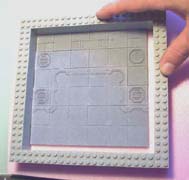
| 7. | I'm using a square wall made of Legos to help me line up the edges. By making the Legos connect into a full square, I am much more sure that the sides of my floor will be square. An "L" shaped wall of Legos can flex a little and your floor sections could be a little diamond shaped. Since all of the floor sections are going to butt together, the floor sections being slightly off-square would be more noticeable. |
 |
|---|
| 8. |
If it doesn't cut all the way through, break off the excess edge after you cut the foam and it will break fairly clean. |
 |
|---|
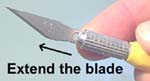 Once the glue is dry, you will want to cut off the excess foam. If you extend the blade of your hobby knife, you can cut completely through the foam in a few passes. Be sure you use a sharp blade or the foam will tear.
Basic Set Pieces
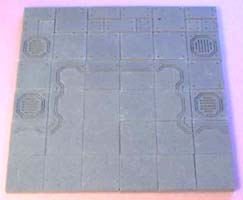
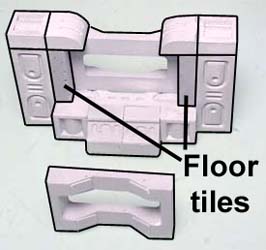
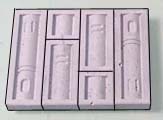
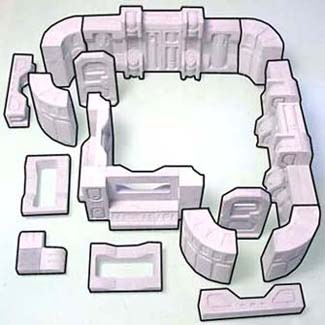
| 1. | The basic set will consist of the pieces shown here. To build these pieces, you will need to cast the #301 Starship Wall mold 24 times, and the #270 Starship Deck mold 30 times. The rooms shown on top of the floor sections are glued down to the floor. The other wall sections are separate so you can move them where you like. When making new pieces of your own design, notice that the floor sections are based on groups of 3 x 3 tiles. |
|---|---|
 |
Floor Sections
| 2. | We'll start by making the floor sections. Assemble and glue these onto foam board. |
 |
 |
 |
|---|
| 3. | 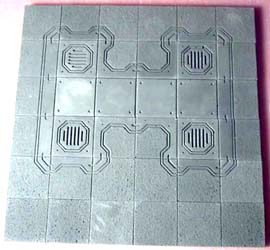 |
 |
 |
|---|
| 4. | 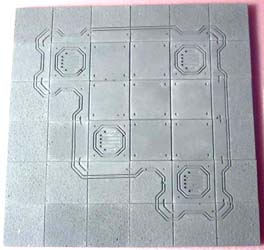 |
 |
 |
 |
|---|
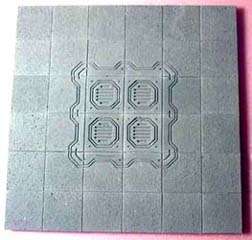
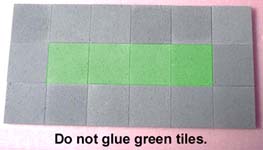
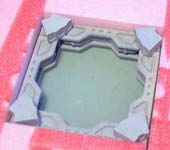
| 5. | The center photo uses blocks from mold #301. Do not glue the tiles shown in green. |
 |
 |
 |
|---|
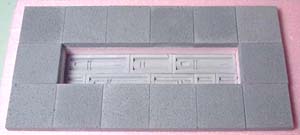
| 6. |
Remove the green tiles (shown in the photo above) and cut a hole in the center of the floor. Glue the blocks into the bottom of the hole. |
 |
|---|
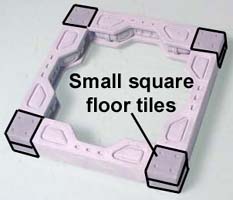
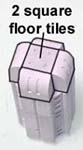
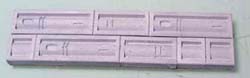 Glue these blocks together from mold
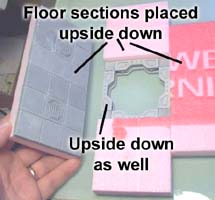
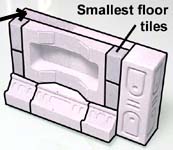
 | 7. | For the last floor section, stack and glue two small square floor tiles on each corner. Once dry, flip it upside down, and place floor sections around the outside of it (upside down as well). |
 |
 |
|---|
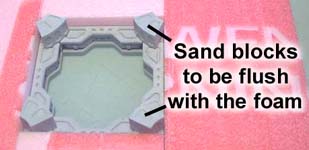
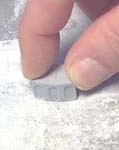
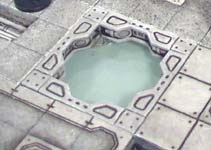
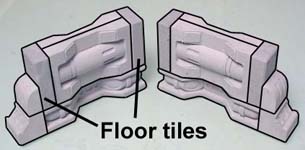
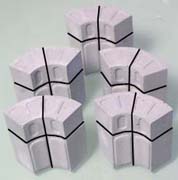
| 8. | Take four rounded corner blocks and sand them down until they set flush with the top of the foam. You may have to sand them down quite a bit. Afterwards, glue them onto the corners of the frame. |
 |
 |
|---|
| 9. | Once dry, paint this hole in the floor the same color as the rest of your floor tiles. Once you flip the piece over, it should be flush with the top of the floor tiles. |
 |
 |
|---|
Elevator
| 10. | Glue these blocks together from mold #301. |
 |
 |
 |
|---|
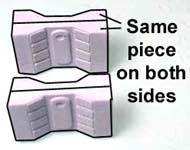
| 11. | Glue two identical panels back to back and cap them with the pieces shown. Glue two doors back to back. |
 |
 |
 |
|---|
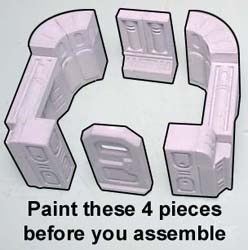
| 12. | Glue the piece shown until you have four main pieces. Be sure to paint these pieces before you glue the remainder of the room together. Otherwise you will not be able to reach the inside areas with spray paint. For painting instructions, please visit our Painting Instructions page. |
 |
 |
|---|
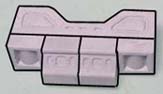
Power Nodes
| 13. | Glue these blocks together from mold #301. The bottom row of blocks are 1" long and the upper row of blocks are 1/2" long. Cap it off with a stack of two small square floor tiles and the decorative blocks around them. Make 2 of these. |
 |
 |
 |
|---|
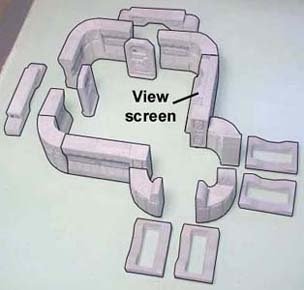
View Screen
| 14. |
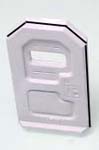
Glue the remaining blocks, but do not glue the other side of the window. Sand down one end of the window so it will fit easily after painting. To see how to insert colored plastic in the window, see our Tips & Tricks 18 page. |
 |
 |
|---|
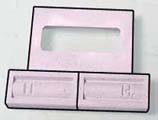 Glue a window block face down on top of the tube blocks.
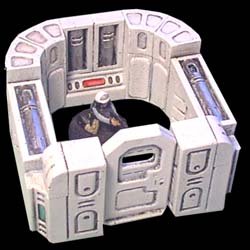
Control Room
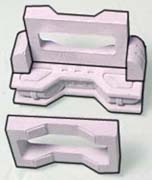
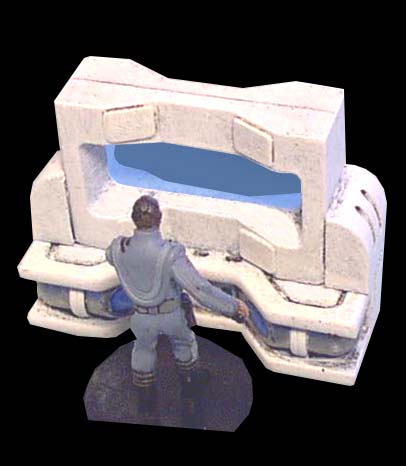
| 15. | Glue the blocks together as shown. Center the window over the blocks below. I'm putting the blocks against a wall of Legos to help keep the window straight. Place floor tiles on each side of the window and glue the remaining blocks. The other half of the window does not get put in until after the piece is painted. Sand down the sides of the other window half so it fits loosely. Otherwise the window insert will not fit in after it is painted. |
|
 |
|---|
| 16. |
Place floor tiles on each side of the pipe panels. Do not glue the walls onto the back until after the piece is painted. Sand down three sides of the window so it will fit easily after painting. To see how to insert colored plastic in the window, see our Tips & Tricks 18 page. |
 |
|---|
 Pipe panels go on both sides of these pieces.
Storage Room
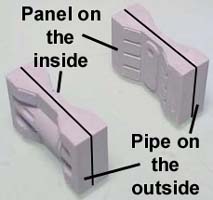
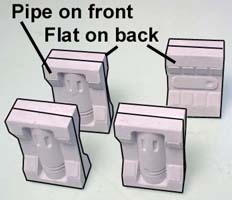
| 17. |
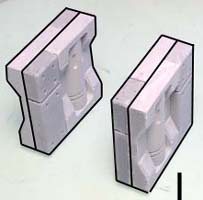
Glue four panels (pipe on the outside, flat on the inside). Glue each on top of a buttress piece, making sure the buttress faces outward on each side. |
 |
 |
|---|
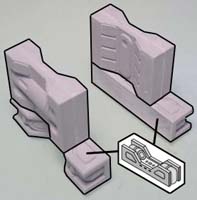
 Glue together two corners as shown.
| 18. | Add the sloped blocks onto the front. The window is not glued at this point. Paint the pieces before you glue the window onto the back of the room. |
 |
 |
|---|
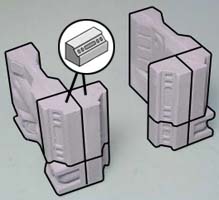
| 19. | Paint all the pieces in the above photo first. After painting, the clear plastic is inserted between the two halves of the window and then glued together. I glued the room onto the 3 x 3 floor section. You don't have to glue it onto the floor section, but the room may be too fragile to handle if you don't glue it down. To see how to insert colored plastic in the window, see our Tips & Tricks 18 page. |
 |
|---|
Cargo Room
| 20. |
Paint these pieces first before gluing them together to make a complete wall section. |
 |
|---|
 One half of the room includes the center wall shown in the first photo, and the two ends shown in the second photo. These two ends are a mirror of each other.
| 21. |
Paint these pieces first before gluing them together to make a complete wall section. |
 |
|---|
 The other half of the room includes a center wall, and the two ends shown in the second photo. These two ends are slightly different than the corners above.
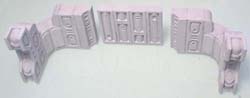
| 22. | The two wall sections look like this before painting. Do not glue them to the floor. Instead, just set them on the floor wherever you like. These walls can be used for a room, or you can use the empty floor for part of a layout instead. |
|
 |
|---|
Large Conduit
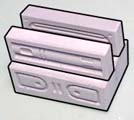
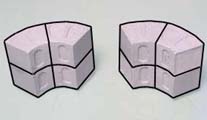
| 23. | Glue two of the same blocks flat side up. Add the long thin blocks (pipe side out) on top. Make two rounded corners as shown. |
 |
 |
 |
|---|
| 24. |
Glue the curved sections on each end and paint the whole thing afterwards. Make 2 of these whole pieces. |
 |
|---|
 Turn the piece upside down and glue four floor tiles, two on each end of the piece.
Observation Lounge
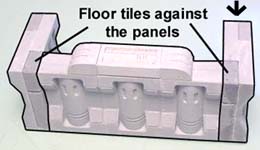
| 25. | Glue floor tiles onto the sides of these pipe panels. Notice that two of the panels are a mirror of each other. Glue two of the same type back to back. |
 |
 |
|---|
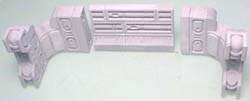
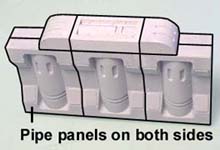
| 26. | This wall section uses pipe panels on both sides. Add the decorative caps on the top. Glue the two slabs (from the photo above) onto the ends of the wall so the floor tiles are against the wall ends. |
 |
 |
|---|
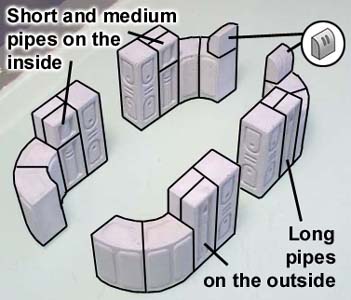
| 27. |
Glue the wall pieces using two rounded blocks on each corner. The pipe sections have one long pipe on the outside and a medium and a short pipe on the inside. |
 |
|---|
 Glue two rows of windows together as shown.
| 28. |
|
 |
 |
|---|
| 29. |
For painting instructions, please visit our Painting Instructions page. To see how to insert colored plastic in the window, see our Tips & Tricks 18 page. I have glued this room down to the floor because it would be too fragile to move otherwise. |
 |
|---|
 Paint all of the pieces shown here before you glue them together.
Testing Center
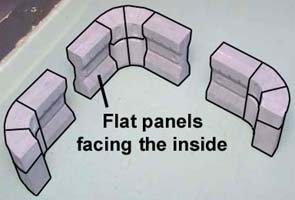
| 30. | Glue these four sets of panels with pipes on one side and flat panels on the other. Glue the corners onto these panels as shown. Be sure that the flat panels are facing inside. |
 |
 |
|---|
| 31. |
Make three 90 degree corners as shown. Add the small decorative blocks on the top ends, making sure they are flush with the flat surface of the corners. |
 |
|---|
 Glue two doorway tops. Make sure you apply glue to the edges because there is not much surface to glue to.
| 32. | Glue two flat panels together. Turn them around and glue the remaining blocks on the back. Make the additional wall piece in the last photo. |
 |
 |
 |
|---|
| 33. | The first photo below shows what large sections should be glued together before painting. For painting instructions, please visit our Painting Instructions page. To see how to insert colored plastic in the window, see our Tips & Tricks 18 page. I have glued this room down to the floor because it would be too fragile to move otherwise. | |
|---|---|---|
 |
 | |
Science Station
| 34. | Glue two windows face down on top of the long pipe pieces shown. Stand them up and add the angle pieces on the front. |
 |
 |
|---|
| 35. | Glue the windows at right angles with the long block at the corner. Glue the sloped blocks on each end. Glue five corner pieces to be used later. |
 |
 |
|---|
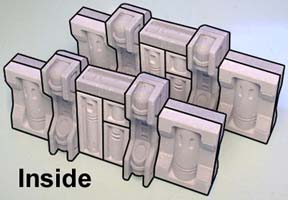
| 36. | Assemble and glue the two wall sections as shown. The first photo shows the inside of the wall and the second photo shows the outside of the wall. |
 |
 |
|---|
| 37. | Glue the top cap piece together using a small square floor tile and two of the rounded edge pieces. Glue together two complete doors also. |
 |
|
|---|
| 38. | The first photo below shows what large sections should be glued together before painting. For painting instructions, please visit our Painting Instructions page. To see how to insert colored plastic in the window, see our Tips & Tricks 18 page. I have glued this room down to the floor because it would be too fragile to move otherwise. | |
|---|---|---|
 |
 | |
Spare Pieces
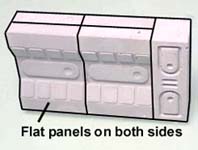
| 39. | Glue and assemble these extra wall pieces. All of the wall sections use flat panels on both sides of the wall. These extra pieces are used to close off hallway sections or put barriers between rooms. |
 |
|---|
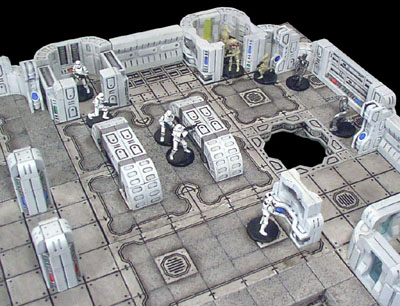
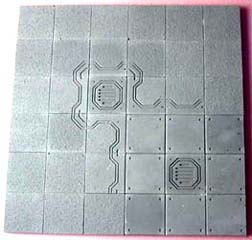
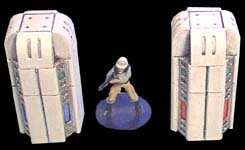
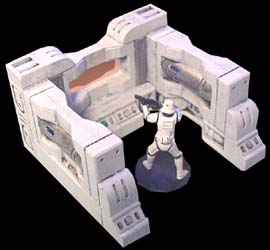
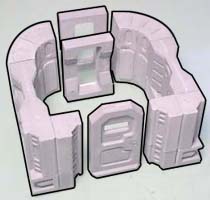
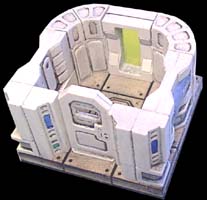
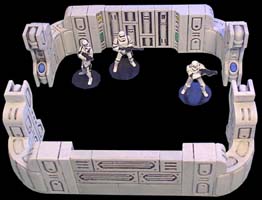
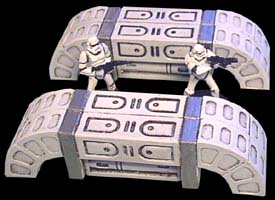
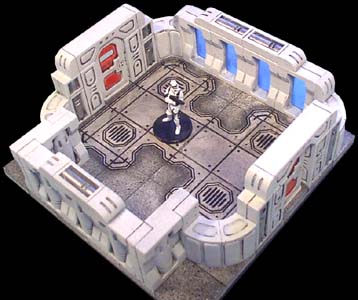
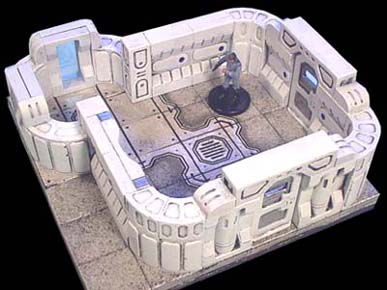
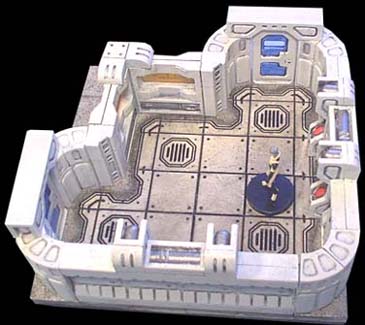
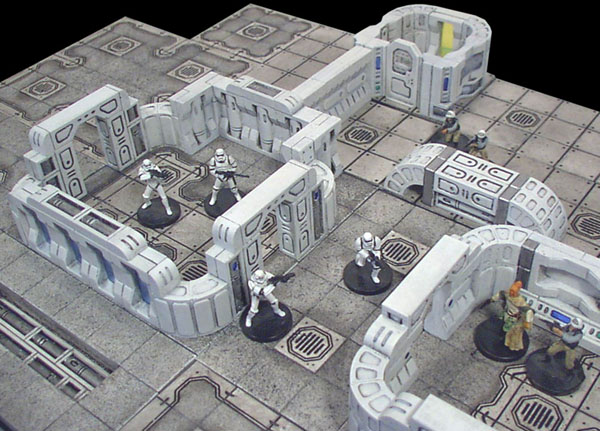
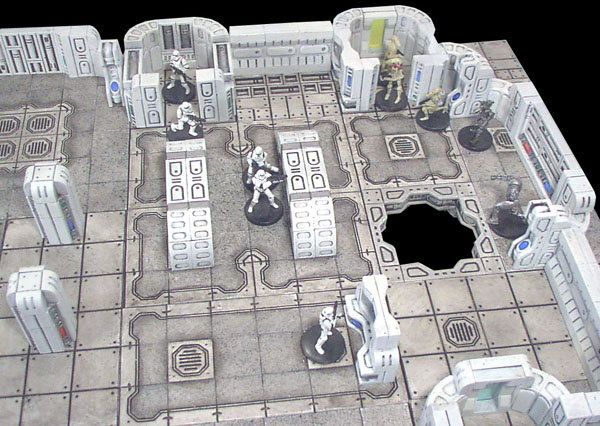
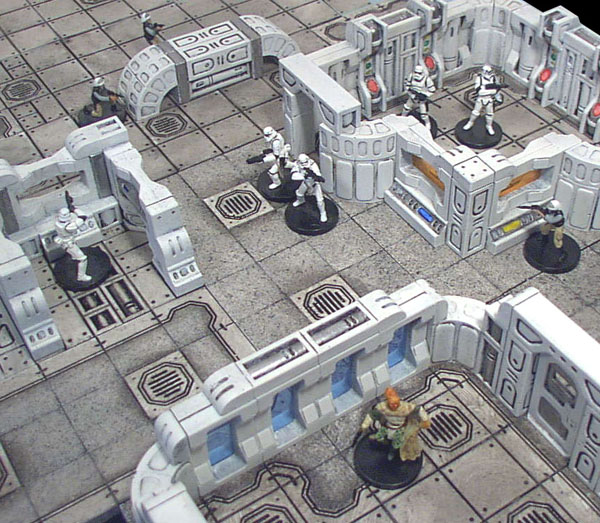
The floor sections and rooms can be easily rearranged into any kind of layout you want. As long as any additional floor pieces are based on a 3x3 size, then everything will fit together correctly. Here are a few photos of the finished pieces arranged in simple layouts. The Star Wars miniatures are from Wizards of the Coast. For instructions on how the pieces were painted, please visit our Painting Instructions page. To see how to insert colored plastic in the window, see our Tips & Tricks 18 page. |
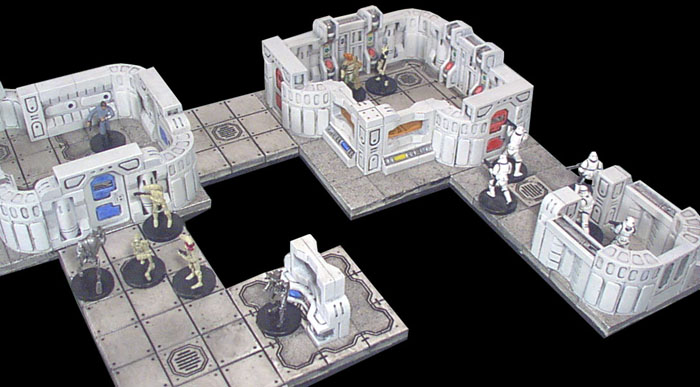
Click on the photos for a larger view. |
 |
 |
 |
 |