Mountain Gate Building Instructions
This page shows you how to build the mountain gate. You will have to cast the fieldstone bridge mold (#74) 14 times to build this model. This mountain gate is a difficult project. There are many times where you will have to cut and fit foam pieces by eye. Carving the rock texture takes a little practice, and a few of the bridge pieces (such as the walkway) are fragile. |  |
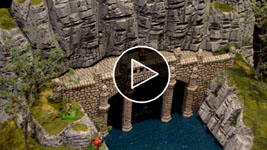
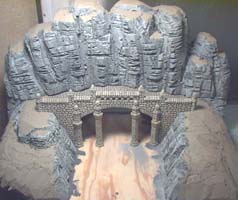
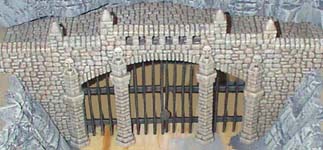
| 1. | Finished View of the Mountain Gate This video shows the completed mountain gate. This is a very large and detailed project but it's main purpose is to show one possible use for the fieldstone bridge mold #74. |
 |
|---|
| 2. | I had pictured in my head what I wanted to do with this project. However, picturing what's in your head clear enough to get it to a specific size and shape can be a problem.
1) How will the bridge meet at the back of the cliff face - will it overlap the bridge or will the bridge just butt against it? 2) What happens when the river ends at the front of the model? Will the hills look like they're sliced off (like a cutaway view)? 3) Should the outside edges of the left and right hills slope away gently or look like cutaway views? Making a clay model is great for answering these types of questions. It helps you visualize what the model will look like and will point out any obvious problems you hadn't thought of yet. |
|---|
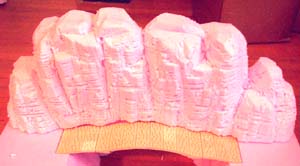
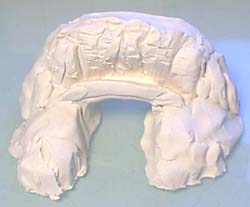 To help me visualize the project better, I took a handful of modeling clay and tried to make the shape of the hill I wanted along with the bridge. This is very useful, because it pointed out several problems I hadn't considered before such as:
| 3. | You will need to cast the fieldstone bridge mold (#74) 14 times to build this model. Our first step is to make the regular walkway shown on the Basic Bridge Building Instructions. |
 |
|---|
| 4. |
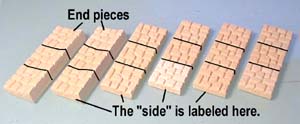
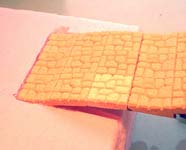
Glue the pieces in sets of three as the photo shows. Let them dry completely. |
 |
|---|
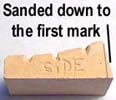 We're going to extend the sides of the bridge to make it longer. Sand down six of the walkway ends to the first mark.
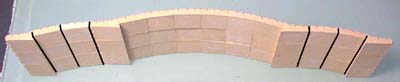
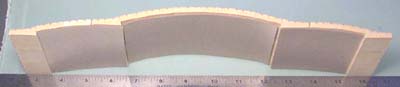
| 5. | Add these pieces onto the ends of the walkway as shown. I used a ruler to make sure the bottom of the walkway was flat. To strengthen the walkway, glue pieces of cereal box onto the bottom. Let this dry overnight before you attempt to handle it! |
 |
|---|---|---|
 |
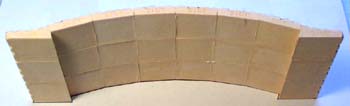
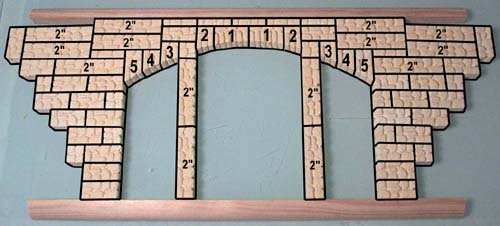
| 6. | Glue together the front of the bridge. I used wood strips to help keep the bottom and top of the bridge straight. For information on how the bridge arch numbers work, refer to the section on About Mold #74. |
 |
|---|
| 7. |
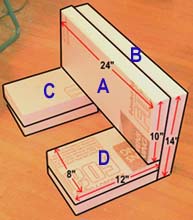
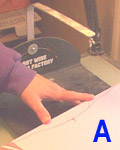
You will need four 8" x 12" pieces, one 24" x 14" piece and one 24" x 10" piece. To cut the board, lay down a straight edge and cut as deeply as you can with a sharp hobby knife. Snap the board along the cut. |
 |
|---|---|---|
 |
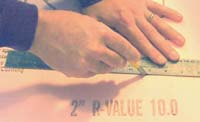
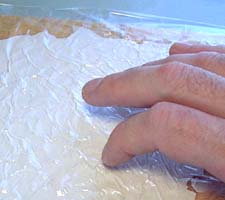
 The foam for the rock hill is polystyrene insulating board also known a Pinkboard or Dow Blueboard. You can find it at most building supply stores or lumber yards. What I'm using is 2" thick.
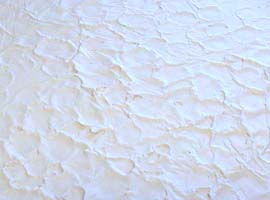
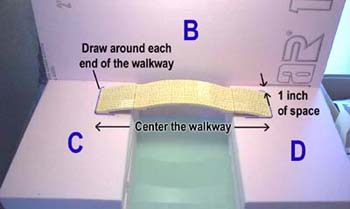
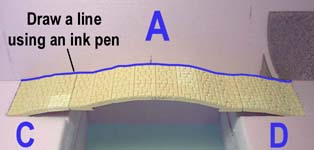
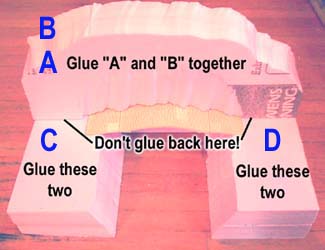
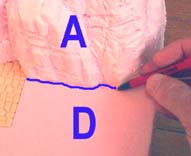
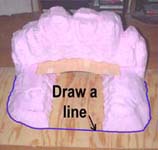
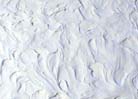
| 8. | Remove piece "A" for the moment. Set the walkway across pieces "C" and "D" so it's centered between them. Position the walkway 1" out from the back wall and mark the position with an ink pen. |
 |
|---|
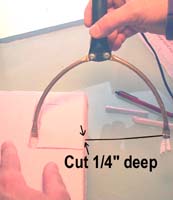
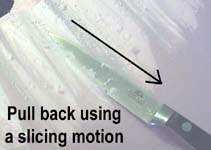
| 9. | We want to recess the walkway down into the foam. Start by cutting a deep groove with a hobby knife where you marked with a pen. Next I use a hot wire foam cutter to cut 1/4" slice of foam out. My cutter is a hot wire foam factory. There are cheaper cutters available, but I've been very happy with mine. |
 |
 |
|---|
| 10. | Set the walkway down into the foam on each side. Be sure that the very end of the walkway is flush with the foam. Don't worry that the rest of the walkway rises above the foam. This will be covered by the front of the bridge. |
 |
|---|
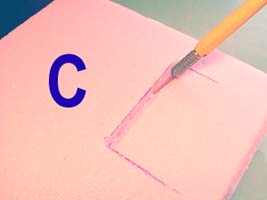
| 11. | With the walkway in place, set piece "A" behind the walkway and draw a line with a pen. I used a hot wire cutter to trim out this section of the foam. Now you should be able to set piece "A" back on and it will overlap the walkway. |
 |
 |
|---|
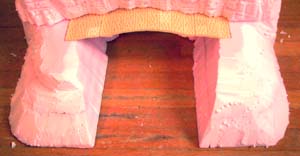
| 12. | Using super glue (or white glue), glue together pieces "A" and "B". Also glue together both parts of "C" and "D". Now you will have 3 large foam pieces. Do not glue these 3 foam pieces together yet! We will need access under the bridge to carve the foam and place water under the bridge. The next photo shows where cuts were made using a hot wire foam cutter. |
 |
|---|
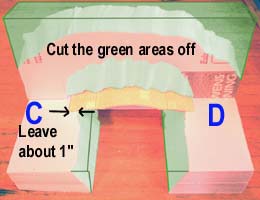
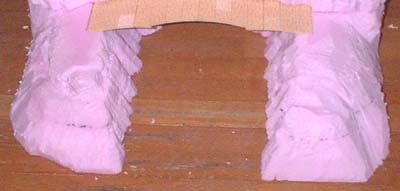
| 13. | Trim off the back of the foam using a hot wire cutter. Follow the clay model you had made as a guide to tell you where to cut. Cut the insides of pieces "C" and "D", but don't cut it any closer than 1" from the walkway ends. Cut away behind the walkway on piece "A". Do not cut any deeper than 1", or you will have holes behind the walkway (the walkway only slides under piece "A" by 1 inch). |
 |
|---|
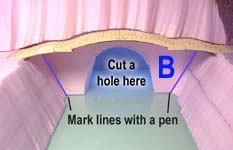
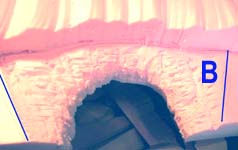
| 14. | Cut a hole for the cave opening in piece "B". Texture around the cave opening using a hobby knife, but not past the lines you've drawn on both sides. I'll give instructions for the texture later on in this article. |
 |
 |
|---|
| 15. | I'll start by shaping the foam into basic chunks of rock. I do this using a combination of a very sharp knife and a hot wire cutter. The hot wire cutter is good for taking off larger edges and the knife helps get into the smaller places. The next series of photos shows the cutting process for the back of the mountain (pieces "A" and "B" which are glued together). |
 |
|---|
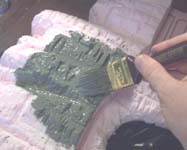
| 16. | To texture the face of the rock, refer to the page on designing rocky landscapes found on the Tips & Tricks 9 page. |
 |
 |
|---|---|---|---|
 |
 |
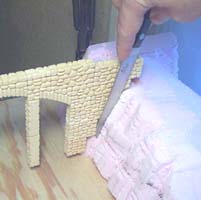
| 17. | Draw a line where piece "A" meets the bottom pieces. When you carve the bottom pieces, don't go inside this line. The next few photos show how I carved the bottom. |
 |
 |
|---|
| 18. | Where the steep slope is (next to the river), I textured the rock face using a hobby knife. The other slopes I made more gentle, where I intend to put grass there. |
 |
|---|
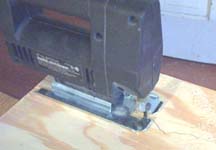
| 19. | I wanted to mount this on something fairly sturdy, so I'm using 1/4" plywood. Draw a line around the bottom and cut out the wood using a jig saw. Be sure to wear safety glasses while cutting. |
 |
 |
|---|
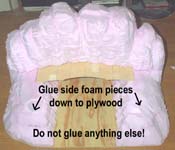
| 20. | Glue the side foam pieces down to the plywood. Do not glue anything else down! For the next step, leave the walkway between the foam hills (even though I've removed it in the next photo). You'll need to cut a slot to slide the front of the bridge down into the hill. |
 |
|---|
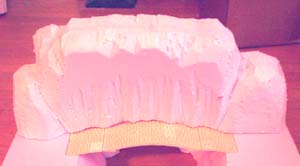
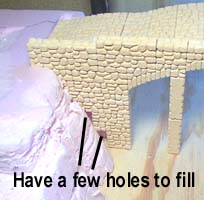
| 21. | To cut this slot, I'm using a very sharp steak knife. This part will take some trial and error. Be sure you set the walkway in place first. Otherwise you won't be able to tell where the front of the bridge goes. I've placed the bridge front in the slot and found that I have a few holes showing. I'll need to add a few blocks to the bridge front to cover these. |
 |
 |
|---|
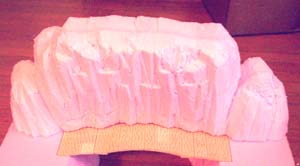
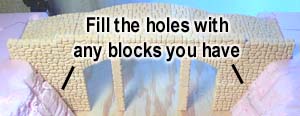
| 22. | Fill the holes with any spare blocks you can find. I used extra arch pieces and other odd bits. It doesn't matter what the outside edge of the bridge front looks like as long as you put enough blocks to fill the gap. |
 |
|---|
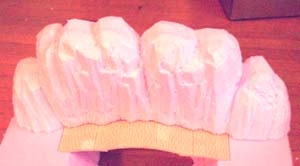
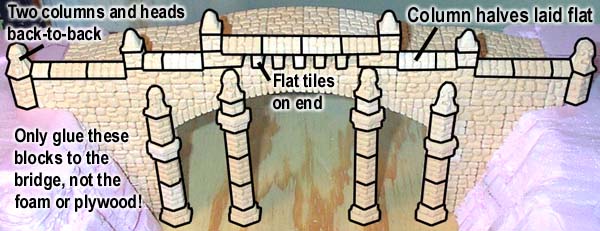
| 23. | Glue these additional pieces onto the bridge front. Do not glue them to the foam or plywood! Be sure that the bridge front sets all the way down flat onto the plywood. |
|---|---|
 |
| 24. |
I'm painting the rock faces more of a gray color. I'm using the same colors shown on the Castle Gray Painting Instructions page. The first coat is a dark gray paint thinned down so it will flow into all the cracks. Then I've dry-brushed 2 lighter coats of gray to finish the job. |
 |
|---|
 Remove the bridge and walkway so you can paint the pieces. I painted the bridge using the colors from the
 | 25. | Next I applied an earth colored paint to all of the level and gently sloped areas. The best way to get an earth colored paint is to go outside, pick up a handful of dirt and put it in an envelope. Then go to the nearest paint store and look through their color samples. Try to find a color that matches the dirt, but make it about 2 shades lighter. The color you pick must be lighter because you're trying to represent the color of dirt as if sunlight was shining down on it. |
 |
|---|
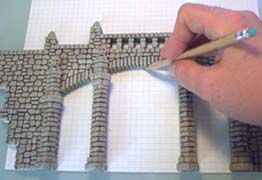
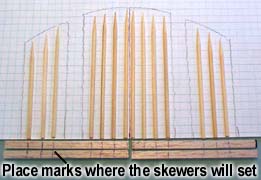
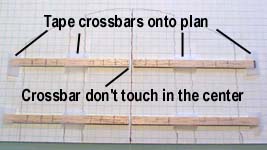
| 26. | Lay the bridge front down onto a sheet of paper and trace the inside of the arches. Cut kabob skewers for the bars and balsa wood strips for the crossbars. |
 |
 |
|---|
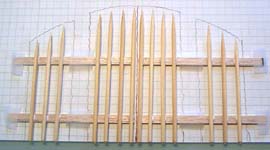
| 27. | Tape the crossbars onto the sheet then glue the kabob skewers down using white glue. |
 |
 |
|---|
| 28. | I spray painted the bars black and dry-brushed them with silver. Then I glued them behind the bridge front. The photo looks a little strange because I had to color out the confusing shadows between the bars. I cut a piece of paper for the lock where the two sets of bars meet in the middle. |
 |
|---|
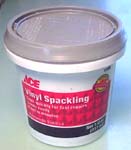
| 29. | For the water, I'm going to use spackling compound. It's a pre-mixed joint filler used to fix cracks in the wall. You can also use drywall joint compound instead. Its good property is that it air dries (which gives you some time to work with it). The bad thing is that it shrinks, so if you put down a layer thicker than 1/8" you'll end up with cracks in the surface of your water. Do a couple of tests on scrap plywood before you do the actual thing! |
 |
|---|
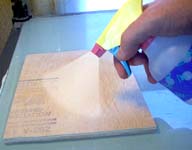
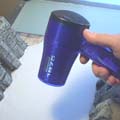
| 30. | Start by lightly spraying the surface of the wood with water. This will help the spackling compound to stick to it and keep it from drying out underneath. |
 |
 |
|---|
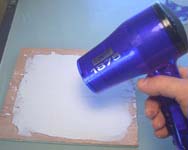
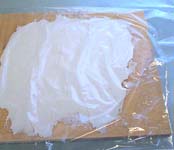
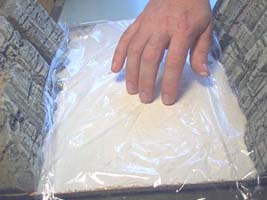
| 31. | The spackling will go on rough at first, but keep working with it and it will smooth out. Apply an 1/8" thick coating over the whole surface. Now take a hair dryer and dry the surface for 30 seconds. You want the surface to not be sticky, but still be soft underneath. Cover the spackling with a piece of clear plastic wrap. |
 |
 |
|---|
| 32. | Lightly drum your fingers over the surface of the plastic covered spackle. Don't put much pressure, just enough to lightly dent the surface. If you use too much pressure, you'll end up with sharp peaks between the depressions. You want to end up with gentle peaks. Try to make a random pattern of finger depressions over the whole surface. You will have to go over the whole surface at least 3-4 times before you're finished. |
 |
|---|
| 33. | Remove the plastic and take a look at your texture. You can make other textures as well. On the first small photo, I gently ran my fingers across the spackle to make gentle waves. On the second small photo, I didn't dry the spackle at all. Instead I just dipped my fingers into the wet spackle and swirled it around. |
 |
|
|---|
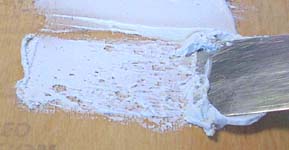
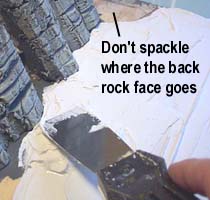
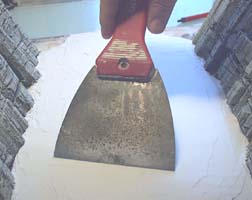
| 34. | Now that I've done the trial run I'm ready for the real thing. Remove the bridge front, walkway and the back rock face (pieces "A" and "B"). Wet the surface of the wood and spread 1/8" thick coating of spackle over the surface and smooth it out with a wide scraper. |
 |
 |
|---|
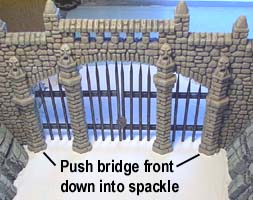
| 35. |
Push the bridge front down into the spackle. Then remove the bridge front. This will leave a depression in the spackle so your bridge will fit after the spackle is dry. |
 |
|---|
 Dry the surface with a hair dryer for about 30 seconds, or until you can touch the spackle without getting goo all over your fingers. It should be barely dry on top but still soft underneath.
| 36. | Cover it with plastic and drum your fingers across the surface. Let the spackle dry completely before you paint it. It took me a while to get the water color right, so below is the formula for it. |
 |
 |
|---|
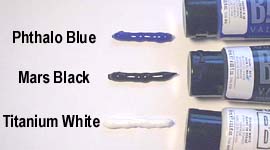
| 37. | Using artist's acrylic paints, the water formula is equal parts of Phthalo blue, Mars black and Titanium white. I thought it was interesting that Mars black adds a greenish tint to the color. For deep water, you may want the color darker (just add black). |
 |
|---|
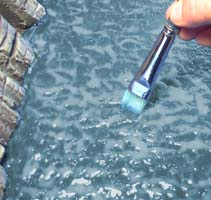
| 38. |
This stuff is about the consistency of Elmer's white glue. Give it a generous coat of the stuff and then dab around with a paintbrush to add some texture to the surface. You can add several layers (after each layer dries) to increase the gloss and depth of the water. Let it dry completely before you add the grass! |
 |
|---|
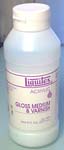 To give the water a glossy texture, I'm going to use Acrylic Gloss Medium. You can find it at any art store and at most college bookstores.
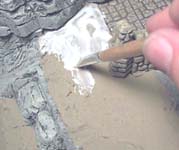
| 39. |
I start by painting a layer of white glue (slightly thinned down) over all of the dirt painted surfaces. Your layout will look better with a variety of colors and textures. Start with the coarse foam first. Sprinkle it in patches like spots on a cow. Most grass types grow in clumps, not evenly spread out or spaced. Vary the colors and textures in different spots. This will give your grass a natural feel to it. |
 |
|---|
 For the grass, I'm using ground foam scenic materials from
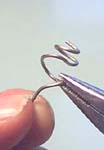
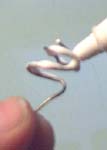
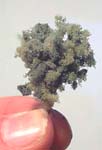
 | 40. | For simple bushes, I took some 19 gauge wire and bent it with pliers. Then I applied some "Tacky" glue to the wire and pushed it in a handful of coarse ground foam. The result was a small bush that you can push into the foam of the hillside. |
 |
 |
 |
 |
|---|
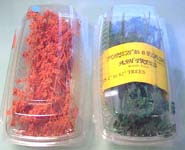
| 41. | To make trees, I'm using a product called Forest in a Flash. I picked it up at my local model railroad shop, but you can also find it at Pretty-Petals.com and Bragdon Enterprises. There are around 18 different colors available. A package costs about $8 and will make several trees. |
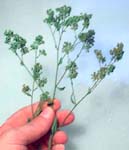
 |
 |
|---|
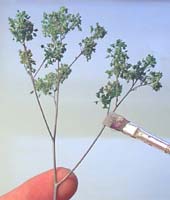
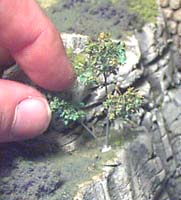
| 42. | You'll have to pull off the small leaves that grow on these plants and paint the trunks and branches a gray color. Wrap several branches together with thin floral wire. Coat the trunk with a layer of latex caulk. Just dab it on and smear it with a toothpick. |
 |
 |
 |
|---|
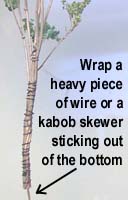
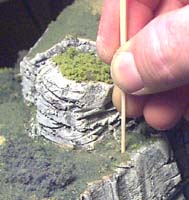
| 43. | To stick these bushes and trees into the ground, take the sharp end of a kabob skewer and poke it into the ground. Apply glue to the bottom wire of the tree or bush. Remove the kabob skewer and poke the tree into the hole you just made. |
 |
 |
|---|
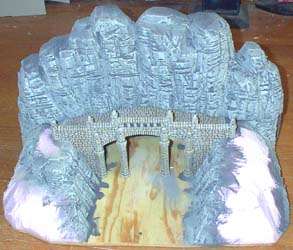
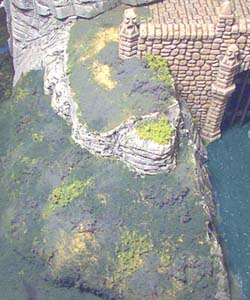
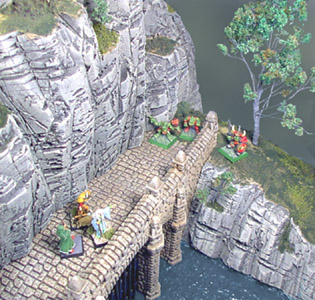
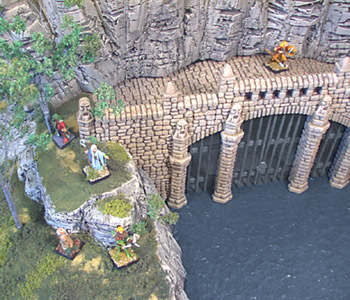
Here are a few photos of the mountain gate. The miniatures are a combination of Warhammer Fantasy(TM) and Holistic Design. |
|
 |
 |