Machinery Building Instructions Page 1
In order to build the machinery pieces shown here, you will need 15 castings each of molds 326 and 327.
 About Molds 326 & 327 |
 Casting Tips |
 Sorting Tips |
 Machinery Parts List |
 Painting Instructions |
 |
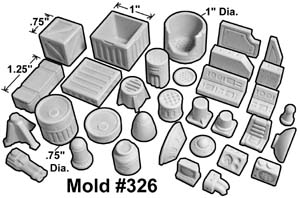
About Molds 326 & 327
 These two molds were especially designed to build machinery. Many times when people build equipment, machinery or vehicle models for movies, they use parts from various plastic models or other sources. They have to cut, sand and do a lot of work to make these specialty shapes fit their model.
The purpose behind these molds is to give the hobbyist a variety of decorative bits and building blocks created in standard sizes, so much of the trimming and sanding that usually happens will not be needed.
However, what is difficult about these molds is to figure out what to do with all of these bits. Because of the sheer number and variety of pieces, these molds are especially difficult to build with for the beginner. Before you purchase these molds, be sure to read the tips on casting and sorting these blocks below so you'll know what you're getting into.
 |
 |
When creating these molds, I tried to put the most commonly used pieces on mold 326. So if you only want one mold, the best choice will be mold 326. It has most of the barrels, crates, guns, canisters, chairs, consoles and other pieces most commonly used to make decorative scenery.
Mold 327 has more of the building block pieces to create actual machines and it's a much more difficult mold to use on its own. If you purchase mold 327, then you should probably get mold 326 as well so you can build the full range of what is shown on these pages.
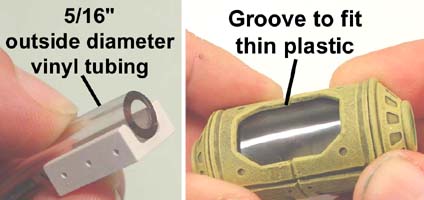 Some of the pieces on mold 327 have a channel that will fit 5/16" vinyl tubing. This will allow you to make liquid tubes on your machinery that can be painted on the inside to resemble fluid flowing through these tubes. Instructions for how to do this can be found on the Power Coupling Instructions section.
Mold #326 has a cryo tube half with a groove on the inside so you can fit a window in them cut from thin plastic. For exact instructions and a window cutting template, look at the Death Ray Instructions section.
Casting Tips
In order to build the machinery pieces shown here, you will need 15 castings each of molds 326 and 327.
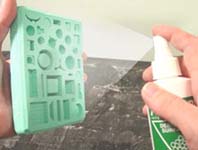
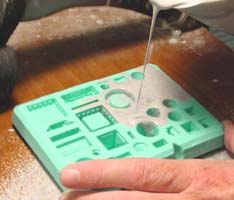
| 1. | When casting pieces from either of these molds, I strongly suggest that you use either the wet water method or use a surfactant or debubblizer to remove air bubbles from your castings. Using a vibrating table will also be very helpful for removing air bubbles. |
 |
|---|
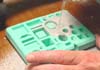
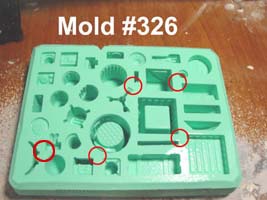
| 2. | You will want to pour the plaster on the ridges between pieces, not directly down into each cavity. If you pour a thin stream onto the edge, the plaster will slide down the side wall and run across the bottom removing air bubbles from the casting. I have circled in red a few key places on mold #326 where you should pour first. These are next to very deep small pieces that may give you trouble otherwise. |
 |
|---|
| 3. | Pour a very small drop of plaster onto these key ridges first. Then pour on all the ridges around the mold until all the cavities are filled, vibrating the mold during the whole pouring process. |
 |
 |
|---|
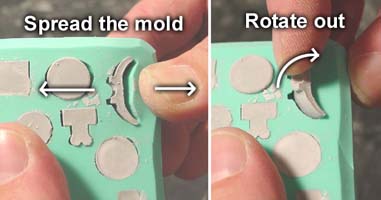
| 4. | Removing the Radar DishTo remove the radar dish half from mold 326, start by spreading apart the mold. Then place your finger on the center of the piece, drag it across towards the edge of the mold and rotate the piece out of the mold. |
 |
|---|
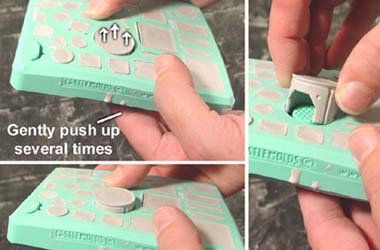
| 5. | Removing the Cryo TubeTo remove the cryo tube half from mold 326, do not spread apart the mold. If you do, you will most likely break the piece. Instead, place a finger under the mold directly under the piece and gently push upward several times. This will wiggle the piece slowly upward in several small steps. Once enough of the piece is exposed, grab onto it and pull it out of the mold. |
 |
|---|
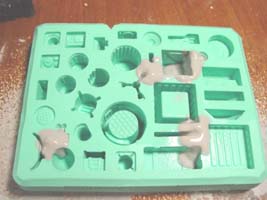
Sorting Tips
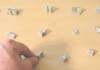
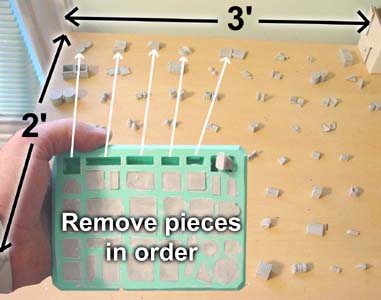
| 1. | For these two molds, I cannot stress enough how difficult these pieces are to sort if you throw them all into one pile. To make this sorting process fast and easy, allocate a 3' x 2' area of table space to spread the pieces out on. Start with your first mold and remove the piece in the upper left corner. Try and remember which piece this is because you want to always start by removing this same piece on every mold you empty. Place this piece in the upper left corner of the table. Now remove other pieces from the mold working across from left to right and placing them on the table in the order they were removed from the mold. |
 |
|---|
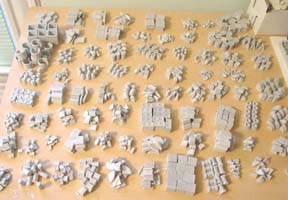
| 2. | Be sure to leave plenty of room between the piles, especially around larger items like the crates and barrels. When you have finished sorting the castings they will fill up the table pretty well. In order to find the piece you need as you are building, we will now need to arrange them so you can find them. |
 |
|---|
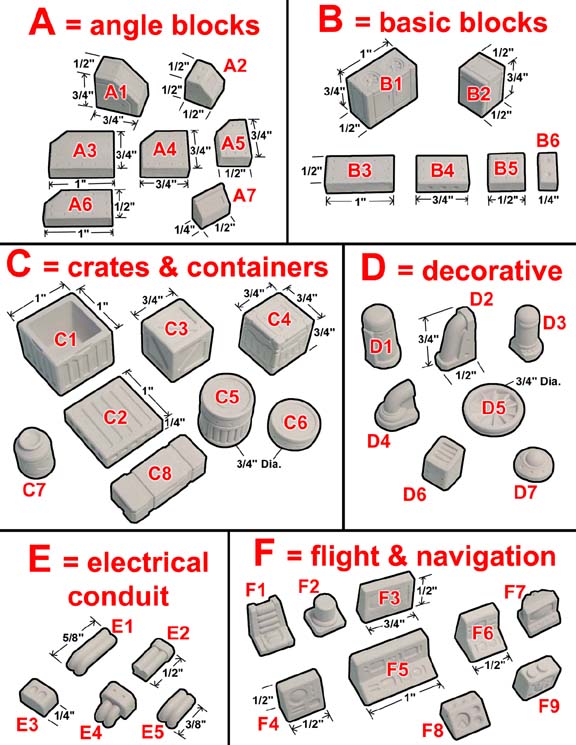
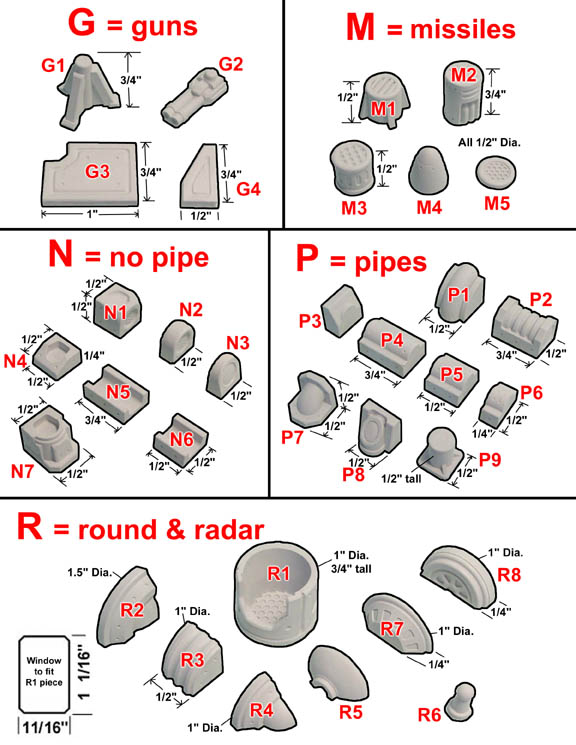
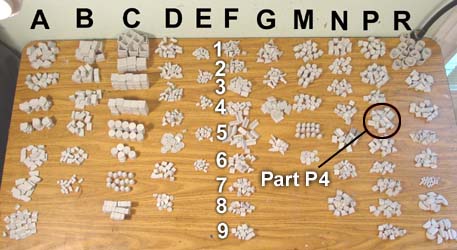
Machinery Parts List
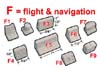
Here are a couple of charts with each piece from molds 326 and 327 labeled. Click on each photo for a larger image. Be aware that if you print them this way, the small window for the R1 piece may not print out the correct size. You can find easily printable versions of these charts on our Printed Plans page labeled "Machinery Parts List". These will print the correct size. I sorted them in the way that made the most sense to me and also tried to associate the letters with a word that could be remembered. |
 |
 |
| 1. | If you have table room, I would suggest arranging them on the table according to their part numbers. This makes finding the part you need easy. Each vertical column is sorted by letter. Each pile of blocks descending in each column is arranged by number. This way if you need part P4, you simply scan across to the "P" column and count down to pile 4 to find your part. |
 |
|---|
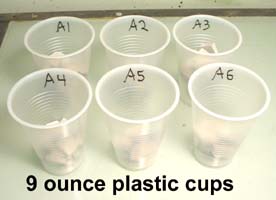
| 2. | If you lack table room, you can use 9 ounce plastic cups instead. A 9 ounce cup is a good size if you have about 15 castings from each mold. However, it will not be large enough for big pieces such as the crates. For these you will just need to keep them in a pile on the table. I have labeled each cup with a magic marker and sorted each type of piece into each cup. |
 |
|---|
Painting Instructions
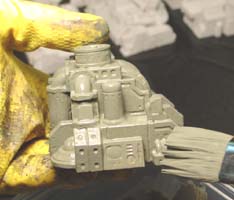
| 1. | To paint these pieces, I used the same painting method that is used on the Ship Corridor Painting Instructions. This is the advanced method which uses the green color on the outside edges. Start by painting the Dark Olive Drab color all over the piece. This paint is thinned slightly so it will go into all the cracks better. For the color recipe and more details, please see the Ship Corridor Painting Instructions. These instructions will also tell you about wearing gloves to protect your hands, how to remove excess paint and drips from the piece, and many other tips. |
 |
|---|
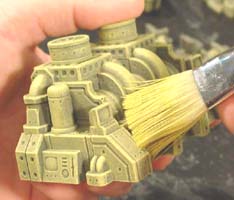
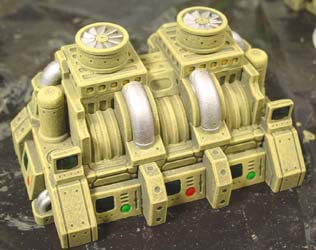
| 2. | Continue this same painting process by painting the medium green and light yellow green colors of paint found on the Space Hulk painting instructions. The color formulas for each of these colors of paint can be found there. You will not need to cut any paper masks for it since there are no colors to keep separate. This photo shows a machinery piece that has had all 3 coats of paint applied to it. |
 |
|---|
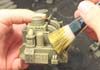
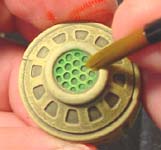
| 3. | Next I started painting some details. I used silver paint for most of the pipes and fans.
I used dark green for most of the computer monitors and view screens. |
 |
|---|
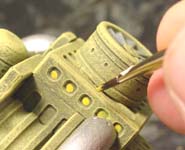 You will also notice that I used red, green and yellow for buttons and recessed holes. Putting a small dot in the center of a dark recess will give the appearance of small lights.
| 4. | I also used some fluorescent colors on several areas. These worked much better than I had expected. Fluorescent paint colors are fairly transparent. You need a light color underneath or you won't be able to see them. My final dry brush of light yellow green was bright enough that the fluorescent paint colors worked like a fluorescent stain, making the painted area stand out nicely. |
 |
|---|
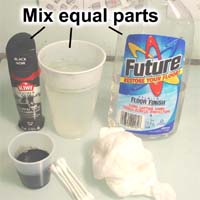
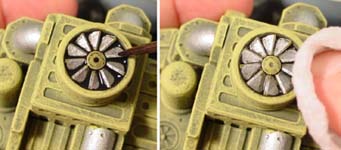
| 5. | The silver is pretty stark. I used Games Workshop's Mithril Silver paint. To add detail to the silver cracks, I'm going to mix up a black ink wash. The wash is made of 1 part black shoe polish, one part water and 1 part Future Floor Finish. You will also need a damp paper towel and possibly some cotton swabs to reach into tight places. |
 |
|---|
| 6. | Paint this ink wash onto the fans and also around the edges of any silver pipes. Using a damp paper towel, wipe off the excess ink wash that you do not want. The cotton swabs will help you to soak up hard to reach areas. |
 |
|---|
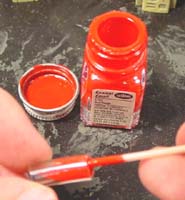
| 7. | Some projects will require the use of 5/16" vinyl tubing. The only paint that will stick to this tubing is enamel plastic model paint. This is a common oil based paint used to paint model cars with. You can find it any place that sells model car kits. To paint the tubing, stick a toothpick in the bottle and slide it inside the tubing. Move it around to paint the inside of the tubing. Feel free to experiment with different colors or blends of color inside the tube. |
 |
|---|